
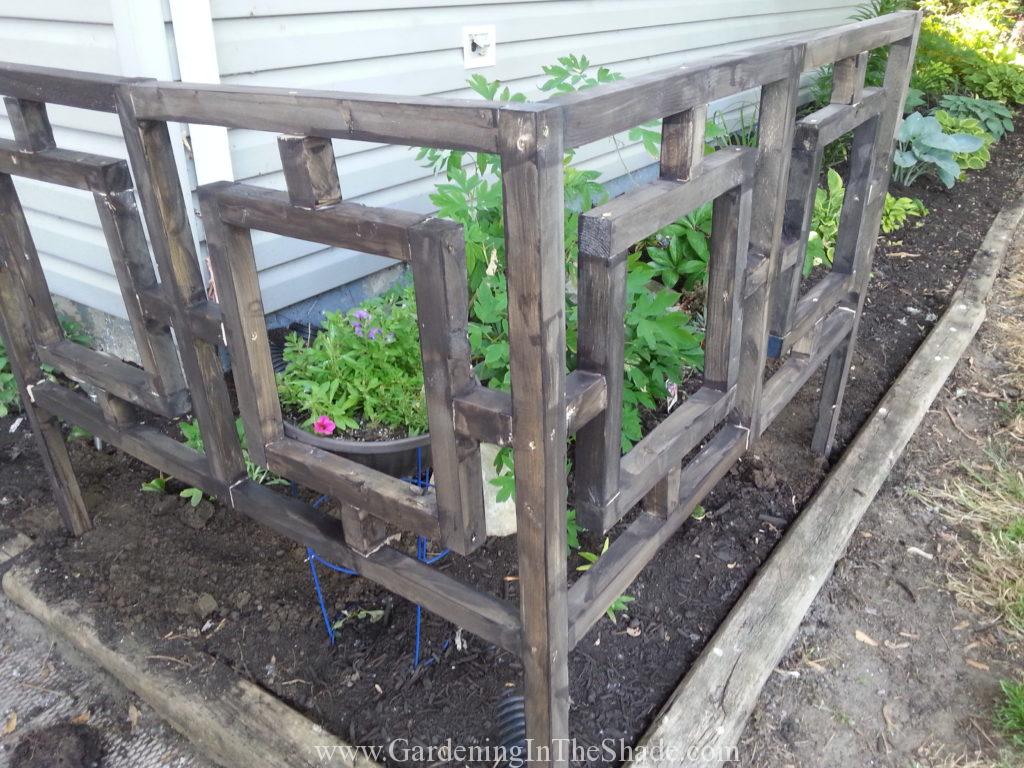
I spent the weekend making these two sections of a fretwork garden fence. I came up with the idea when I saw this really pretty DIY Geometric Fretwork Screen made from 2 x 2 lumber while scrolling through Pinterest.
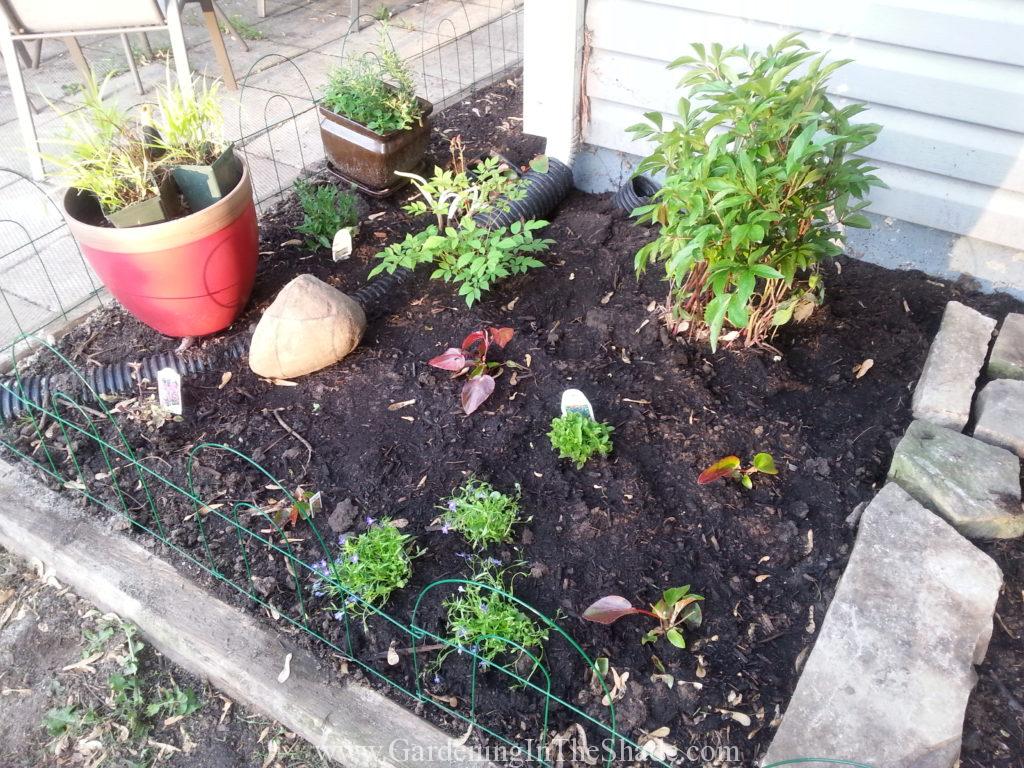
Last year I put in this cheapy wire fencing that I always think of as ‘granny’ fencing to try to keep the dogs from stomping all over my plants and eating them. It didn’t really work that well, because both dogs just hopped over it when they wanted to graze, or avoid walking in the grass, or (I’m looking at you Louie!) to poop on my plants.
They’ll happily run through a muddy ditch, but wet grass must be avoided at all cost!
Over the winter, cats being cats and dogs being dogs, my retriever managed to get one section hooked in his collar. He was the sorriest looking dog ever standing at the bottom of the stairs with 26 feet of wire fencing trailing behind him.
So that’s gone.
Ever since my perennials started popping up this spring, I’ve been weighing (and pricing) different options to add fencing to my flowerbeds. I can’t keep hollering “Get off my flowers” every 5 minutes, it’s like trying to keep toddlers from eating sand. Except everything is either not to my taste or completely out of my price range.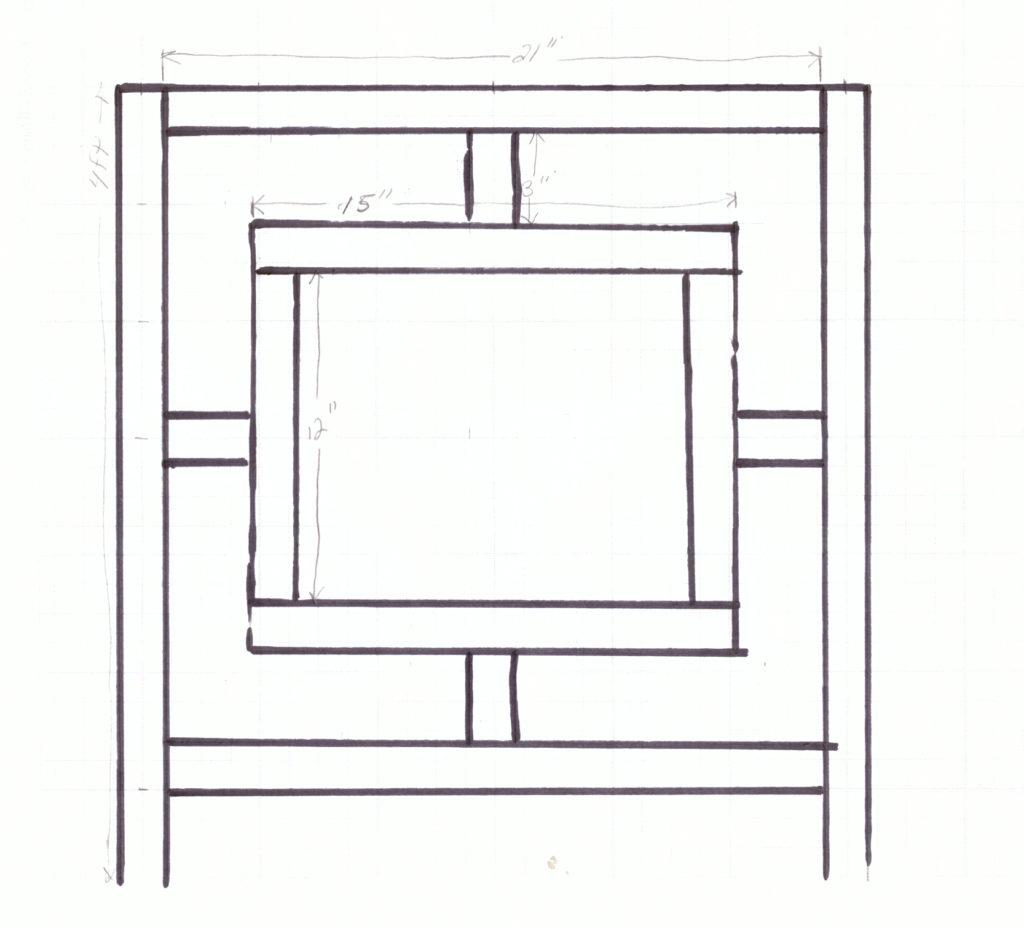 When I saw that folding screen I instantly visualized the look as fencing and worked up a rough plan based on 2 foot increments – one side of the bed is 24′ long, the other 26. Sketching up my own plans was probably my first mistake.
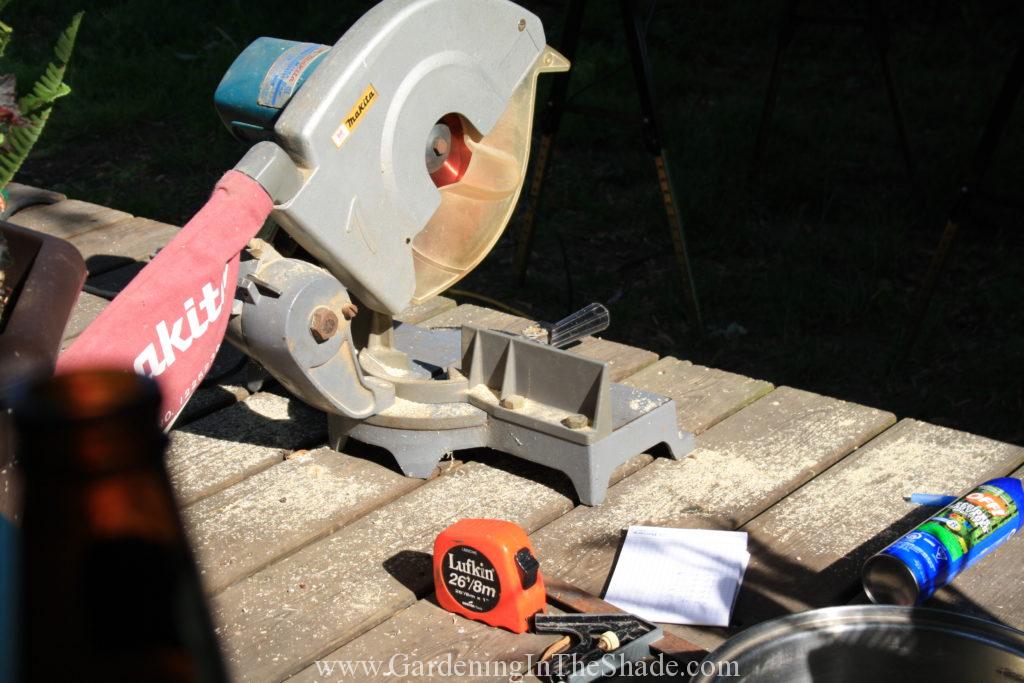
For tools I have a miter saw, an orbital palm sander, and a drill, along with the use of my son’s impact driver (That impact driver is amazing!) and that’s pretty much it, or at least all that was useful for this project. By the end of the weekend it was pretty obvious I really needed to have a table saw and a nail gun. Better plans too.
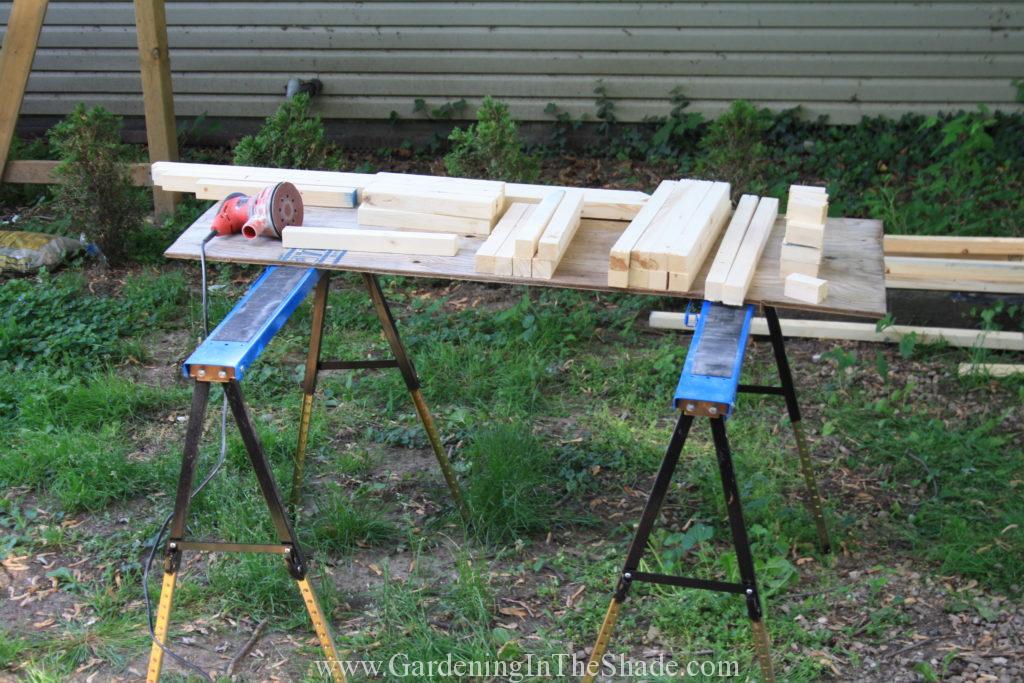
I did a quick sanding of all of my lumber before using it because 2 x 2’s or at least the cheap spruce 2 x 2’s are usually pretty shitty and they have a stamp in the middle along with blue ends. Once I cut all the pieces, I sanded off any splintery ends.
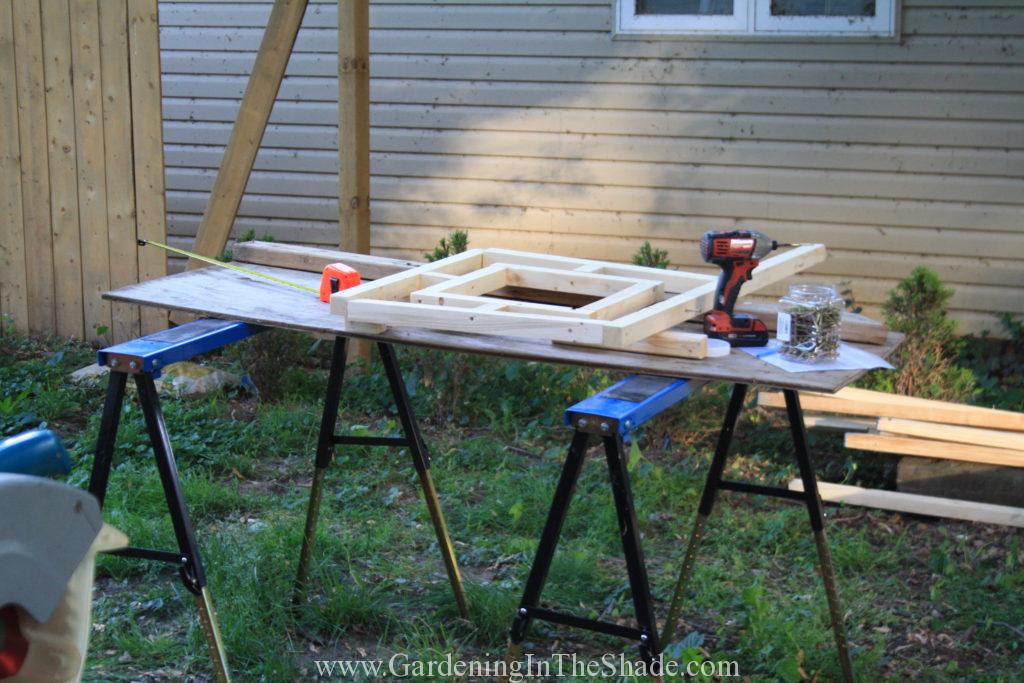
Then I started putting it together and I was kind of excited to see it starting to look almost like I had pictured it, until it wasn’t.
It was flimsy, and barely holding together. I honestly couldn’t picture it working at all as it was.
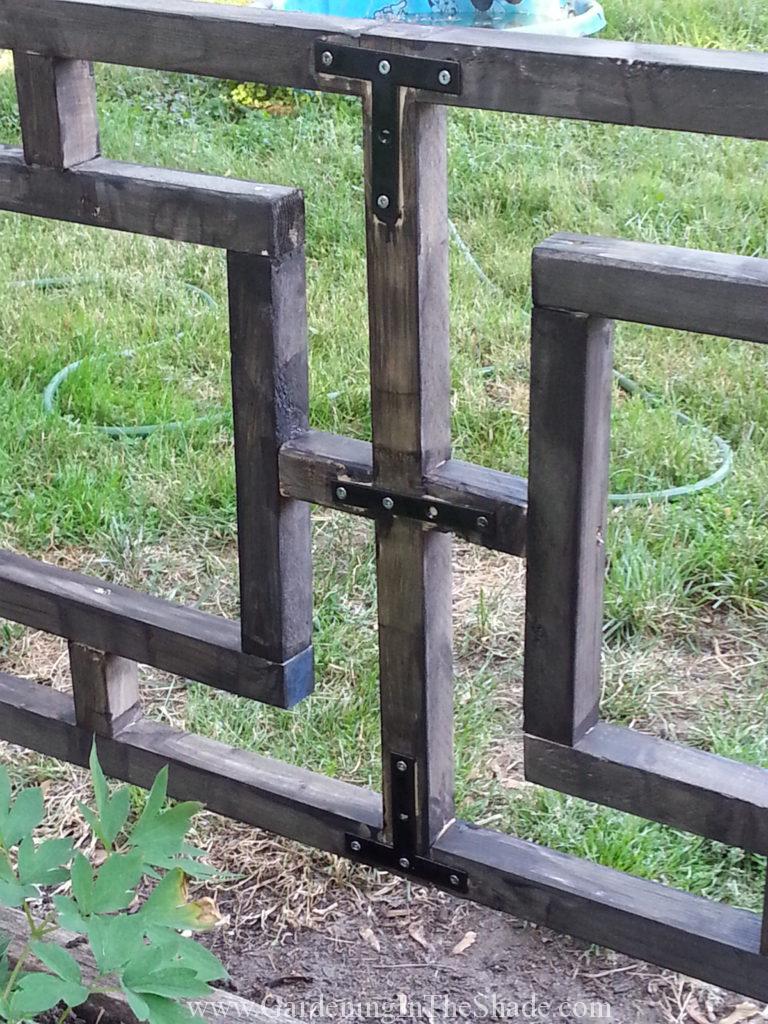
So back to the hardware store, I bought some of those metal straps and corner brackets they sell and spray painted them black. Those straps add up pretty quick and bumped the price of two 4′ fence segments from around $20 closer to $50.
Originally the idea was to pound each post into the ground since they were only 2 x 2’s.
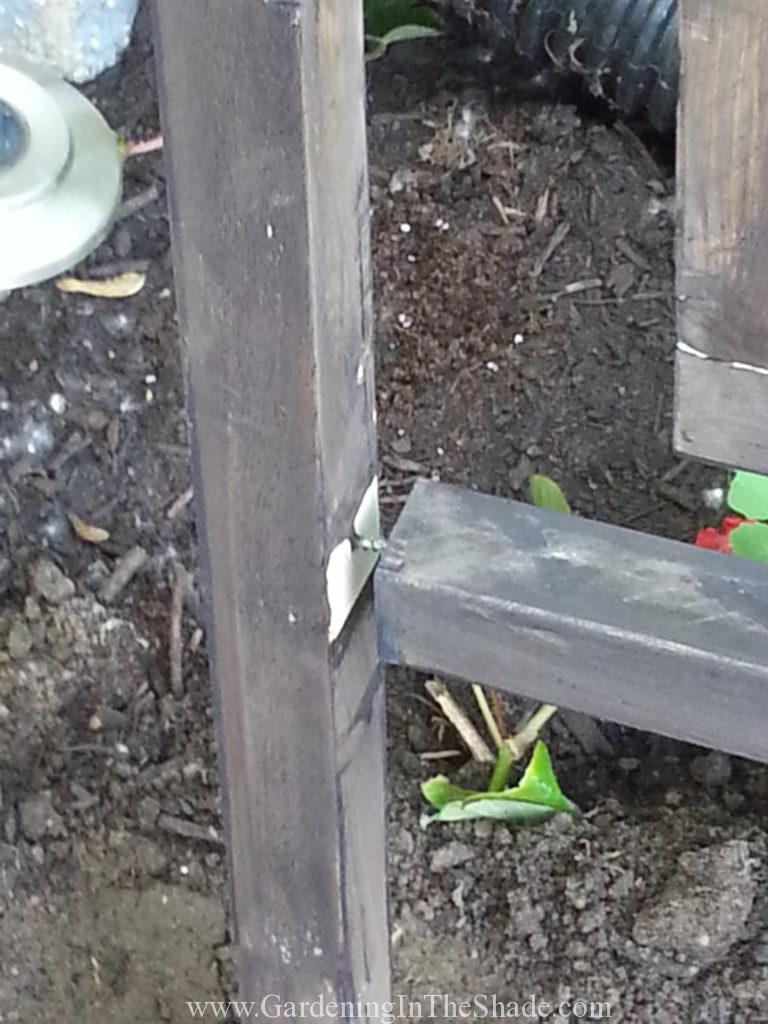
Apparently that wasn’t a good idea either. If that had happened before I stained it, you would be looking at pictures of raw spruce 2 x 2’s.
This was my first time using stain and I know it looks horrible, but honestly I can’t even be bothered to try to fix it. The fence is just not going to work. For now it might keep the 80 lb adolescent German Shepherd from sitting on my sedums, but I can’t see it surviving a winter.
Nor can I see myself using this plan to finish fencing in both sides of the bed. Not only is it too rickety, it’s too tall. I think it would look better if the bottom rail were only 6″ off the ground. Plus if I have to use the pieces of metal all the way along, not only are they ugly (I can see them from my deck) but they’re expensive.
Do I still want a fretwork garden fence?
I still love the idea of how it could look. So I’m wondering if doing a few things differently would make it actually work.
Things like buying say 2 x 6, or 2 x 8’s and ripping them lengthwise so that I’m starting with better lumber.
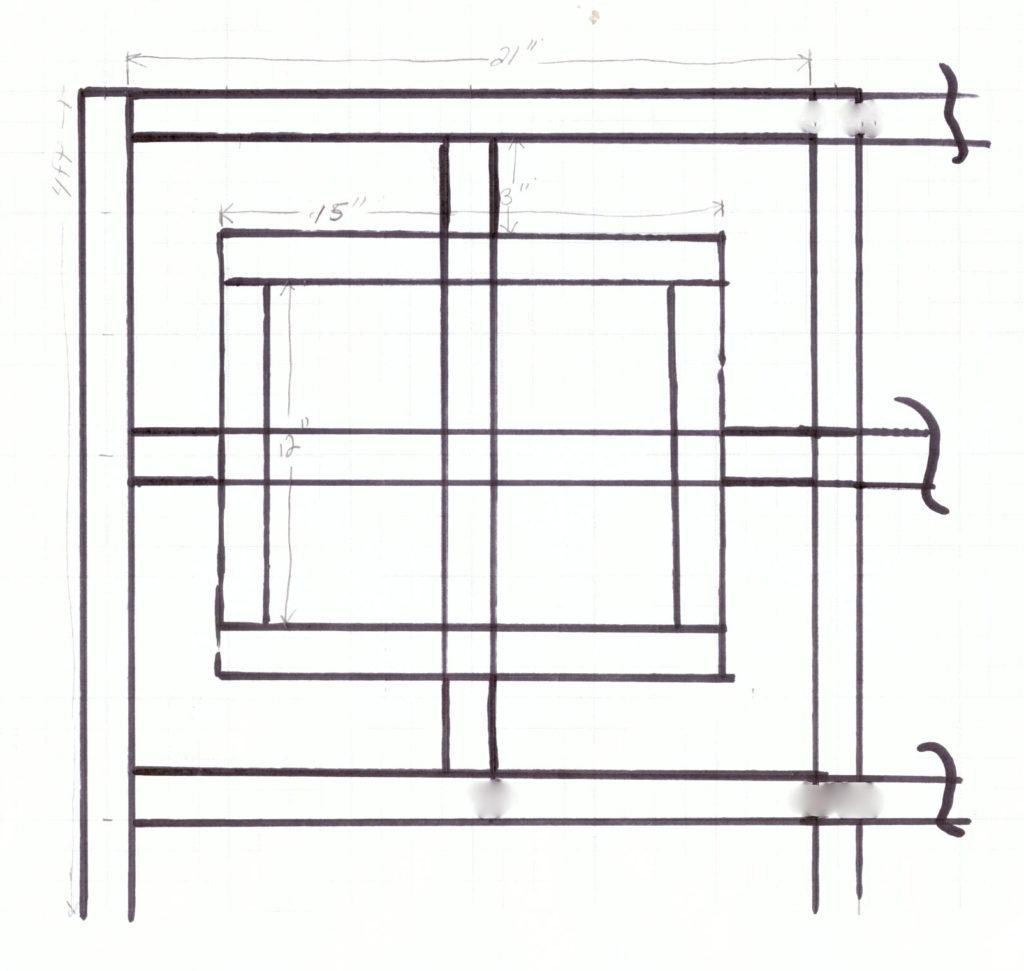
And things like altering the plans so the top and bottom rails were one single length instead of butting against that vertical piece in the middle or even using 4 x 4’s for the posts and 2 x 4’s for the top and bottom rails.
Definitely every place the pieces cross should have a dado so they can cross and be nailed together. And the spacers should carry through the center of the inside square instead of using the fiddly 3″ pieces I used.
Another thing I would need to do is account for the posts at each end in my measurements or find myself with an odd sized panel at the end of the run. Since I didn’t do that with the first sections, maybe it’s a good thing it didn’t work out enough to finish the garden. I would have ended up with a section roughly 9″ narrower than the rest of the fence sections at the end.
In its own way, learning how to work with lumber isn’t much different from learning how to sew. You get better at planning and measuring. Eventually you acquire more of the tools you need to do the job better or faster and sooner or later you either learn to sew or build stuff that looks good and works.
Or you find another hobby and buy the things you need.
In the meantime, for what I spent on lumber and hardware this weekend, I could have fenced the whole thing in granny fencing again. Heck, I could have even splurged on the 3′ tall stuff instead of the 2′ tall I used last year.