Restored Brother 930 Knitting Machine

eeRestored Brother 930 Knitting Machine with Ribber

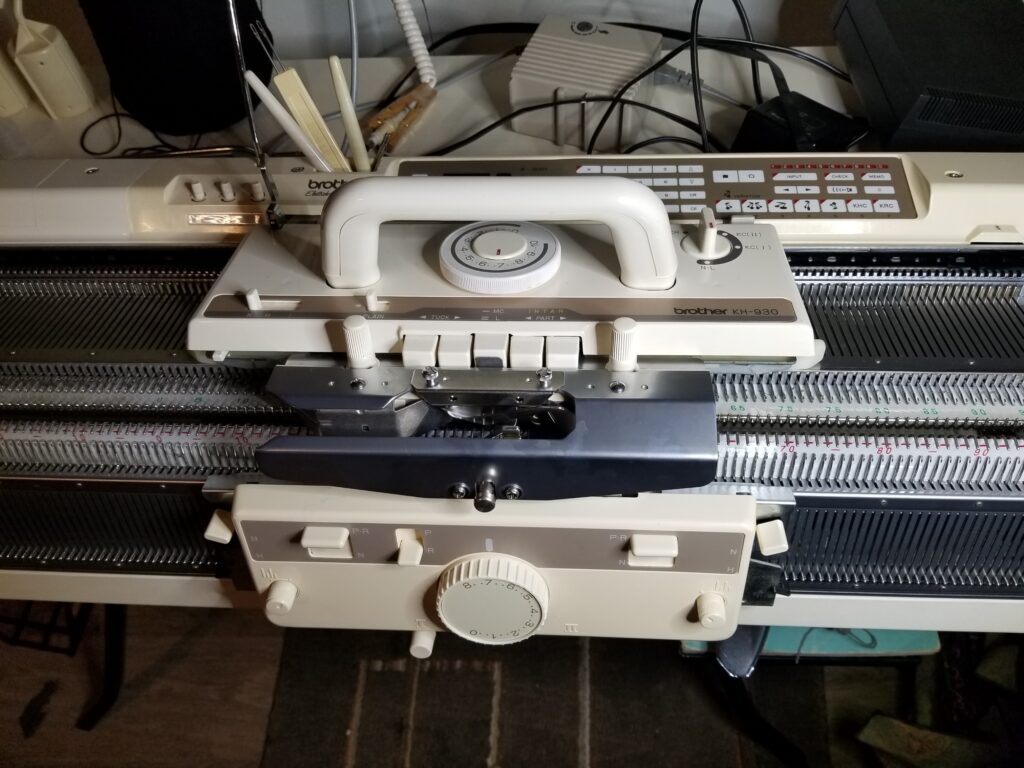
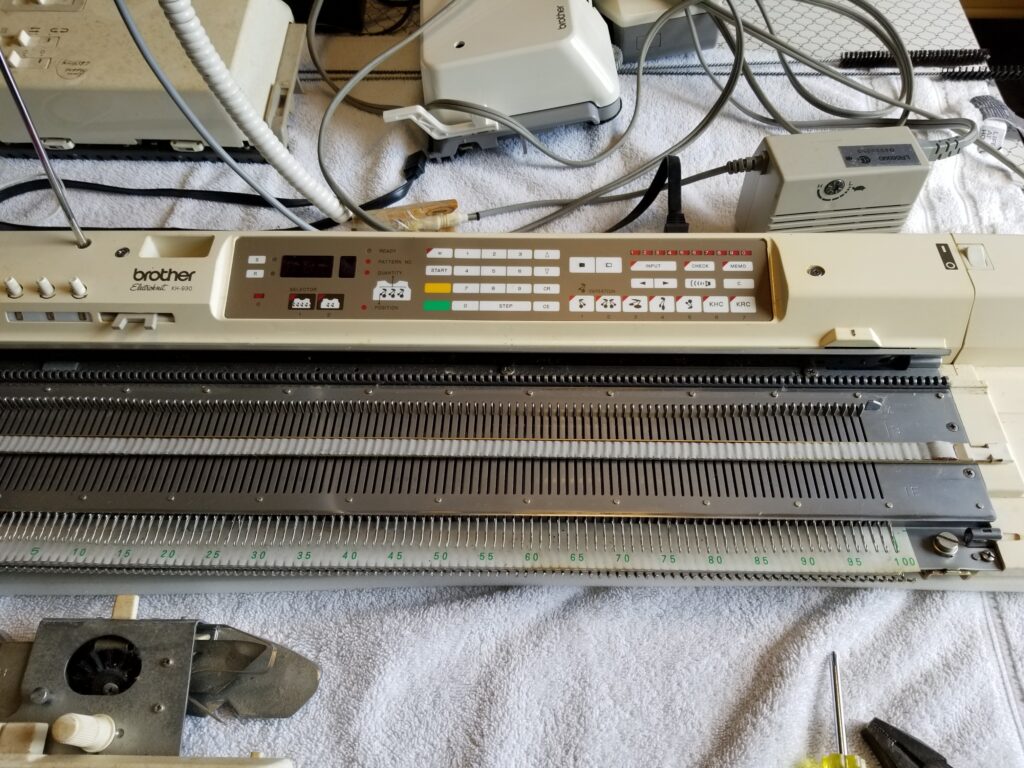
I just finished restoring this Brother 930 Knitting Machine and wow is it ever a beautiful machine. It came with a tilt-table and which is amazing to have. With a tilt-table, I can leave the ribber on the machine but when I’m not using it, adjust it so the main bed sits flat. Then when I need the ribber, I just adjust it back so the main bed and ribber are at the correct tilt.

When the first owner actually used her machine…

The first owner took such good care of her machine. It was a pleasure to clean it up and restore it to working condition. She kept her machine out of direct sunlight and covered it when she wasn’t using it. This prevented the plastics from yellowing and kept out the worst of the dust once the first owner was no longer able to use it.

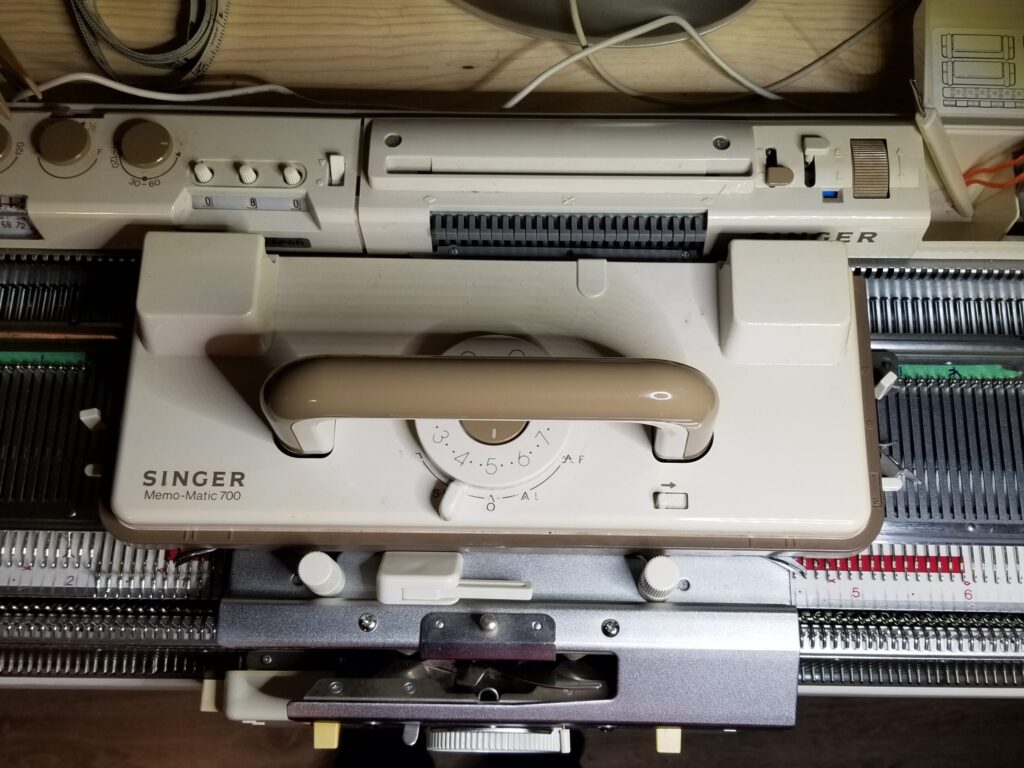
Secondly because she knew how to use the machine the ribber mounted to the main bed at exactly the correct tolerances on the first try. When I cleaned and replaced all 400 or so needles (200 for each bed), I only needed to replace one needle. My first machine, a Singer 700, required 50 new needles on each bed to knit and probably still needs more if I want to knit the full bed.

Of course the sponge bar needed a new sponge. The sponge deteriorates over time and no longer keeps the needles in their proper position. But that happens no matter how well you care for your machine.

I published a rather lengthy video on the cleaning process.

Or you can just follow along below.
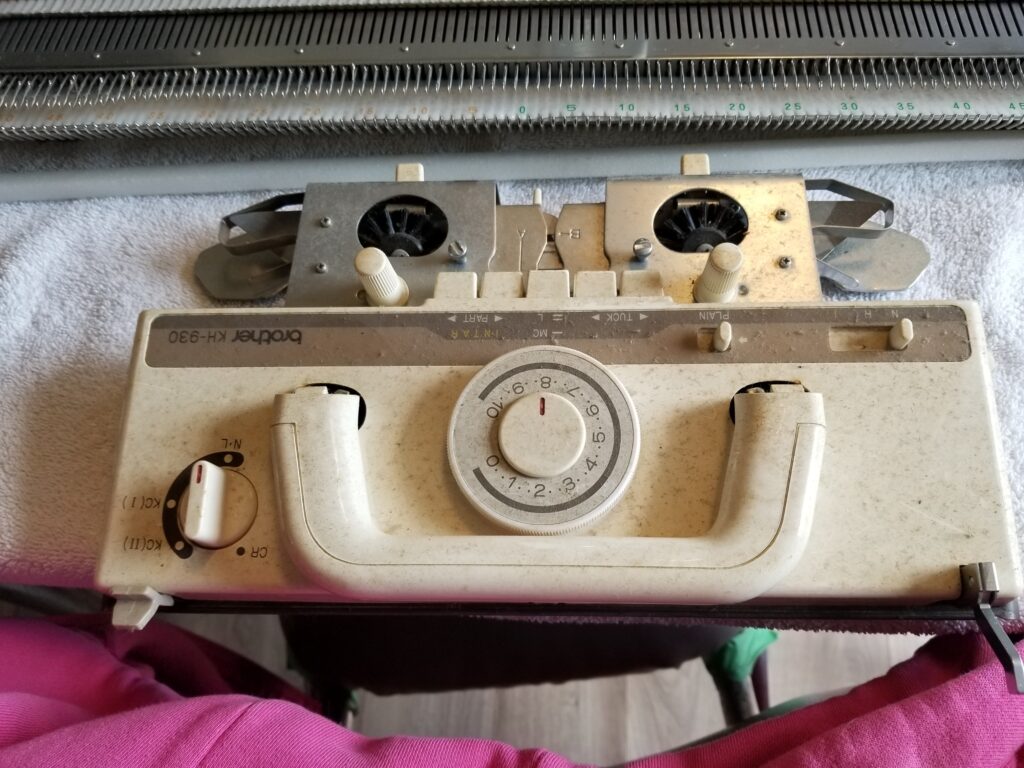
The Main Carriage

Brother 930 K Carriage

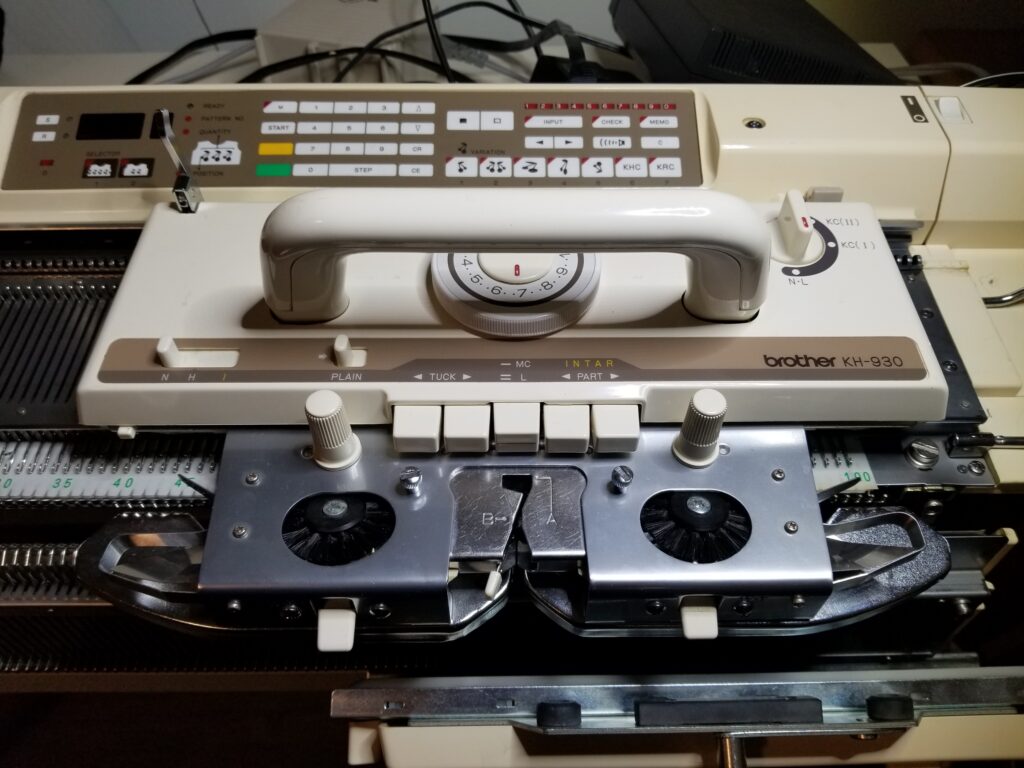
Starting with the main carriage, I removed the plastics first and washed all of those in dish soap (no it wasn’t Blue Dawn because that shit isn’t the magic potion you all think it is) and warm water. Then I spent a considerable amount of time freeing the buttons from their hardened grease and oil prison. Once everything was moving freely and correctly, I reassembled it all so I could answer the most crucial question…

Does it Knit?

Fair Isle Sample Knitted on a Brother 930

Well, yes, yes it does knit. And it knits beautifully! I knitted this sample of fair isle from one of the built-in patterns and it did not miss a stitch.

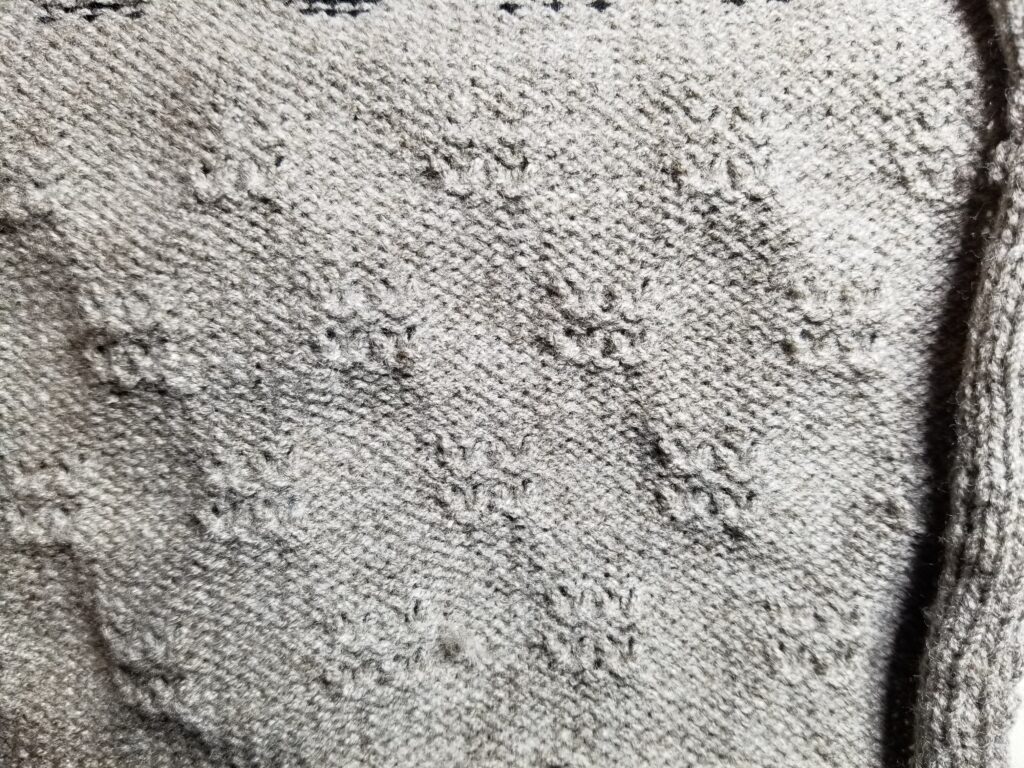
This tuck stitch sample came out beautifully. Again, I used one of the built-in stitch patterns.

Same for this slip stitch sample.
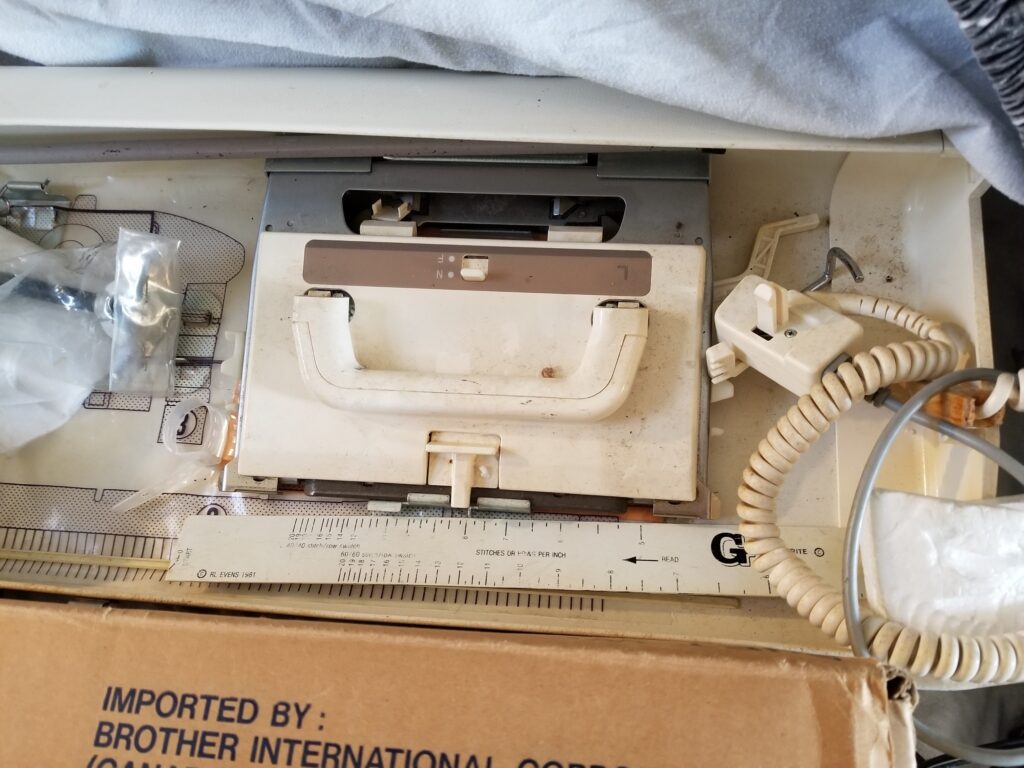
The Ribber Carriage

Next the Ribber Carriage got the same treatment. I didn’t spend quite as much time on it, there are fewer moving parts internally so hardened grease and oil wasn’t as much of an issue. Of course the most important thing is always going to be – will it knit?

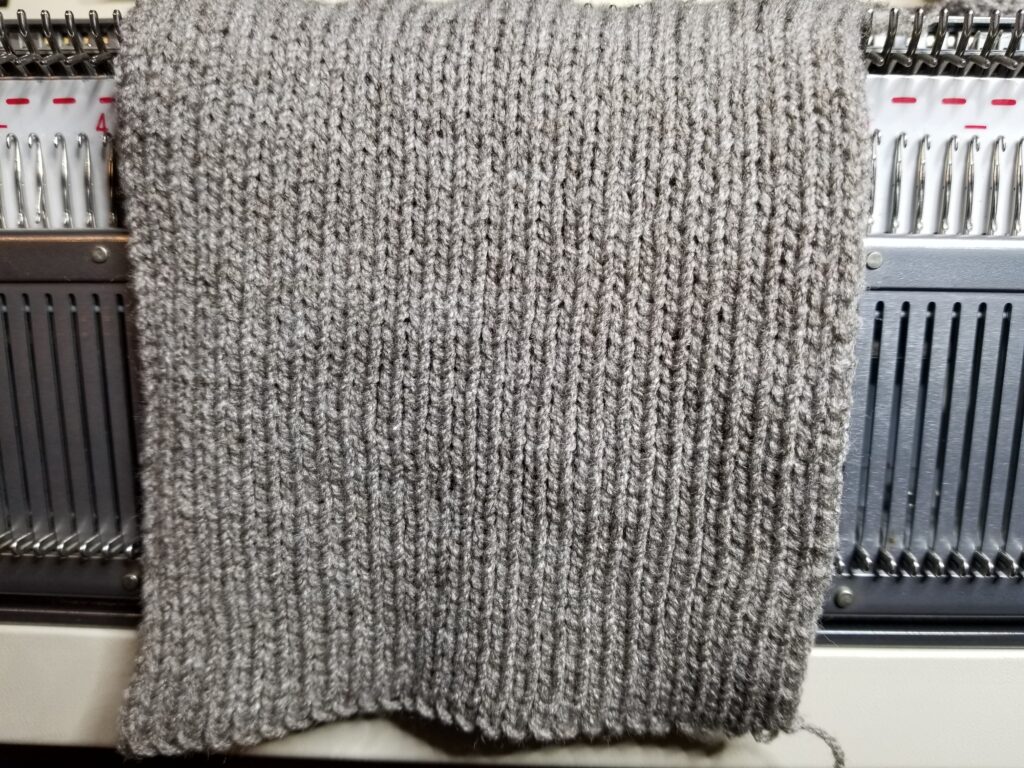
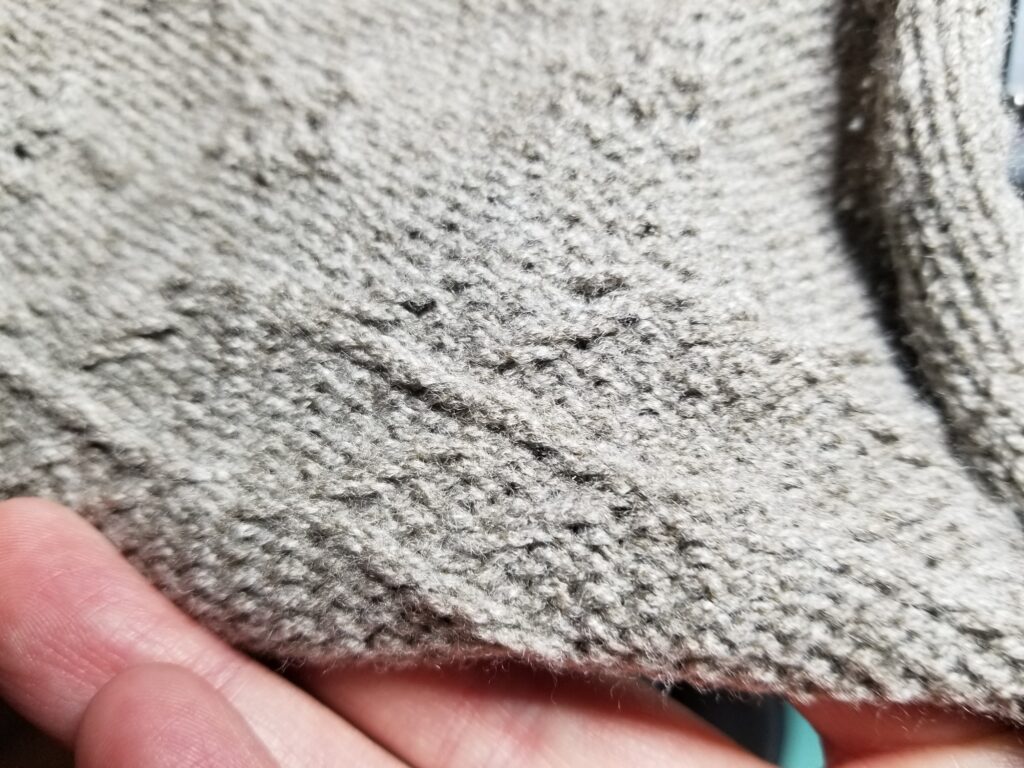
And it does knit as you can see from this 1 x 1 ribbing sample.

What’s Next?

So that just leaves the garter carriage to go over and test. Then I want to spend a little time organizing my knitting space before I choose a pattern and start knitting. Hmm, do I start with a sweater? Maybe a scarf or shawl?

I Bought A Brother 930 Electronic Knitting Machine!

Brother 930 Knitting MachineI bought another knitting machine – a Brother 930 this time. This one is an electronic machine and I am pretty excited about it! I had already bought some knitting machine yarn from the same lady, and she gave me a pretty good deal on this machine. I mean honestly, wait until you see all the goodies it came with!

So let’s get into what this Brother 930 came with!

Brother KG95 Garter Carriage

A Brother KG95 Garter Carriage

If you’ve never used a knitting machine, it’s important to know they only form stitches in one direction. A knitting machine on it’s own can only knit stockinette. Sure, there can be patterning in those stitches but you can’t knit garter stitch unless you’re willing to do some pretty extensive hand manipulation. Knitting ribbing requires either some hand manipulation of the stitches or a ribber to attach to your machine (this machine did come with the KR 850 Ribber as well).

What the garter carriage does is allow all of that to be done on the machine without any intervention. You set it up and that little guy will chug away back and forth across your machine, knitting and purling as the program tells it to. Is it fast? Apparently not, but does it matter if you can be doing something else while the garter carriage does its thing? Of course not.

Brother KG93 Garter Carriage

A Brother KG93 Garter Carriage

Yes that’s right. A second garter carriage. This one was not in regular use so the cover didn’t quite cover it. So yeah, it’s a little dusty but that’s okay. We can clean it.

PPD - Pattern Programming Device

A PPD or Pattern Programing Device

So way back in the day’s of compact floppy disks, you could create a stitch pattern on your computer and save it to a diskette. Then you could pop the diskette into this gadget and your machine would knit the pattern! You could also purchase patterns that other designers created on diskette and use those too. There are some diskettes that came with it, but it will be a while before I have time to really look at them.

But wait – there’s more!

knitting machine accessories

A bunch of accessories, including spare needles for the Garter Carriage which is a good thing since they are hard to find and cost around $30 each.

Punch Cards

An absolute pile of punch cards!

Now I don’t think this machine uses them, but my Singer SK700 can! Plus I’m just tickled to have a bin that is exactly the right size to store them.

When you can, buy your machine from a knitter.

The difference between buying a knitting machine from someone who used it, and buying a machine from someone who did not is remarkable. First, she kept her machine covered. So yes some things got dusty but most are remarkably clean.

The second garter carriage is dusty, you could see it in the picture above.

So is the main or K carriage. The Ribber Carriage looks the same.

Brother Lace Carriage

And the Lace Carriage. But they can be cleaned no problem.

The sponge bar will need to be replaced (probably on the ribber too). It is quite flat and crumbly as old sponge gets. It should be around 3 times as thick.

So for the next week or so, I will be spending my evening cleaning up this Brother 930 and all of it’s beautiful accessories. I can’t wait to start using it.

Do you knit or crochet? Or do you have a knitting machine yourself and if you do – do you use it? Let me know in the comments.

Simple Knitted Dishcloth for Chunky Knitting Machines

Knitted dishcloth on the chunky machine

When I first learned to hand knit, dish cloths were the go-to beginner friendly project and I love the results. But – I absolutely hate hand knitting dishcloths. It’s such a short row to knit that it feels like I spend more time turning the project than actually knitting. So working out a pattern for a knitted dishcloth on the chunky machine was a must do project for me.

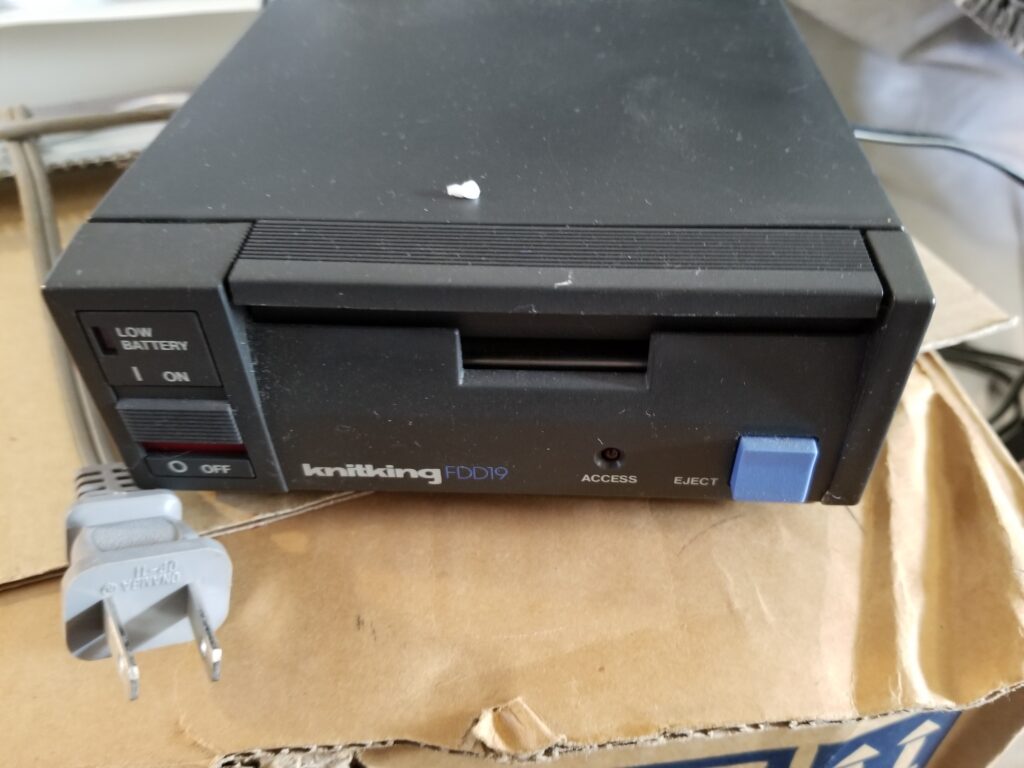
Now if you follow me on YouTube, I did a couple of videos on rehabbing my Singer 150 Chunky Knitter. It’s still got a few issues with needles, two of the brand new needles in the center portion of the bed were defective. Which is why my e-wrap cast on is off center. I’ve cast on 25 needles for my dishcoth because I prefer a smaller cloth. This dishcloth can be knit on any machine capable of knitting this weight of yarn. No patterning capability needed.

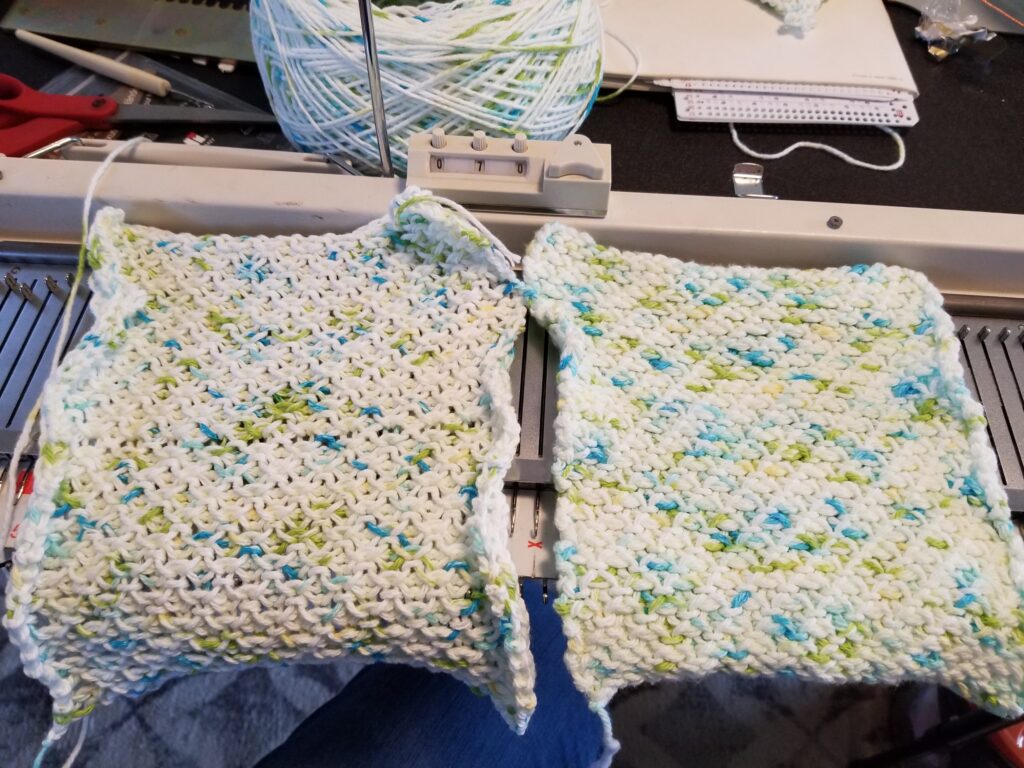
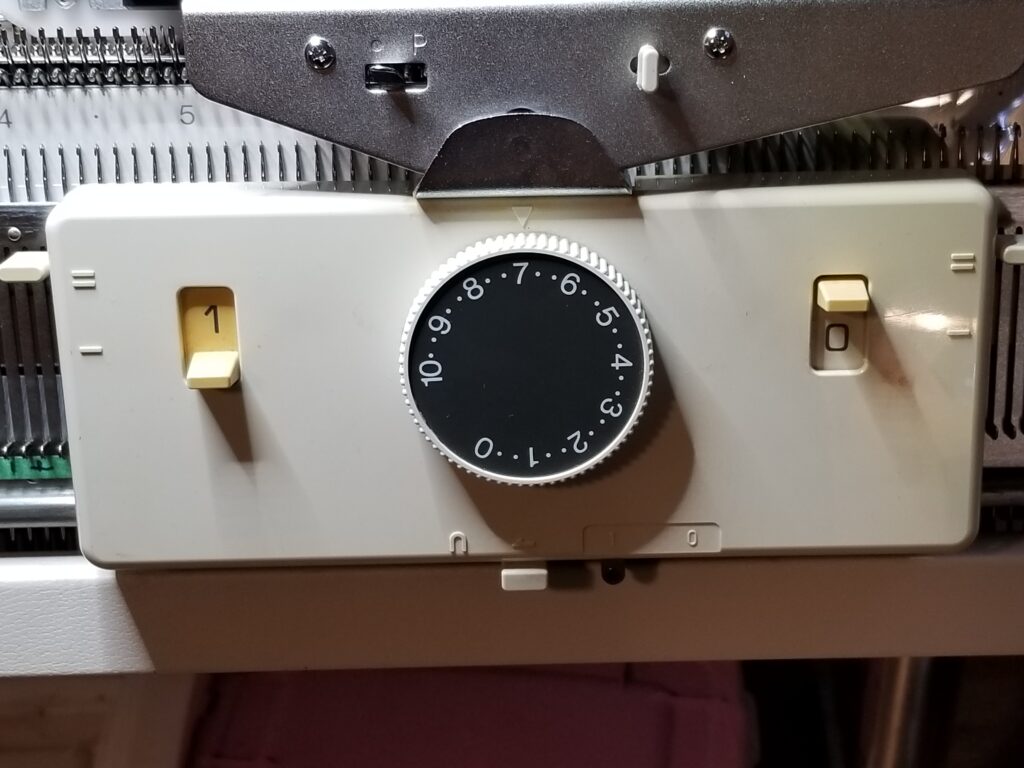
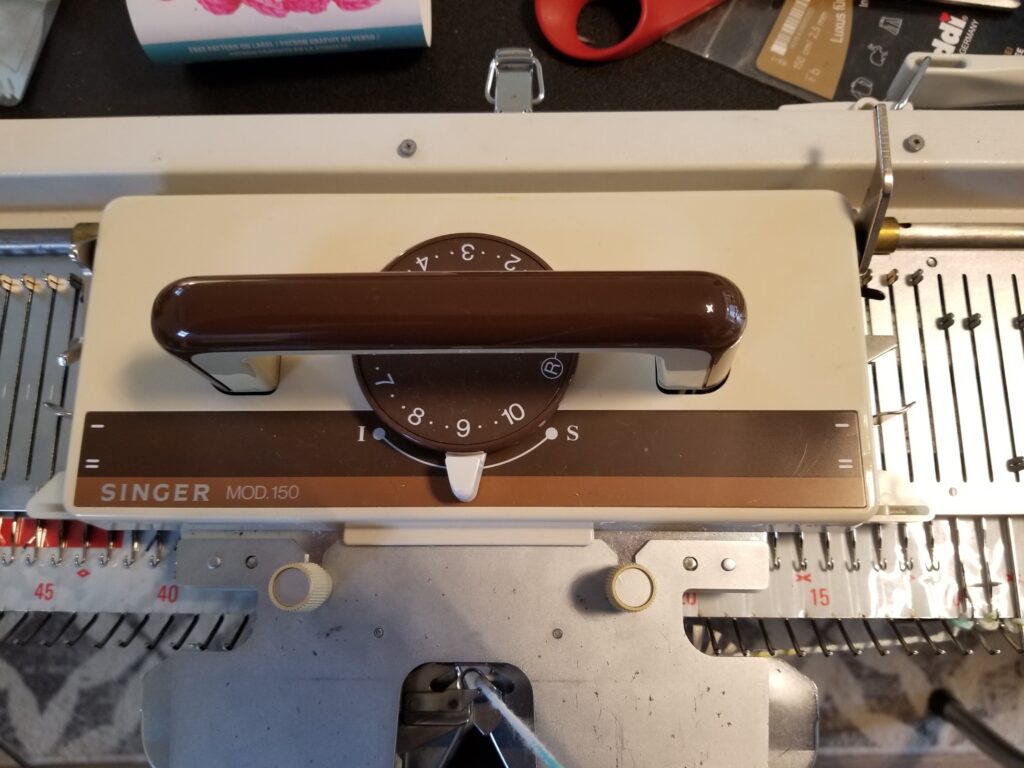
For the first row, I set my carriage to tuck stitch. For my machine that is done by setting the Russell Levers at the sides of the carriage to position ‘-‘ instead of ‘=’. Set the stitch selector to stockinette. On my machine, tension 9 is a good stitch size. Keep in mind the yarn shrinks in the wash which can make the cloth feel more like a pot holder than a dish cloth if the stitch size is too small. You can see how much the washed dishcloth on the right of the first picture shrunk compared to the just knitted cloth on the left.

pull every other needle to hold position
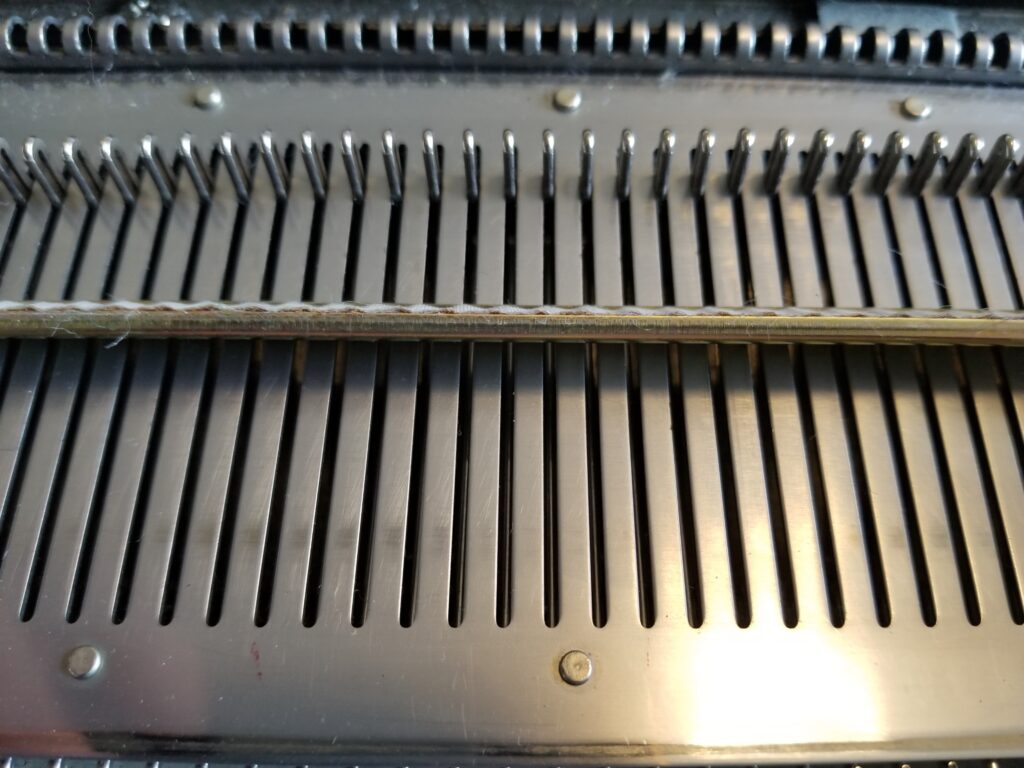
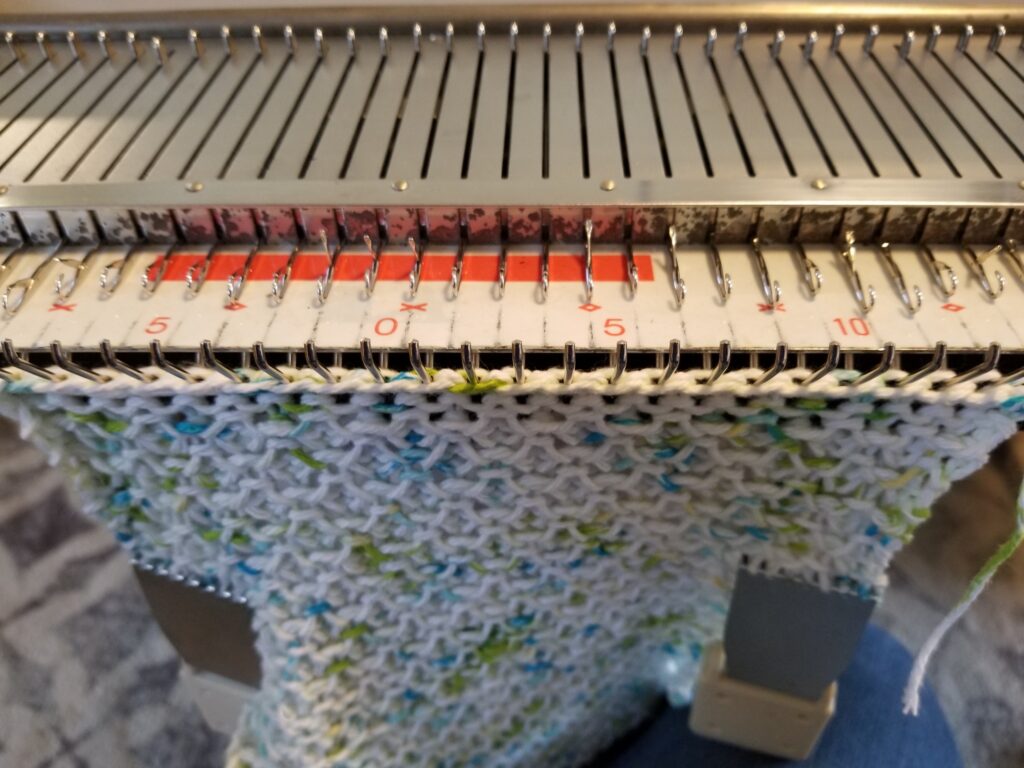
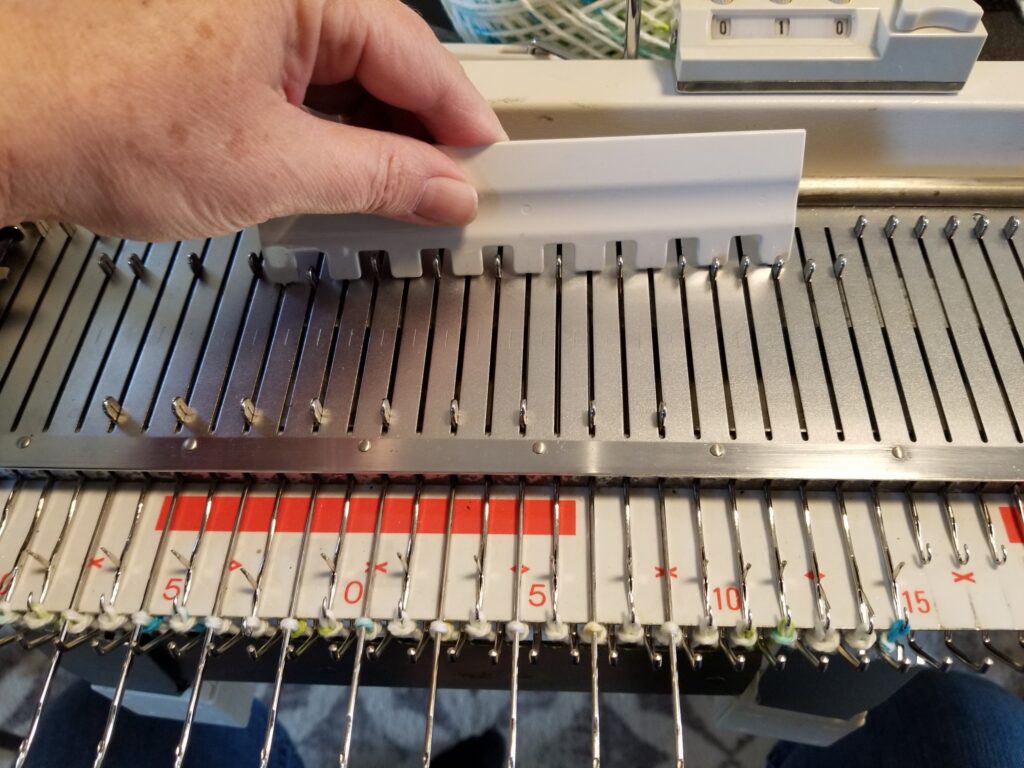
Next leaving the first 2 needles in working position, I pull every other needle out to ‘hold’.

2 rows of held stitches

Then I knit two rows. Next I change my Russel Levers back to ‘=’ to knit all needles.

Knit one row. Change the Russel Levers back to ‘-‘ to skip held needles.

Pull opposing needles to hold position starting one needle from the edge this time. Knit two more rows using tuck settings. Then one row with Russel Levers set to ‘=’ to knit all needles. That’s all there is to it.

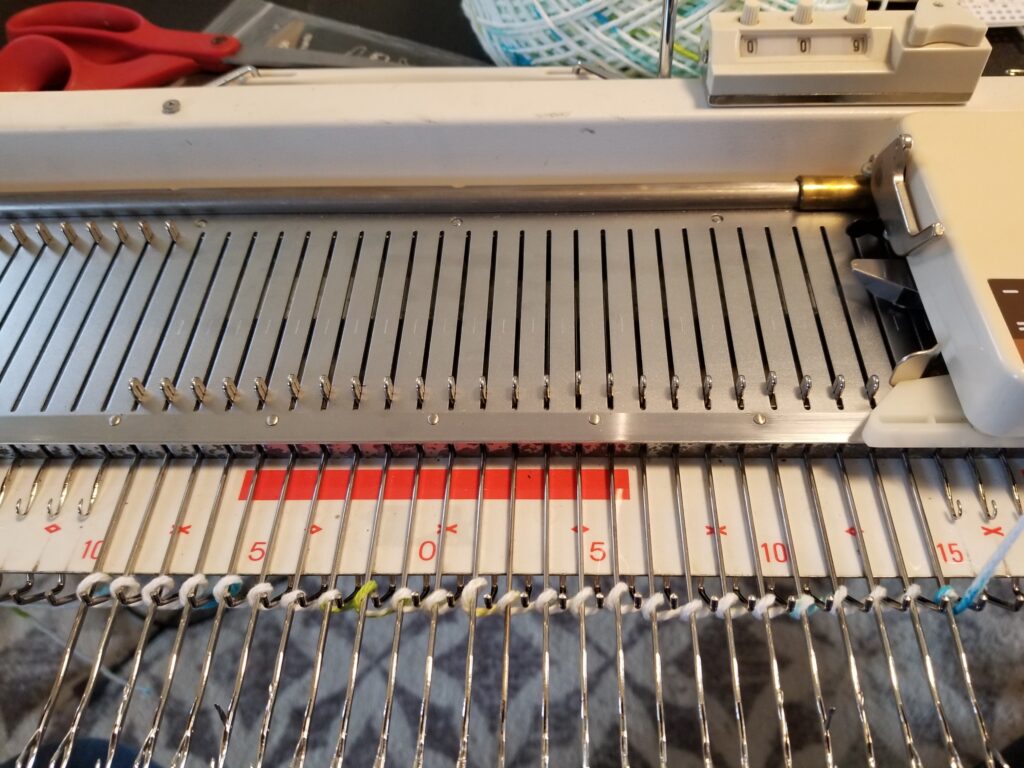
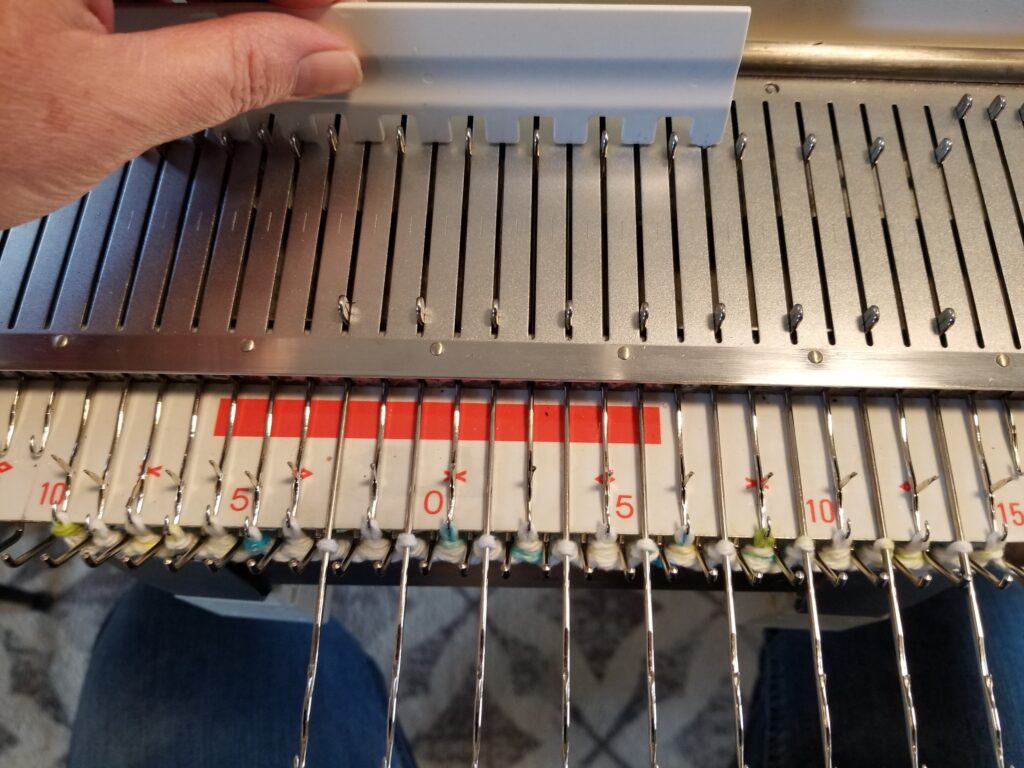
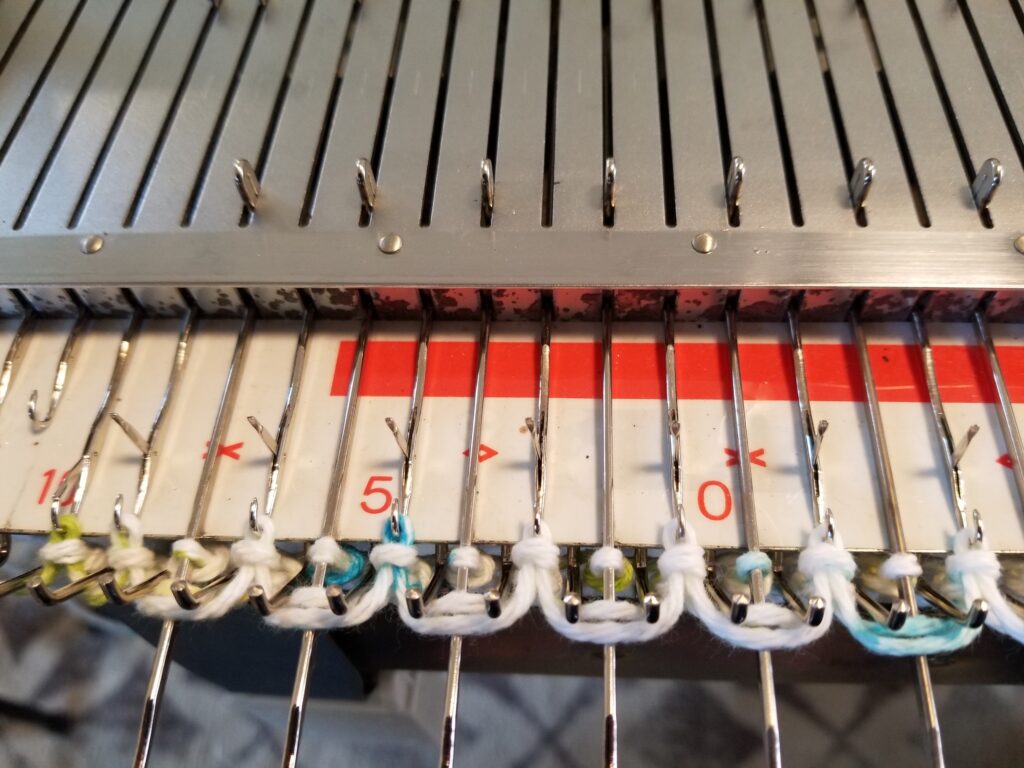
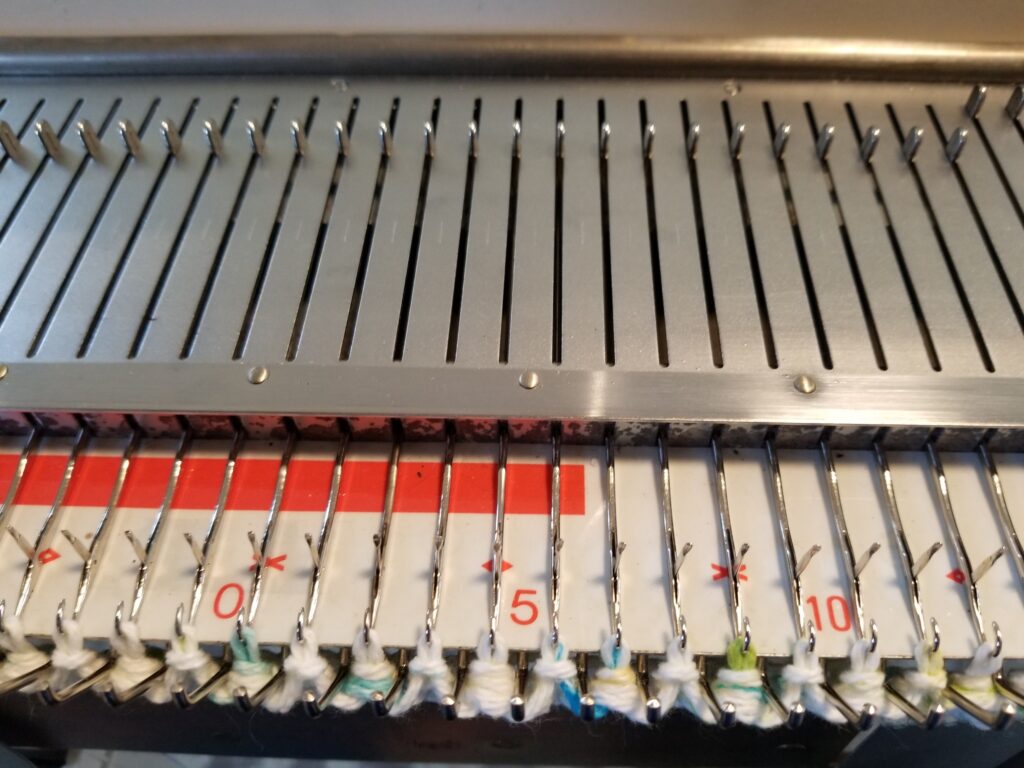
I continue on in the pattern until my row counter is around 70. Then I bind off after the last row of all needles knit.

Circular Knitting on a Singer Knitting Machine

There are loads of tutorials on YouTube that will show you how to knit circular on a Brother Knitting Machine, not so many for a Singer Knitting Machine. What is out there usually has the information needed buried half-way through an hour long video. Which is why I’m providing a brief explainer on how to set up your Singer Knitting Machine for circular knitting with the settings for both carriages.

The Instruction Manual

Singer Knitting Machine Manual Circular Knitting
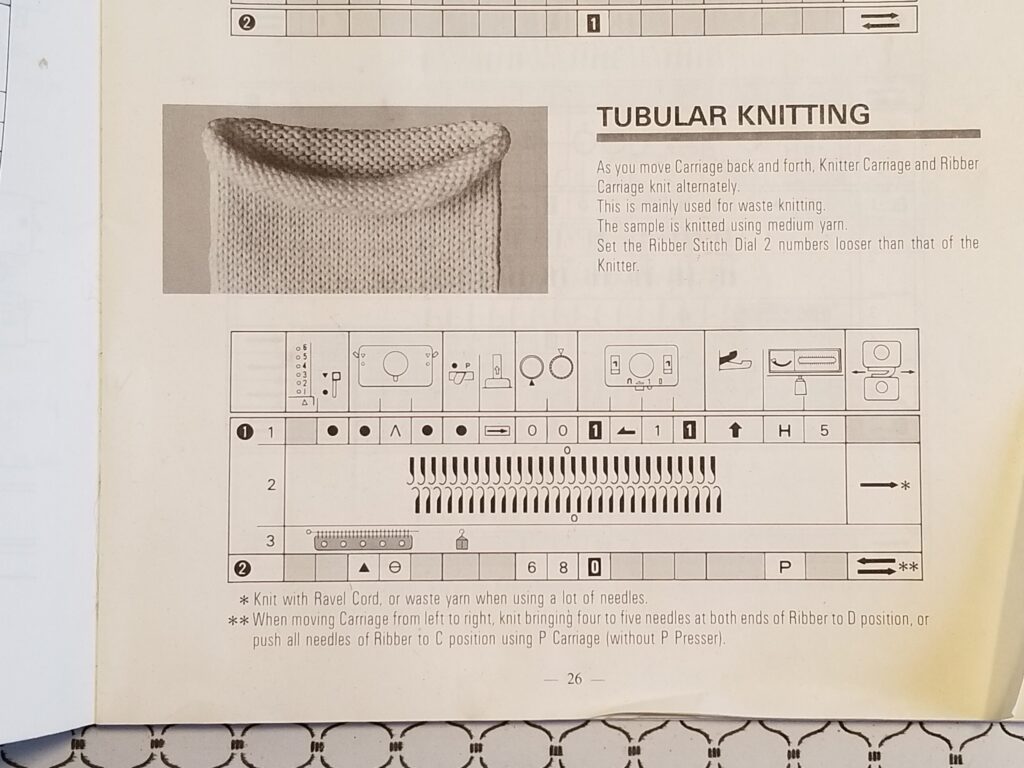
Here are the instructions as they appear in my manual. It’s all there but as new machine knitter I certainly didn’t understand it. So here is what you need to do.

Rack your machine

I am going to assume you’ve already cast on the necessary needles for your project.

Double Bed Knitting Machine Racked for Tubular Knitting

For circular knitting you will need to rack your ribber bed so that the needles are directly opposite to each other. Or at least as close as you can get.

Positioning Singer Ribber Bed

For me on my machine I use P5. Your machine may be different.

Set your Main Bed Carriage

Singer Knitting Carriage Circular Knitting

On the main carriage, you will set your cam lever to slip. Your side lever on one side only will be set to the circle. In the photo above, the main bed will only knit when the carriage is moving from left to right.

Set your Ribber Carriage

Singer Ribber Carriage Circular Knitting

On your Ribber carriage, you will change the set lever on the opposite side to zero. The set lever on the left means the carriage will only knit when it is moving towards the left.

Still not clear?

That’s okay because I also made a really quick YouTube video on this. I’ll apologize in advance for how shouty I sound.

While you’re there it would really help me out if you liked the video and subscribed to my channel.

Drop me a comment and let me know if you found this helpful.

Chicken Wire Allium

Chicken Wire Allium are one of those things that keeps popping up on my Pinterest feed. Every time I see them, I want them because Allium are such a cool looking flower. They’re like giant lolly pops in the garden. So as much as I try to come up with my own unique ideas here I just knew I had to replicate those allium.

Chicken Wire Allium

After a little bit of trial and error, these were pretty easy to make. With no power tools needed, it was something I could work on in the morning without disturbing the neighbors at the ridiculously early time I wake up every day.

Chicken Wire is a bit bitey so I suggest long sleeves if possible. It also tends to tangle up in itself and what not, so it’s not really a good project for when you’re feeling irritable or impatient. As you unroll the wire, run if over the edge of your workbench to straighten it out so it doesn’t keep rolling back up on you.

Materials for Chicken Wire Allium

I’ve provided some links to the materials you will need, they are affiliate links.

How To Make Allium

Prep the Chicken Wire

Prep for Chicken Wire Allium
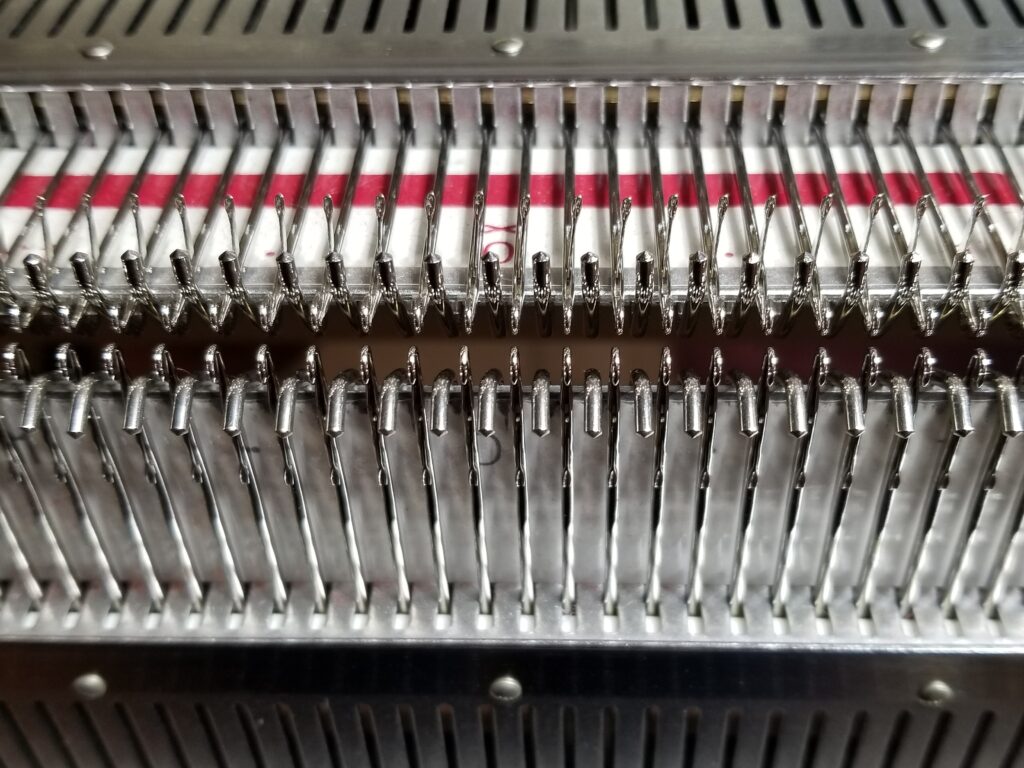
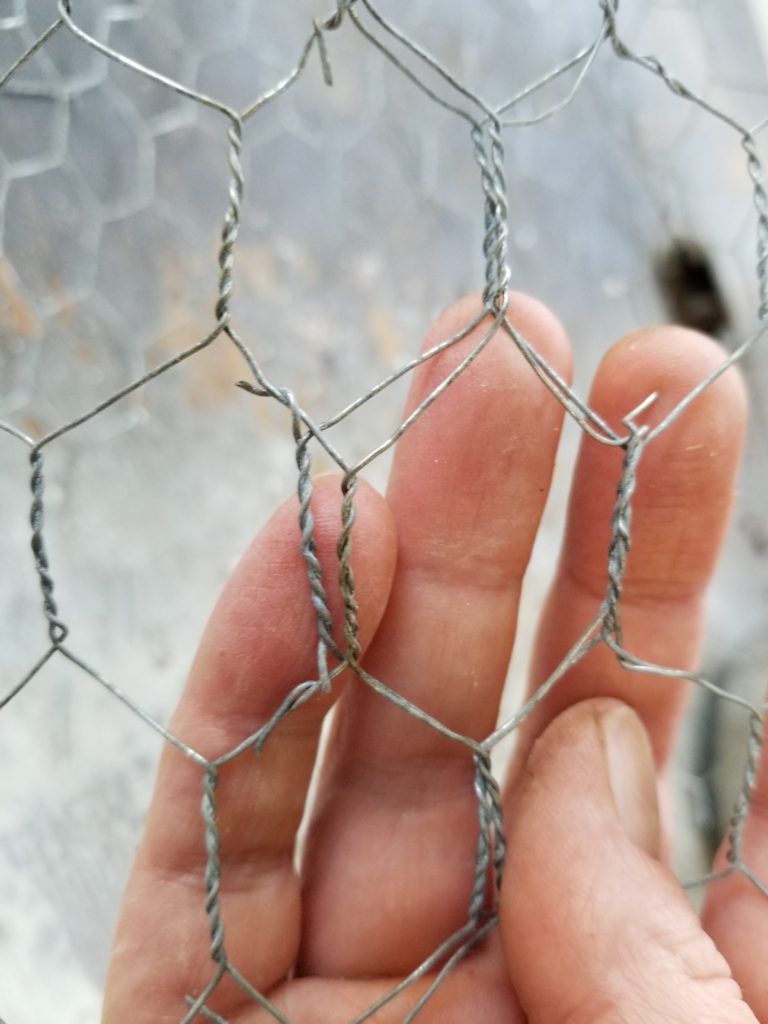
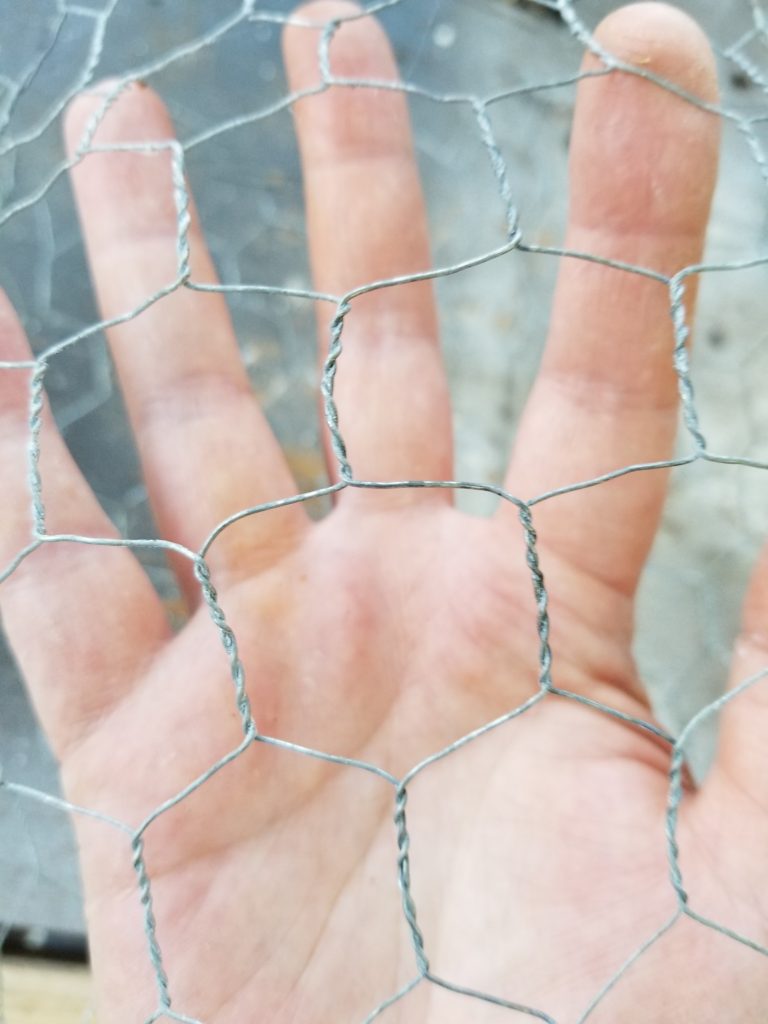
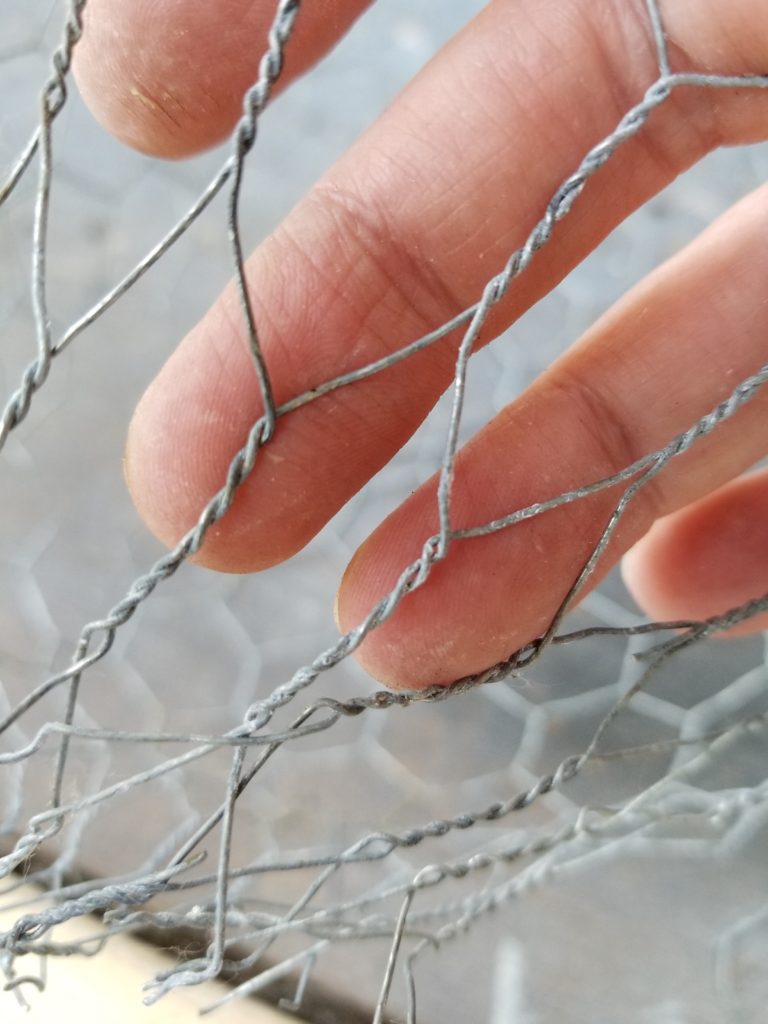
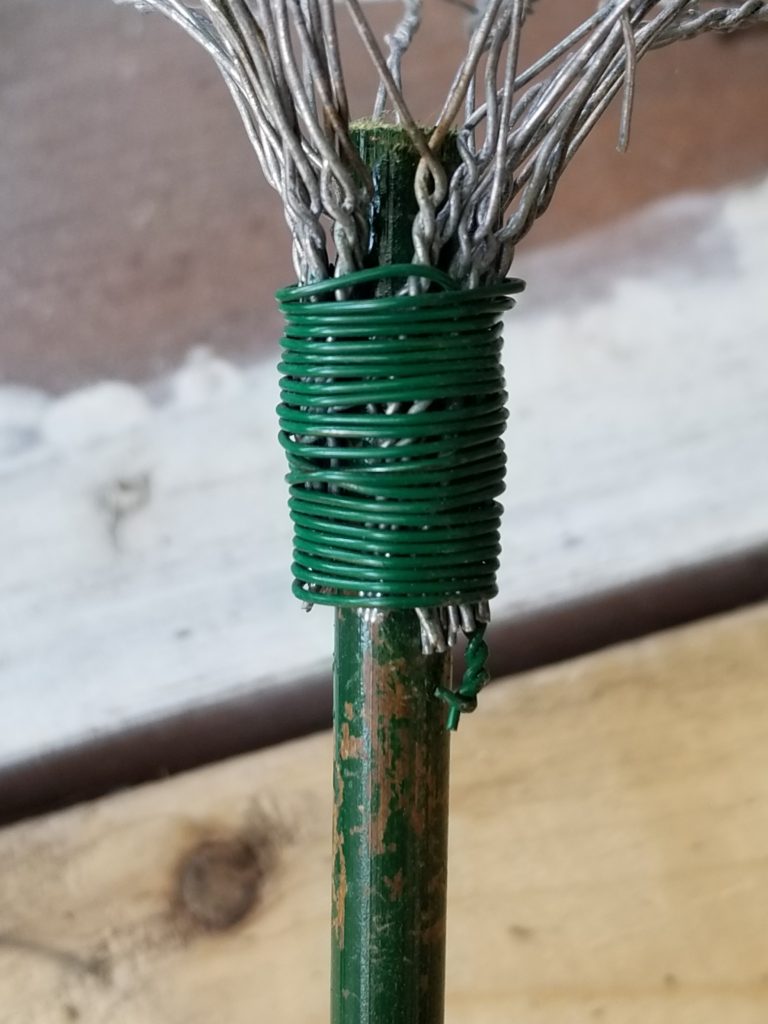
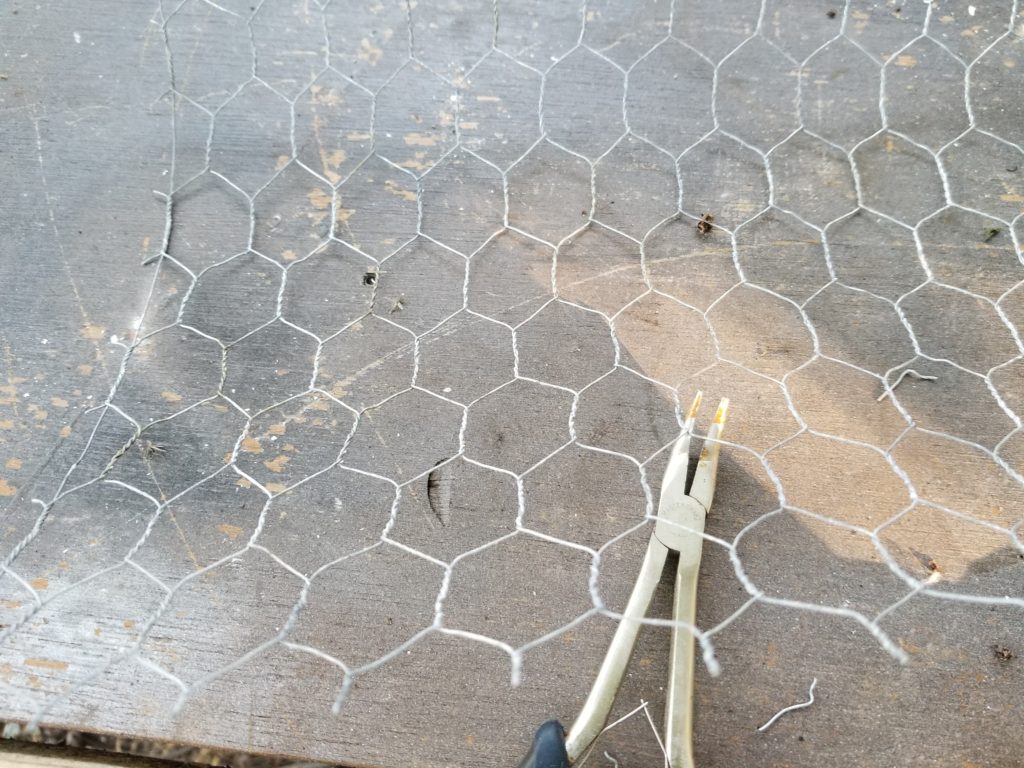
After some trial and error, I found I got the best results with the chicken wire oriented as above. The twisty parts need to be running up and down.

Usually on the edges of chicken wire there’s an extra wire added for stability – that needs to be trimmed off. If there are any running through the middle of your wire, trim out of the middle of each hexagon. If you leave them in it will prevent the mesh from stretching as it needs to. Cut a rectangle of chicken wire for each allium as below.

  • Large Allium – 14″ high x 21″ wide
  • Small Allium – 12″ high x 20″ wide
Shape the Chicken Wire

Shape your chicken wire into a tube, overlapping one row of hexagons as above. Twist your wire ends around to attach.

Half way between the top and bottom of your tube, stretch the hexagons all the way around the tube – they should almost look square. This makes the wire belly out to start your curve.

A row or two above that, start pulling the hexagons to stretch them vertically – this creates the top of your curve. Bring all of the wire ends together at the top and twist together as best you can. I made a dozen of these and never came up with a nice neat way to do this part.

Repeat the same on the bottom half of your tube, but leave the ends open to attach to your stake. Don’t worry too much about perfecting your shape yet. It’s much easier to make adjustments once it’s on a stake.

Grab a length of florist wire and wrap around the bottom of the chicken wire and stake as above. Once you have it on the stake it’s easy to tweak your shape to get a more rounded ball shape.

Hit them with a couple of coats of spray paint, make sure you get good coverage on the inside and outside. As you can see I now have a patch of fuchsia colored dirt, so make sure you don’t paint near anything important to you.

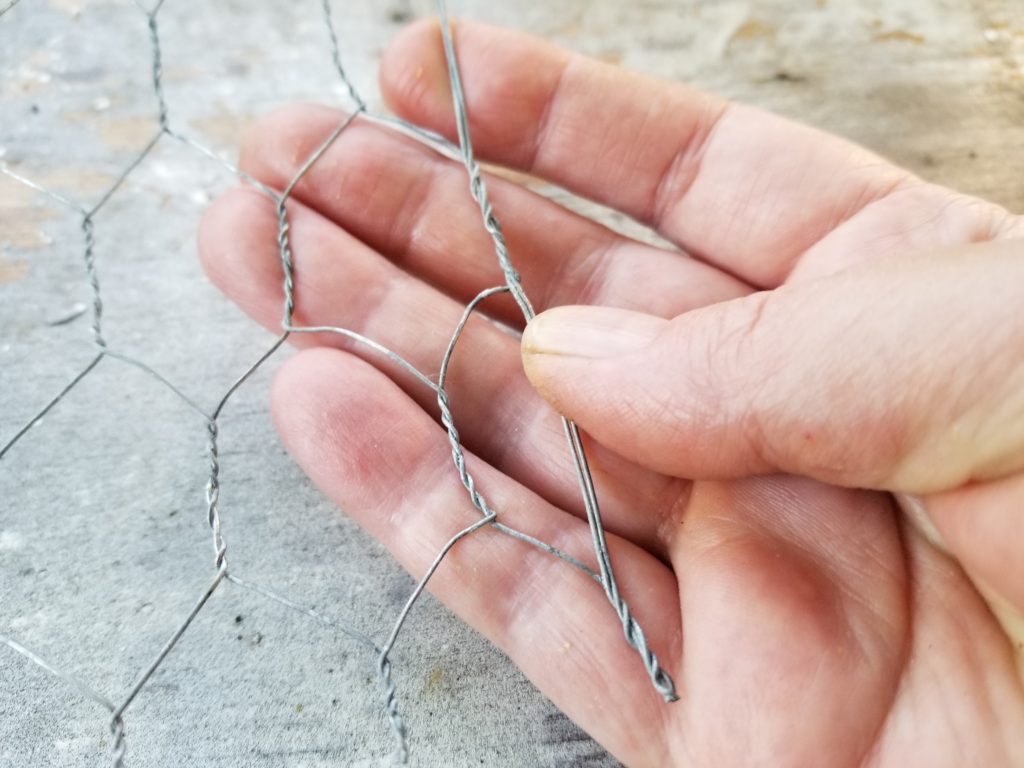
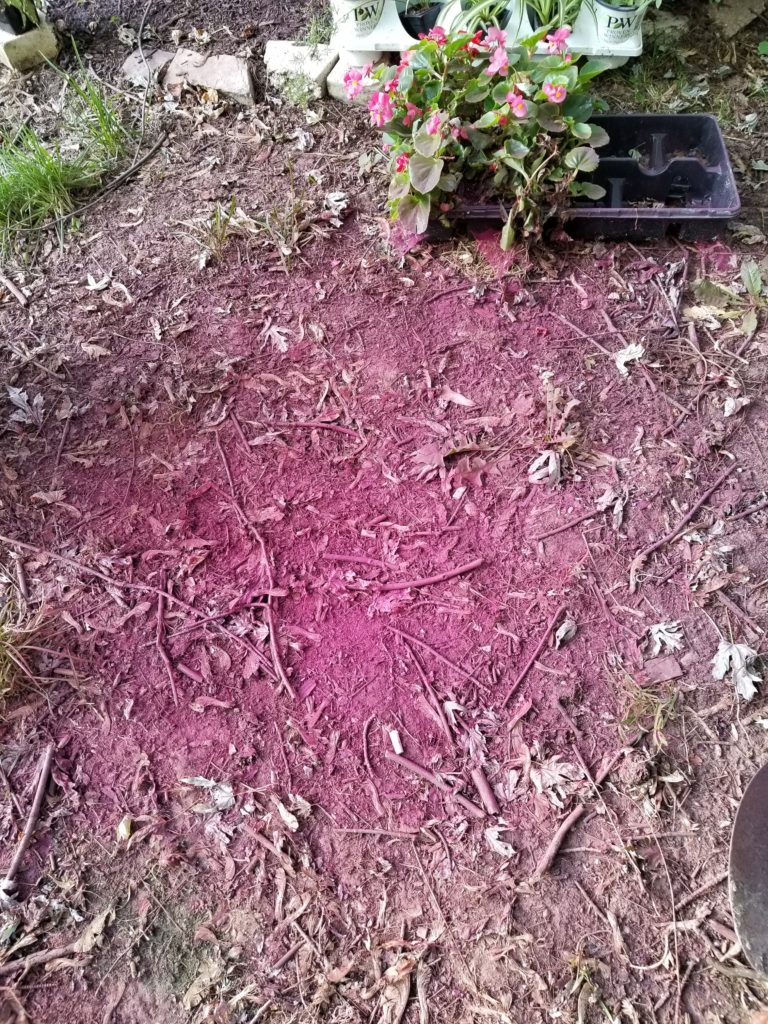
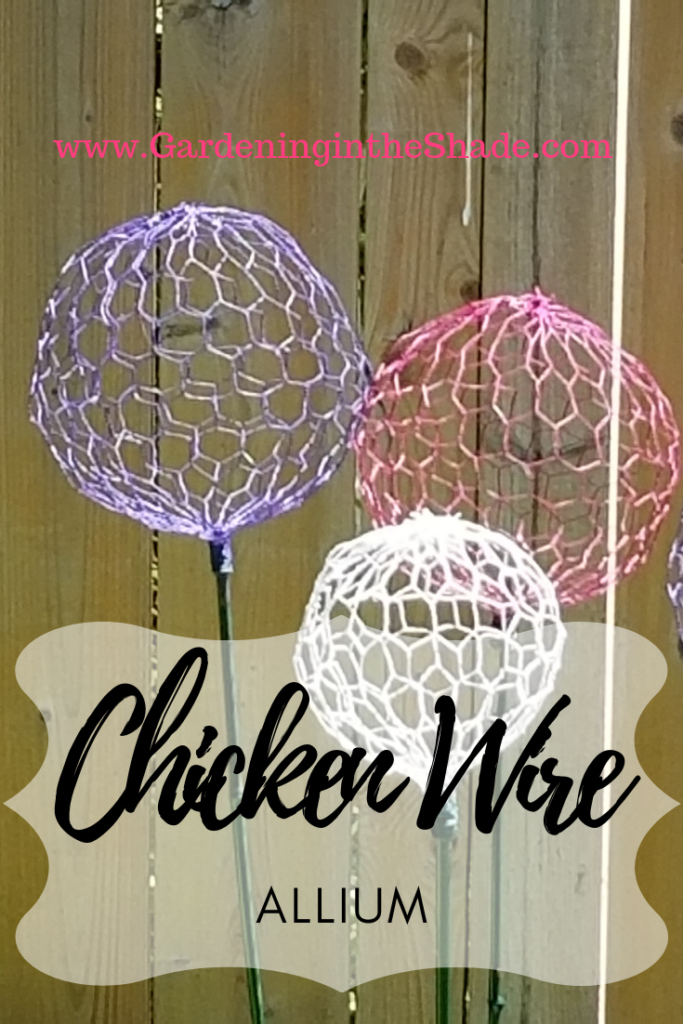
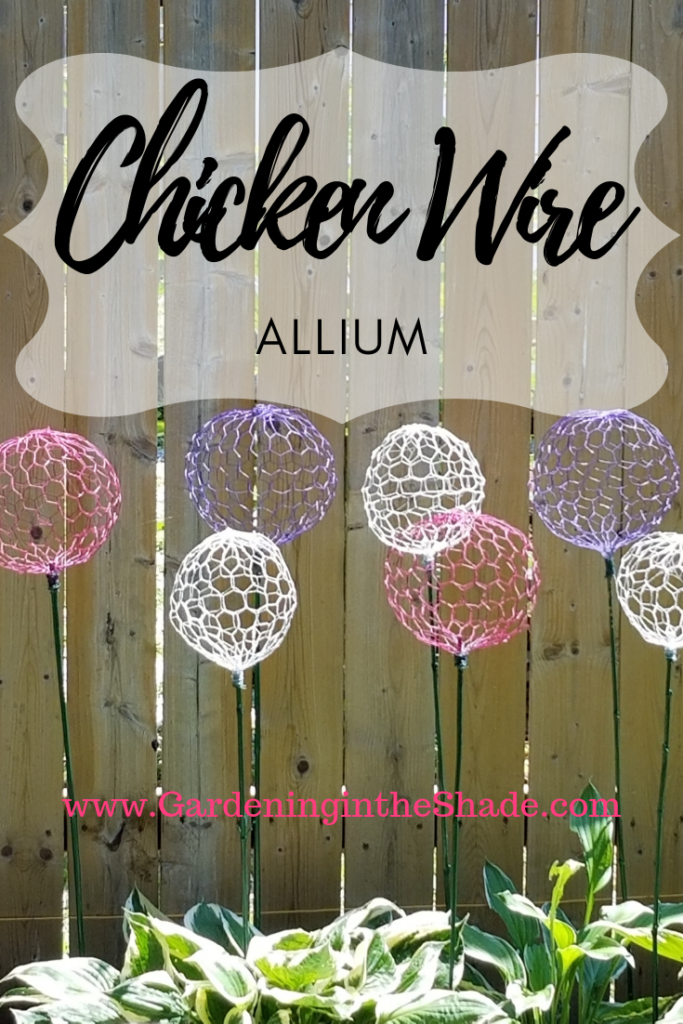
Pick a spot and shove the stakes in the ground to arrange your Chicken Wire Allium any way that makes you happy!

So what do you think? Would you plant a bunch of chicken wire Allium or would you rather buy some bulbs and plant the real thing?