A Quick Fix for Smelly Skechers

Here's a quick little project to fix smelly Skechers.

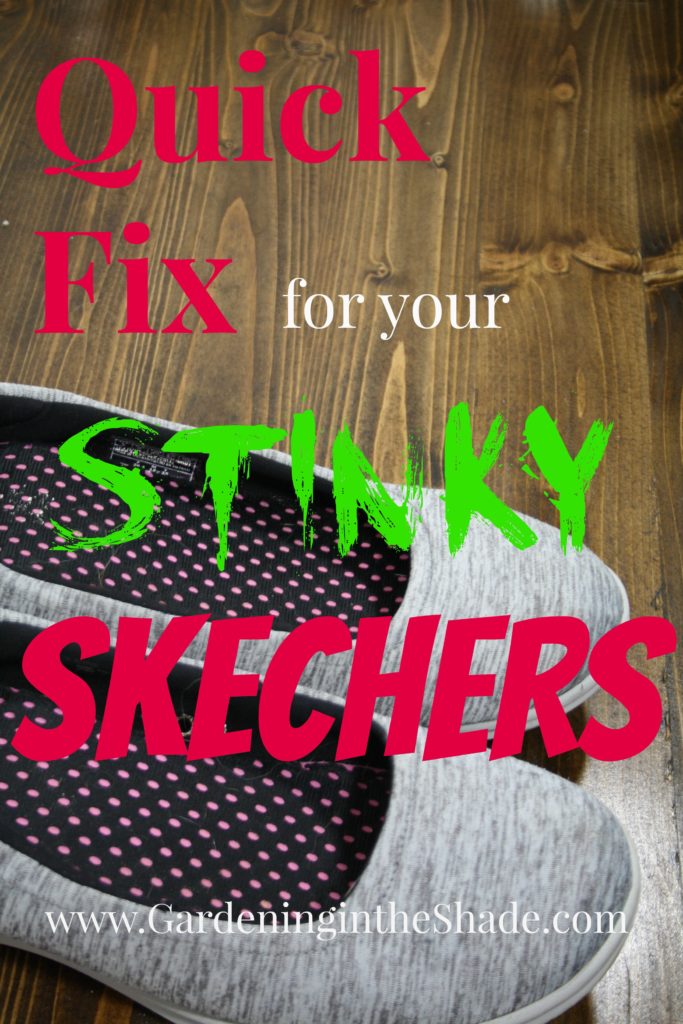
I bought a pair of Skechers last year and they are absolutely my most comfy pair of shoes. In fact, the only reason I don’t wear them all the time is because they either smell too bad to wear or they’re in the wash to get de-funked. Which is a bummer because they’re the perfect cute little shoe to wear with casual capris or crop pants. So I decided to take a stab at solving the problem.

Please note: Some of the links in this post are affiliate links. If you purchase an item through my affiliate links, this has no effect on the price you pay for these items. It simply means this site will receive a small commission on your purchases.

Supplies to fix smelly Skechers
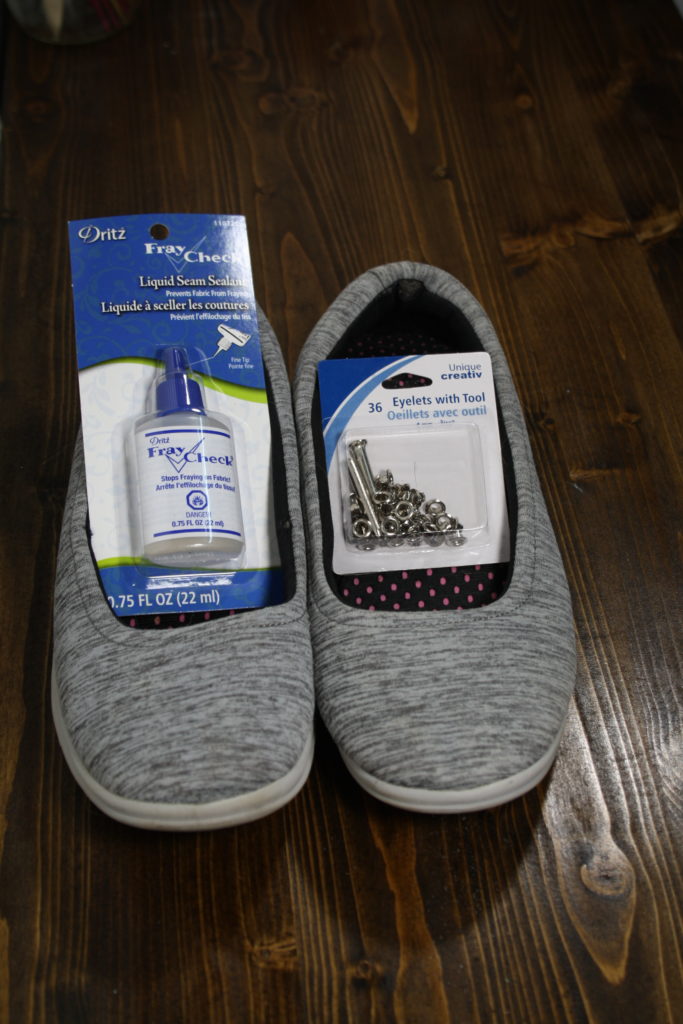
Supplies to Fix Smelly Skechers

How I fixed my smelly Skechers.

Test application on scrap fabric

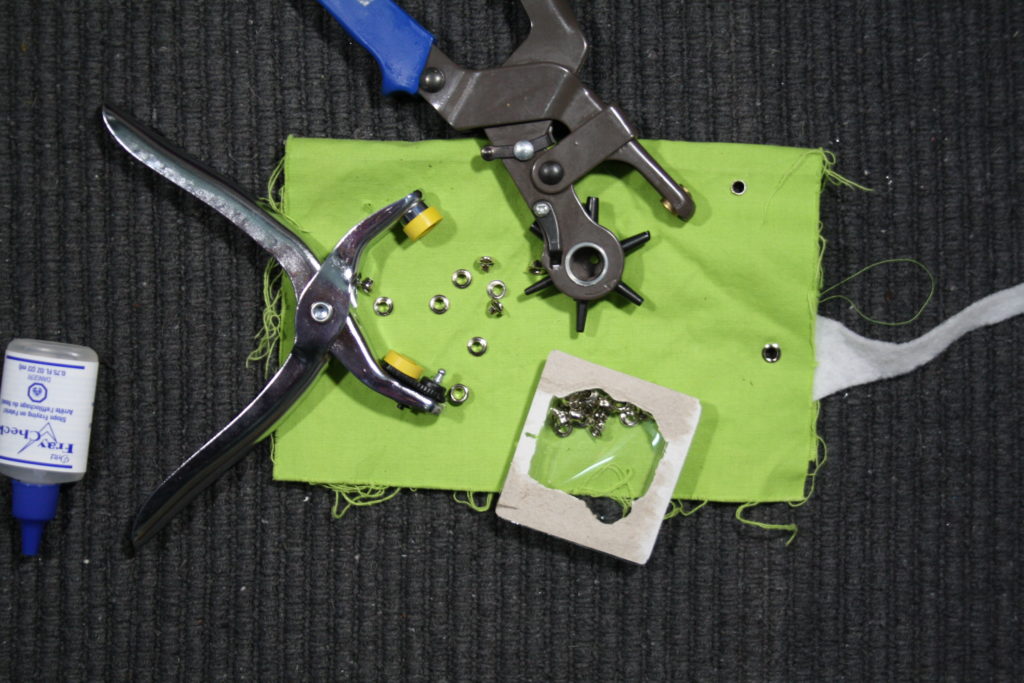
Before I did anything to my shoes, I did a couple of test applications on some scrap fabric.

Put a drop ofPut a drop of Dritz Fray Check in each spot you are adding an eyelet

First I put 3 drops of Dritz Fray Check in a line along the instep of my shoes. I left it to fully dry, then punched a hole in each spot.

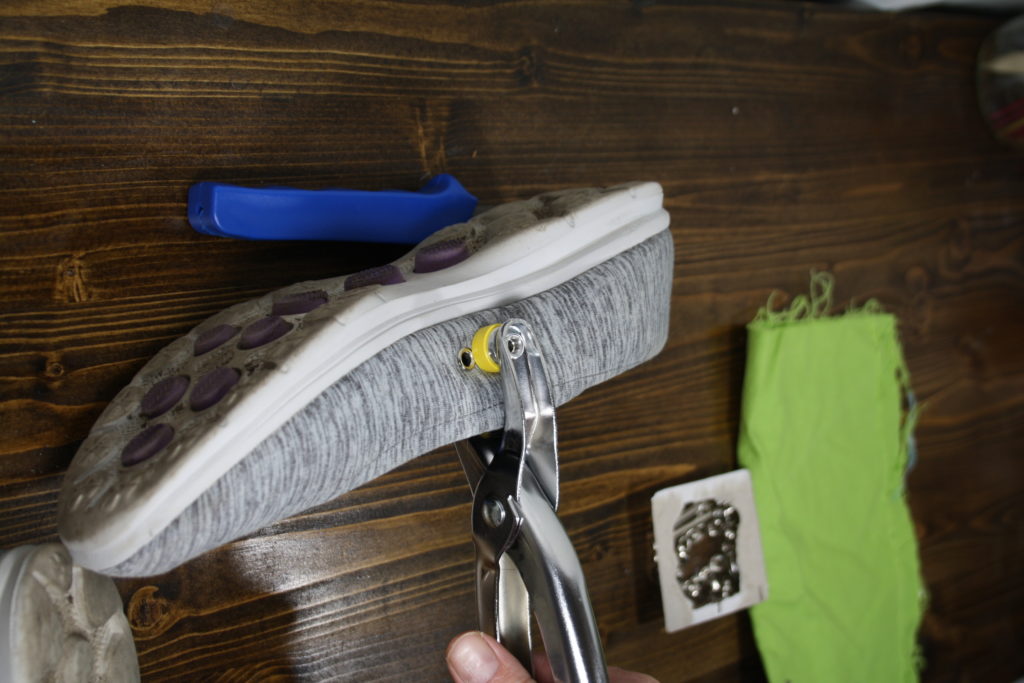
Using the eyelet pliers, I set an eyelet in each hole. Then I applied Dritz Fray Check on the inside of the shoe all around each eyelet.

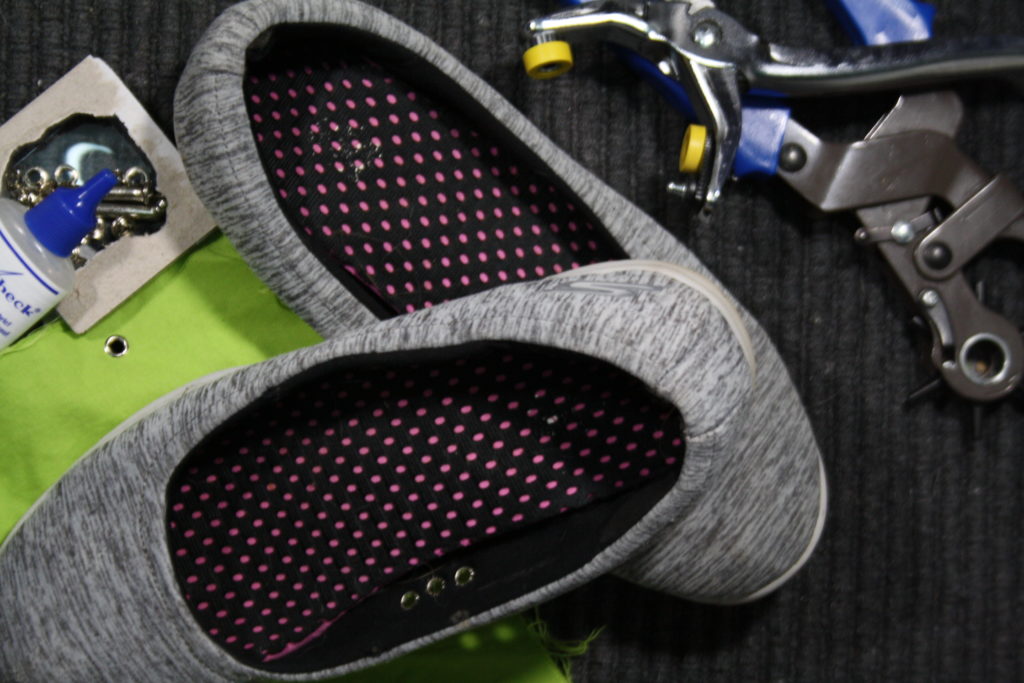
I’ve been wearing mine around the house without socks and it’s actually helped! I’ll probably still have to wash them once in a while, but if I can wear them more than a day or two before they’re unbearable I’m happy. The only other alternative is to completely remove the memory foam insoles.

If you enjoyed this post, don’t forget to share it with your friends! For more just like it follow me on Pinterest, Facebook and Twitter or sign up for regular updates by email.


Atomic Style Planters for Fellow MCM Geeks

For the MCM geeks - Atomic Style Planters!

I’m just going to say it – I’m a complete geek for all things MCM, especially the Atomic style patterns of the day. Fortunately for me, so are Joe and Angie of Ambient Wares and Joe created two amazing patterns you can download for free >here<!

I have so many ideas for these patterns, but the first thing I did with them was make some darling planters for my growing collection of succulents.

Clay pots with an amazing Atomic graphic

Initially, I painted two pots white and another two turquoise. I decoupaged Joe’s pattern to the rims of my pots. Unfortunately, when I sprayed them with sealer, the color of the clay bled through the white paint, making it appear dirty next to the bright white patterned rims. So I masked off the decorative rim and hit them all with the spray paint – Rustoleum Chalked in Serenity Blue – which turned out to be a perfect MCM color.

Planting a Dish Garden with Succulents

Choose a pleasing arrangement for your plants

Once everything was dry and sealed time for the fun! The thriller, filler, spiller rule applies to dish gardens as well as outdoor planters. I created a pleasing arrangement, then I used my favorite planting trick.

Place empty pots in planter as space holders

Gently remove the plants from their pots and then place the empty pots as space holders.

add soile and tamp down

Add soil and tamp in place around the empty pots.

Remove the pot leaving a planting hole

Take out one of the pots and there’s your planting space.

pop a plant in

Pop a plant in and move to the next ‘space’.

Continue until it's all planted

Here you can see the finished arrangement with a few more plants added in.

Small planter

One of the smaller pots, still using the formula of thriller, filler, spiller. I love the way this little pot came together with the delicate blue trailer, the fuzzy leaves of the filler and the spiky dark green height behind.

Another small planter

Here is another small pot. Check out Jaws in there!

Some of my collection

This little table used to be my play table as a kid. Now it sits beside my desk under a window.

the smaller pots in my wicker shelf

This little wicker thrift store shelf hangs above.

with the mini turtle

It’s also home to my mini turtle topiary.

All together now

these little pots make me happy

These little pots with their ‘Atomic’ patterned rims make me happy.

If you enjoyed this post, don’t forget to share it with your friends! For more just like it follow me on Pinterest, Facebook and Twitter or sign up for regular updates by email.

If you have ever thought about starting a garden or craft blog of your own see how easy it is >>here<<.

Save

Save

Save

DIY Pegboard for Craft Room Storage

Make this unique industrial style pegboard!

Pegboards are amazing for small spaces but I’ve just never liked the look of them. It’s all those holes, they make me think of dust and wonder if there spiders hiding in them. So when I was looking for a different storage solution for my craft supplies – like that damn rotary cutter I can never find – I had to get creative.

DIY Pegboard Materials & Equipment:

  • Wood for backing. I used two 12″ x 4′ pine shelves but you could easily use reclaimed wood instead.
  • Hardware cloth with 1/2″ x 1/2″ openings. Do not buy the prepackaged rolls. They are rolled too tightly and impossible to work with. Have it cut to length at the Hardware Store.
  • Washers & bolts for spacers.
  • Screws long enough to go through spacers into wood.
  • Clamp or two.
  • Long straight edge.
  • Drill.

Making the Pegboard:

I stained and sealed both shelf boards before starting. I thought about using a tea stain for a rustic look, but decided I wanted a deeper color. Once dry, I used two mending straps in the back to join the two shelves. I could have used pieces of wood instead, but it was cold and windy outside and I didn’t want to drag my saw out of the shed.

Eye Bolt and Hook to hang Hardware Cloth Pegboard

I started by drilling pilot holes in the top edge of my wood backing and then screwing in the eye bolts. We won’t even discuss those extra holes for the hooks in my recently patched, freshly painted wall.

Clamp the mesh to your work surface at each end with the curl facing up.

I only had one clamp, so I used a case of pop to weight the other end to keep the mesh from curling back up.

Using your long straight edge, start folding the cloth. I did my long edges first, it helps to straighten the mesh. Work your way up and down the fold line, gradually folding it inwards.

When you’ve completed the fold, crimp it tightly with pliers.

Repeat for all four sides then flip it over so the curl faces down, otherwise your mesh will sit right on the backing and leave no space between the mesh and backing for hooks.

Fasten the mesh, top and bottom every 12″ or so. Mark your screw placement, but only drill one pilot hole at a time. The openings in the mesh won’t always be where you expect them.

My first time staining and sealing wood – can you tell?

For each screw, it’s washer, mesh, washer, nut or spacer, washer, and then finally into the wood. Leave some play until all the screws are in.

That’s it!

Mount it on the wall and start hanging up your tools and supplies.

I just bend pieces of wire into hooks but you could buy S-hooks also.

A word about cost:

Unless you are using salvaged wood as your backing, and maybe not even then, just buying a piece of pegboard is cheaper. With the two pine shelves for backing (2@$18.49 ea – $36.98), stain ($8.99), and sealer ($6.99), plus the roll of hardware cloth ($1.99/foot), screws and washers the final cost was $100 – $120.

If you enjoyed this post, don’t forget to share it with your friends! For more just like it follow me on Pinterest, Facebook and Twitter or sign up for regular updates by email.

If you have ever thought about starting a garden or craft blog of your own see how easy it is >>here<<.

Save

Save

Save

Save

Save

Save

Save

Save

Save

Save

Save

Save

Floral End Table

Upcycled TV Stand and Tray Before

Remember that icky melamine folding table I had from the same place my TV Stand turned Tea Table came from? Well I had a lot of fun making and floral end table from that 80’s melamine. Or at least I did after I recovered from a couple of big mess-ups!

I started out by scrubbing the table down and then I spray-painted it in Rustoleum’s ‘Aqua’. Once everything seemed dry enough I moved to the next step. I knew after recently seeing some Merimekko textiles and wall-coverings that I wanted to have big billowy flowers, and that I wanted to use strong colors.

Marimekko Inspired Floral

I added the centers and painted in some little white flowers in the bare spots. It looked awesome. The next morning I took my floral end table outside to spray sealer on it and watch completely horrified as the Aqua spray paint started to lift and crackle. Seriously it was like watching a stone chip in a windshield turn into a crack across the whole thing.

Honestly even though I knew it wasn’t a good finish, I was going to leave it as it was. So then I went to add the second coat of sealer, and grabbed the wrong can.

Crackling Paint on first floral end table

Still I soldiered on and turned it into an ‘airbrushed’ edge, and really I was going to just use it as it was. Right up until a bird came along and shit right in the middle of the table. That’s when I grabbed the palm sander and sanded everything off, giving the melamine a good scuff in the process.

Better the second time around?

Outlining Flowers

Once the base color was dry, I started painting my big billowy flowers again. I’ve doodled flowers like anybody else, but I found it surprisingly hard to make really big flowers. For each one I painted an outline first.

Filling In

Then I used a larger brush to fill them in. The paint I used really showed the brush strokes. Rather than stress about it, I incorporated the texture.

Flower Texture Detail

After the first layer was fully dry, I added centers to the flowers.

Stippling centers

I sort of stippled them for the texture it added to the paint.

Outlining White Daisy Petals

I added some white daisies to lighten up the dark blue flowers.

Daisies Finished

I left it to dry some more.

Stippling Centers of Daisies

I stippled the centers of these too, just with a smaller brush. Once it was completely dry, I took it outside to seal it. I sent a quick prayer to the spray paint gods before starting and then gave it a good coat. Everything was fine this time. I think the first event was just from forgetting to scuff up the melamine before I painted it.


Floral End Table

So there it is, an end table for my deck made from an old melamine folding table. I think I’m going to have to decide which style direction the deck furnishings are going in soon though. Because the Tea Table and the End Table aren’t exactly coordinating or even complimentary styles or colors.

Upcycled Side Table Up Close (1)

So what do you think – are the daisies overkill?

If you enjoyed this post, don’t forget to share it with your friends! For more just like it follow me on Pinterest, Facebook and Twitter or sign up for regular updates by email.

If you have ever thought about starting a garden or craft blog of your own see how easy it is >>here<<.


Save

Save

Save

Save

Save

Save

Save

Upcycled TV Stand Into Tea Table

My current deck furniture situation is okay when it’s just me sitting out there, but there is a shortage of surfaces capable of holding a drink. A situation that gets awkward quickly when I sit out there with my friends. So Saturday I made a trip to Picker’s Pig Pen to see if I could find anything that would work. Well wait until you see how great this TV stand looks after I got done with it.

I found this great old rusty TV cart on Saturday and a melamine TV Tray
I found this great old rusty TV cart on Saturday and a melamine TV Tray. My oldest boy gave them his ‘that’s disgusting’ lip curl.

This is what I started with, an old TV cart that was probably from the 70’s. I always have a hard time picking the right decade, because we kept stuff forever in my family. It had the walnut colored fake wood grain mactac, and the shelves were masonite imitating walnut. But as rusty as it was, it was solid, more solid than any thing I’ve bought new lately.

So I grabbed a bucket of hot water and Mr. Clean and scoured away as much of the rust as I could. Then I spray-painted the metal – fake wood-grain stickers and all – with antique gold spray paint. I am pretty hit and miss when it comes to my spray painting skills, but this time I nailed it. Honestly I kept staring at that frame all night.

But I still had to do something about the ‘walnut’ shelves. One was too warped to use, but I spray-painted the other one in a color to match my plastic Adirondack chairs – Rustoleum ‘Aqua’.

It did not look good with the gold-colored frame at all!

I had seen an article where someone decoupaged a table top and it looked awesome. So I dug through my fabric stash, and tried Mod Podge for the first time in my life. Because it was my first time using it, there are no step by step pictures for this one. I had a hard time just keeping up with how quickly the Mod Podge was drying in the heat, but the link above will take you to some pretty clear instructions. I sprayed it with a Matte finish sealer once it was dry so we will see how well it holds up to the weather.

Check out my new Tea Table!

Upcycled TV Cart

There’s plenty of room for a tray of tea things now, even with my plants on there!

Upcycled TV Stand, Bottom Shelf

A bottom shelf for tucking away anything I’ve piled beside my chair when company comes.

Upcycled TV Stand Front

I really need to decide if I’m going to keep the mirror frame on the deck. It looked fabulous when it still had chippy white paint on it, but all the chippy paint has chipped away to nothing.

Upcycled TV Stand, old fake wood stickers

You can still see the fake wood grain if you look closely.

Upcycled TV Stand

I just love this happy bright apple-green fabric.

The melamine TV tray from the 90’s in the first picture is coming up this week, and trust me it was a DIY that started out so flipping awesome until everything, and I mean everything including random bird poop, started to go wrong.

If you enjoyed this post, don’t forget to share it with your friends! For more just like it follow me on Pinterest, Facebook and Twitter or sign up for regular updates by email.

If you have ever thought about starting a garden or craft blog of your own see how easy it is >>here<<.


Save

Save

Save

Save

Save

Save

Save

Save

Save

Save