Atomic Style Planters for Fellow MCM Geeks

For the MCM geeks - Atomic Style Planters!

I’m just going to say it – I’m a complete geek for all things MCM, especially the Atomic style patterns of the day. Fortunately for me, so are Joe and Angie of Ambient Wares and Joe created two amazing patterns you can download for free >here<!

I have so many ideas for these patterns, but the first thing I did with them was make some darling planters for my growing collection of succulents.

Clay pots with an amazing Atomic graphic

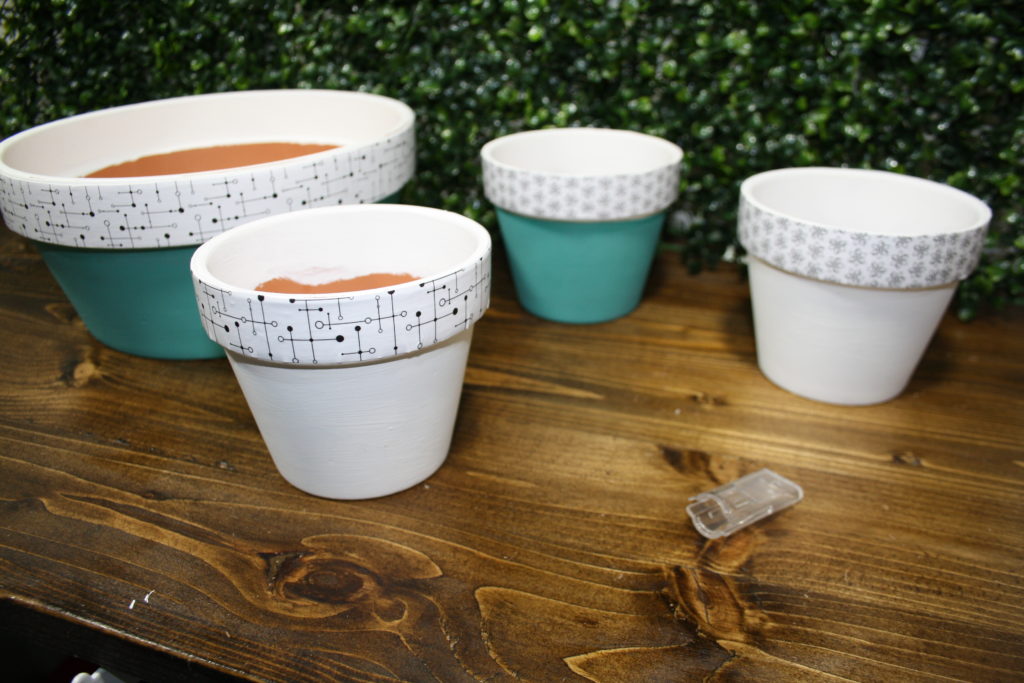
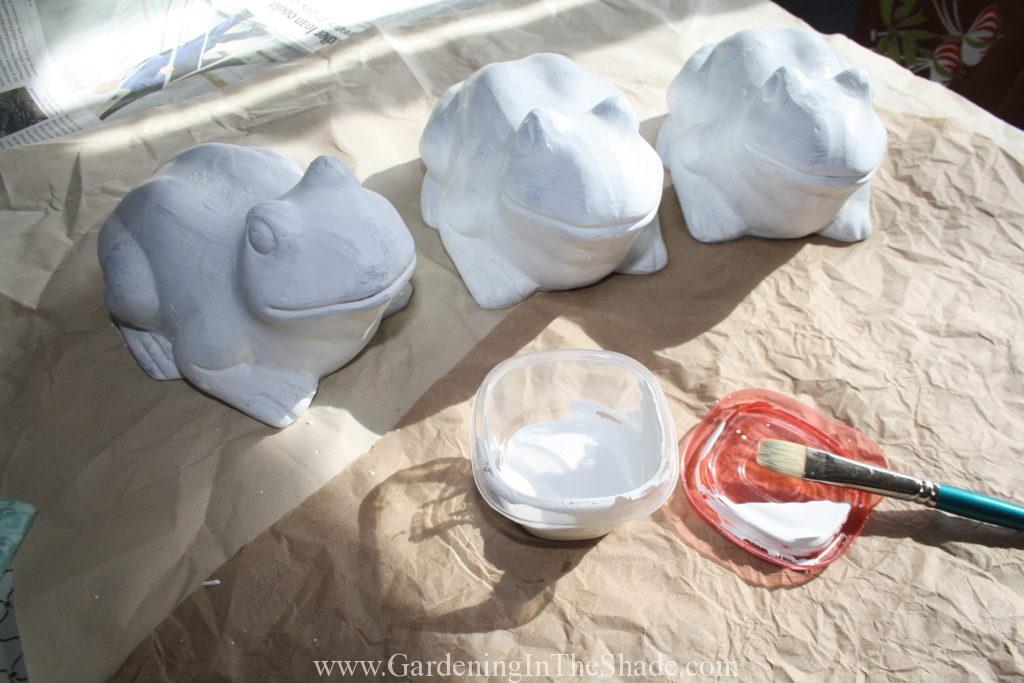
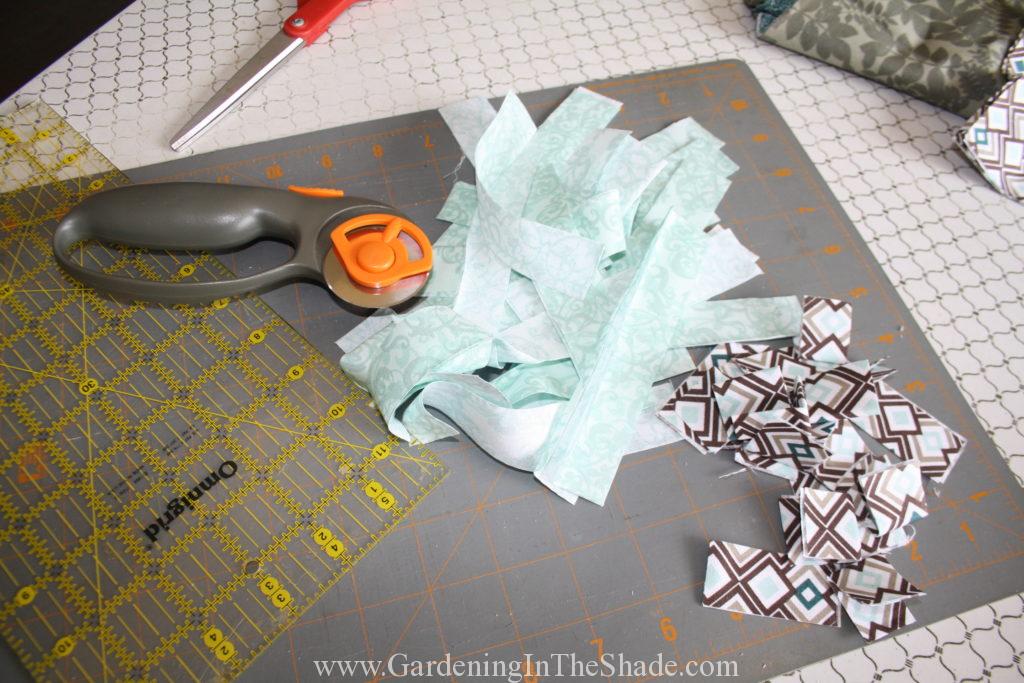
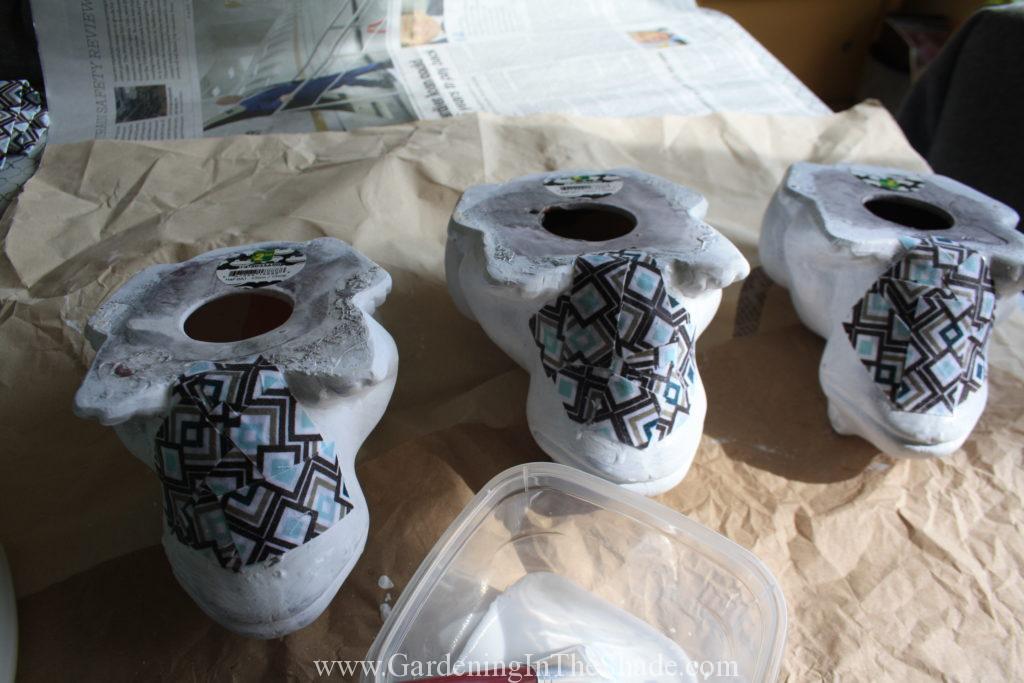
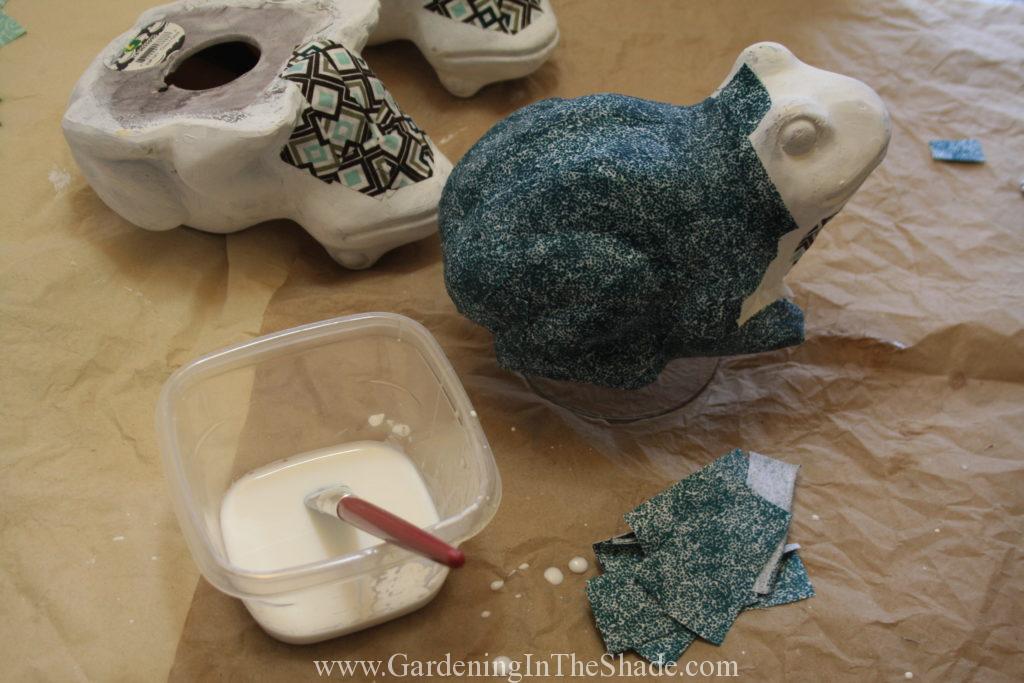
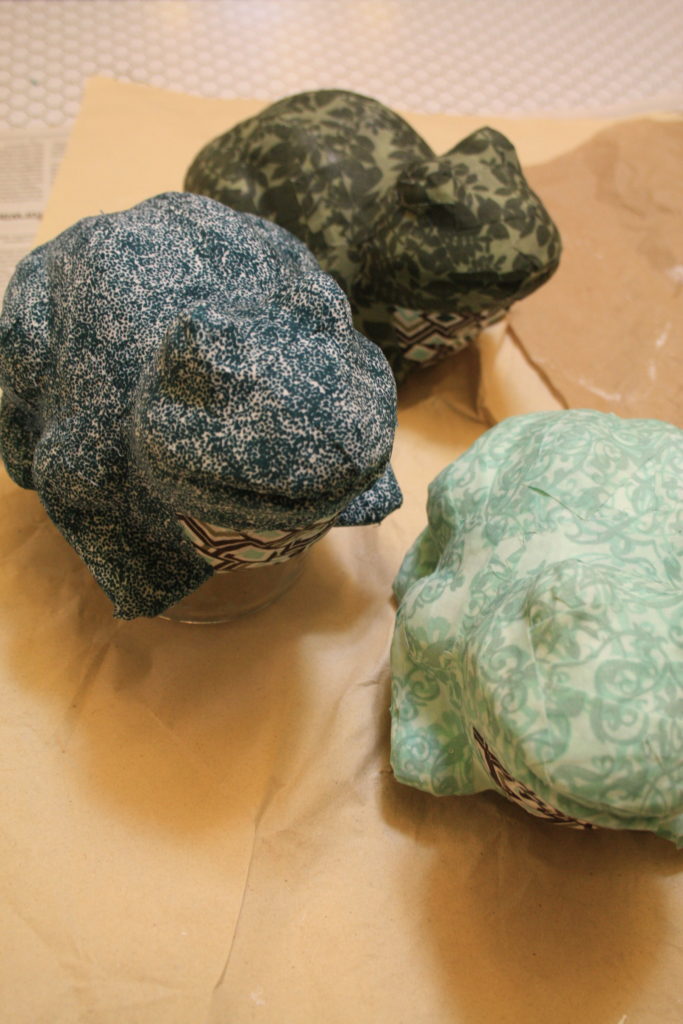
Initially, I painted two pots white and another two turquoise. I decoupaged Joe’s pattern to the rims of my pots. Unfortunately, when I sprayed them with sealer, the color of the clay bled through the white paint, making it appear dirty next to the bright white patterned rims. So I masked off the decorative rim and hit them all with the spray paint – Rustoleum Chalked in Serenity Blue – which turned out to be a perfect MCM color.

Planting a Dish Garden with Succulents

Choose a pleasing arrangement for your plants

Once everything was dry and sealed time for the fun! The thriller, filler, spiller rule applies to dish gardens as well as outdoor planters. I created a pleasing arrangement, then I used my favorite planting trick.

Place empty pots in planter as space holders

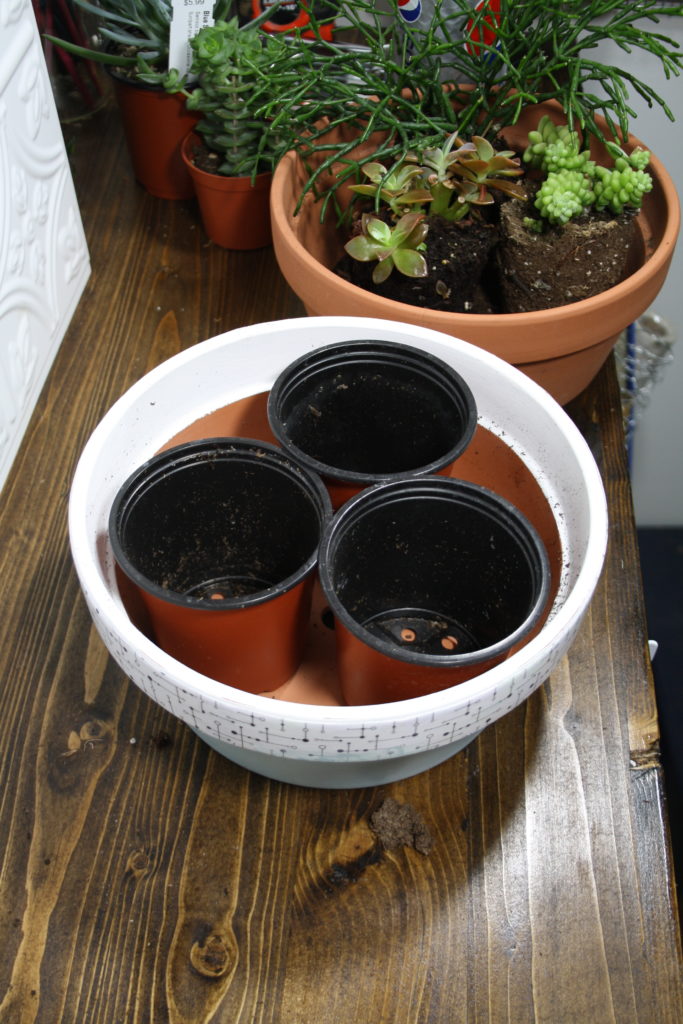
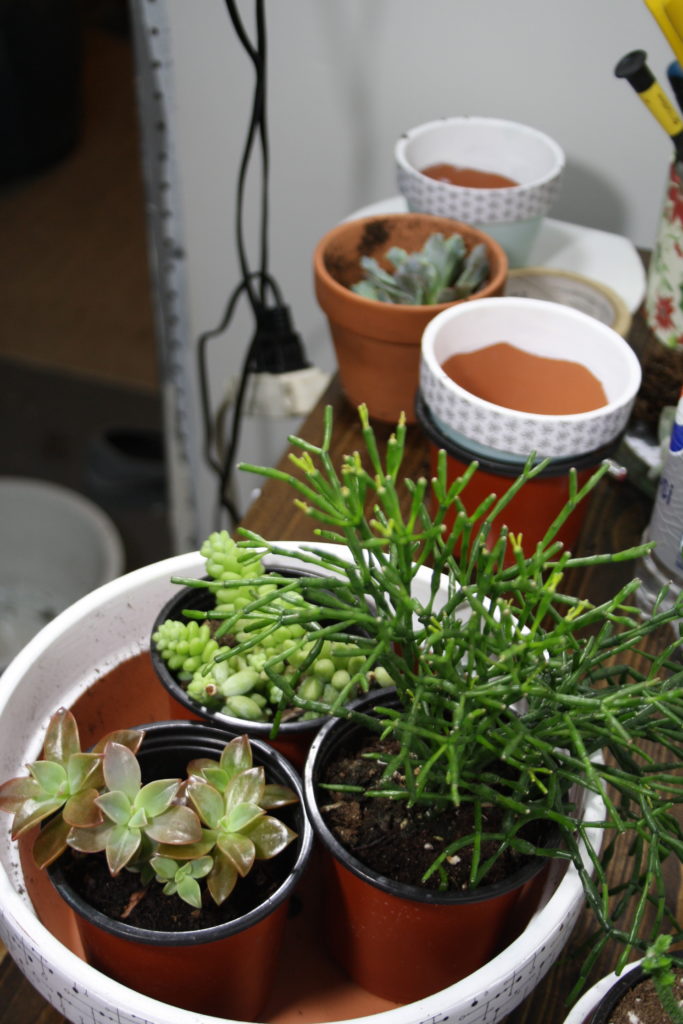
Gently remove the plants from their pots and then place the empty pots as space holders.

add soile and tamp down

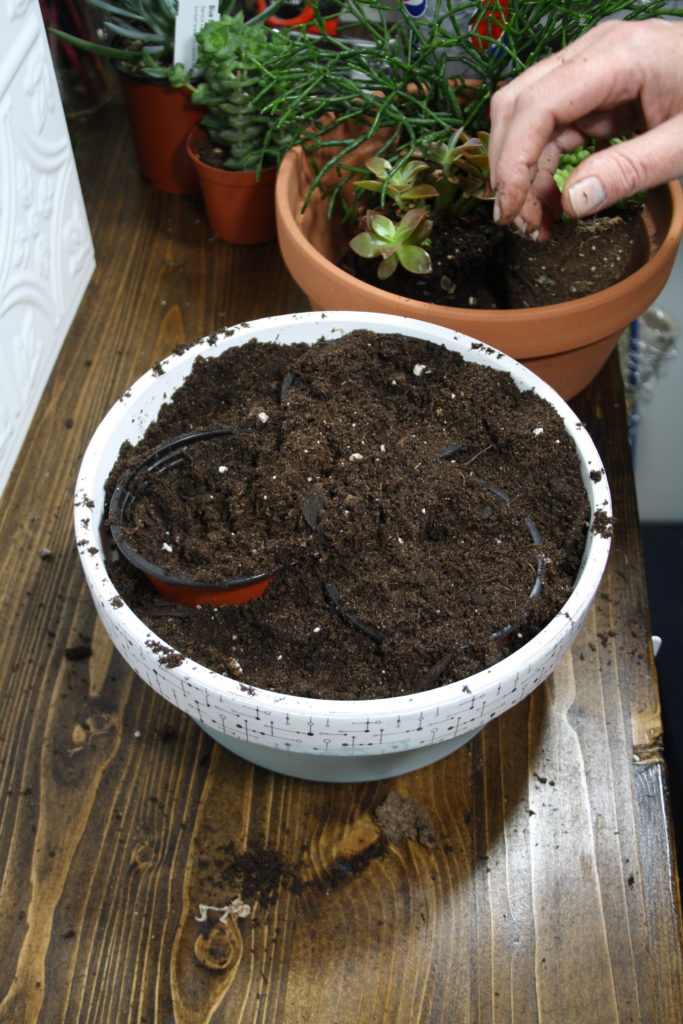
Add soil and tamp in place around the empty pots.

Remove the pot leaving a planting hole

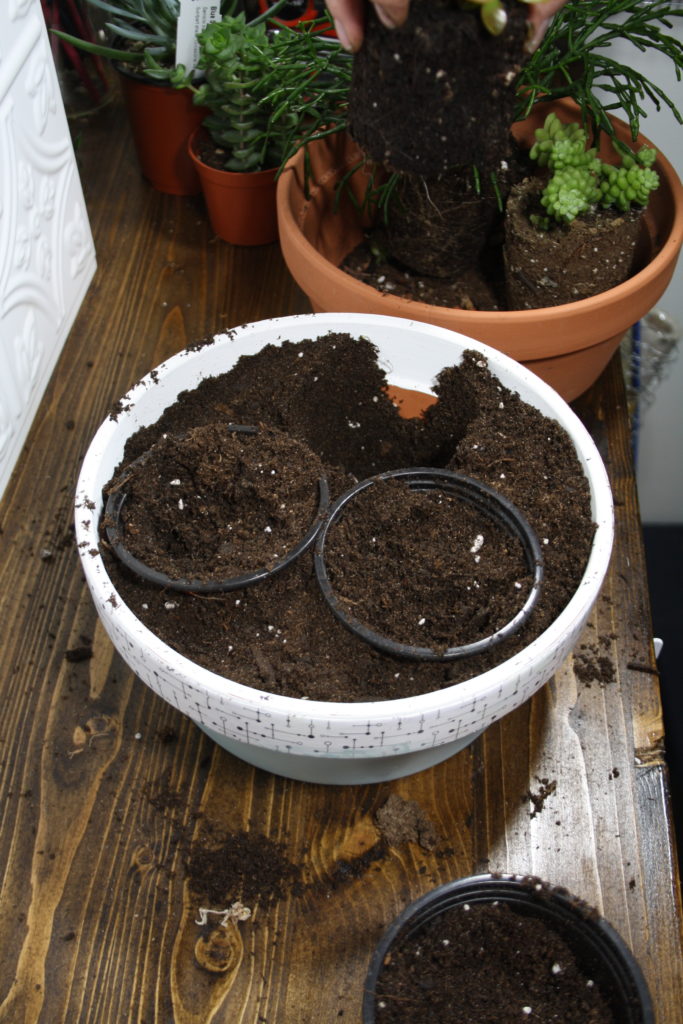
Take out one of the pots and there’s your planting space.

pop a plant in

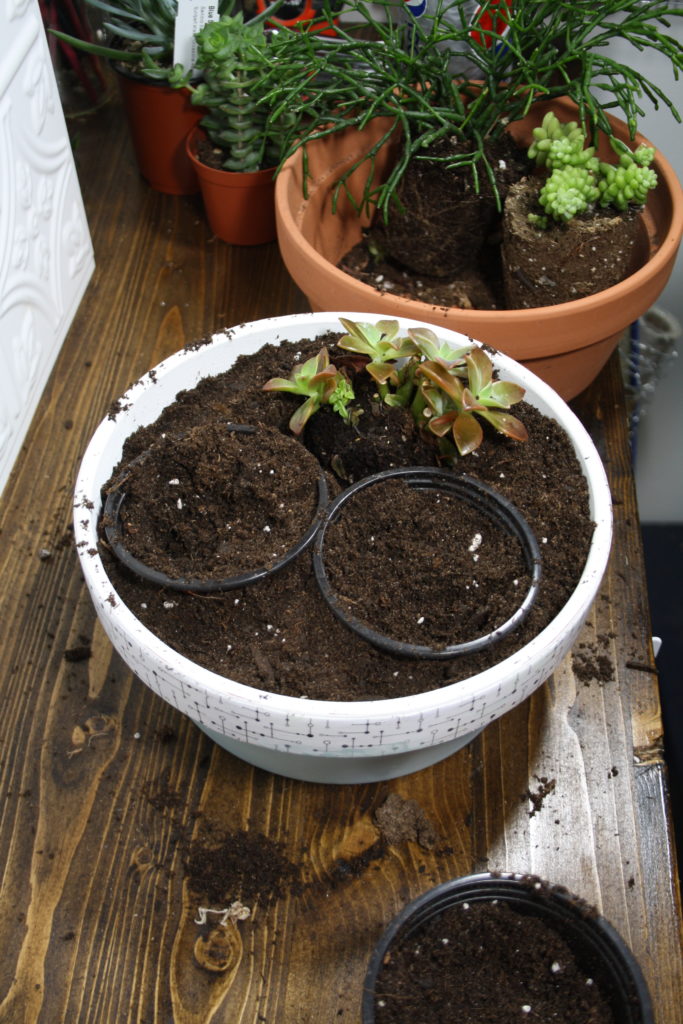
Pop a plant in and move to the next ‘space’.

Continue until it's all planted

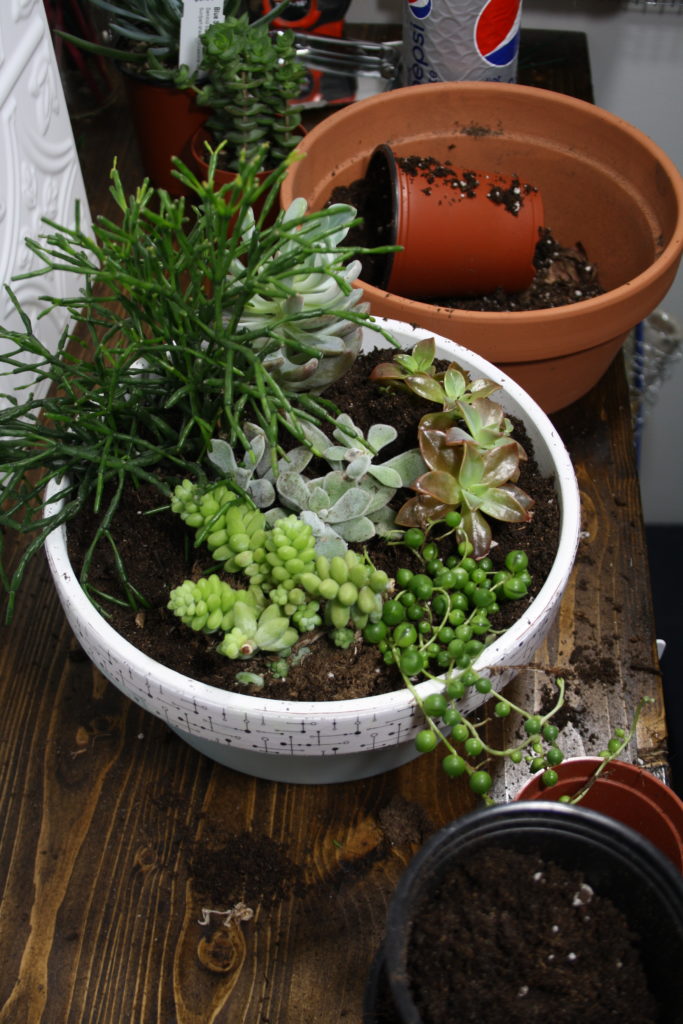
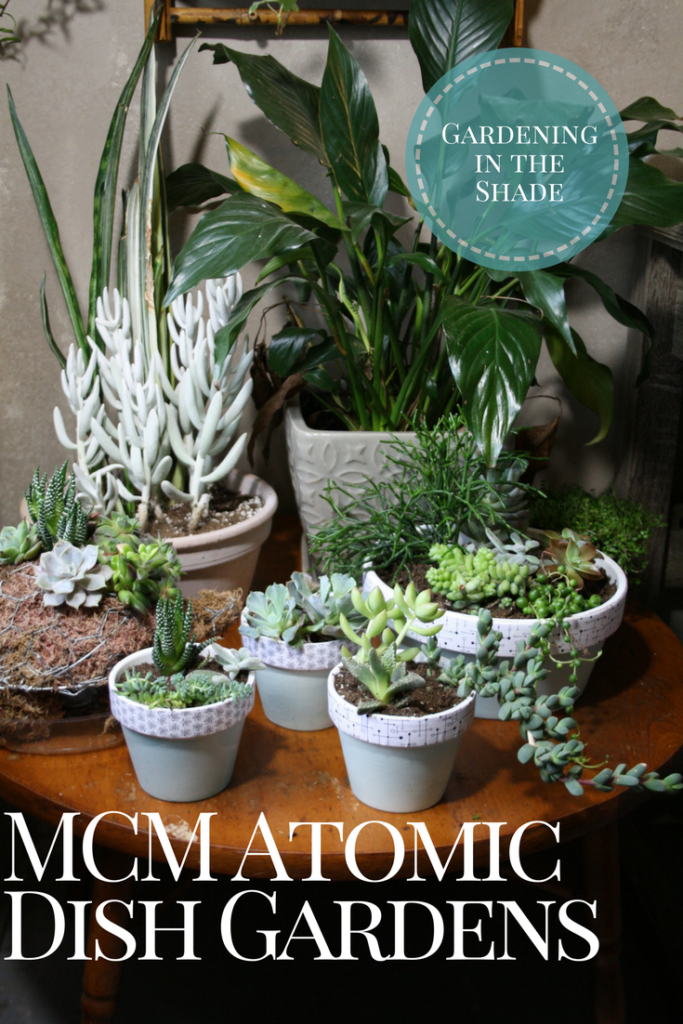
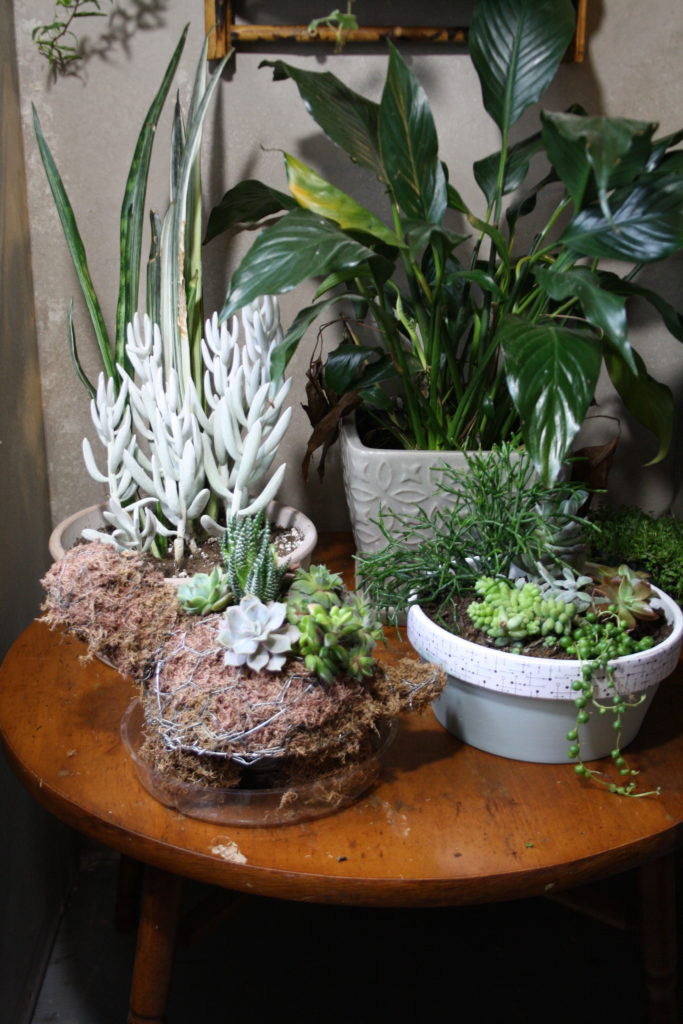
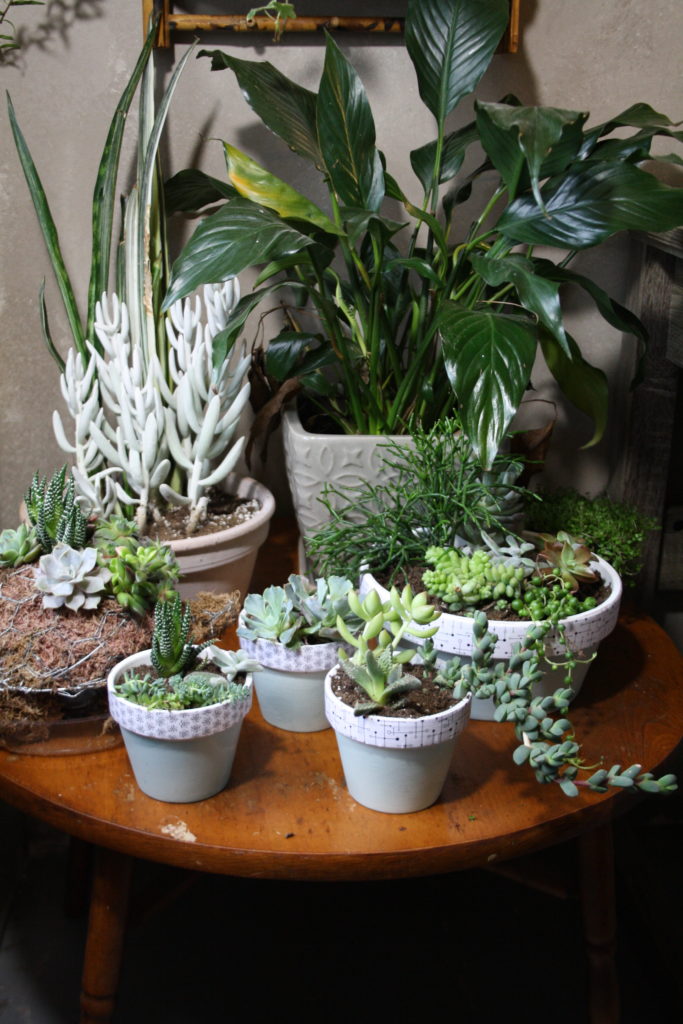
Here you can see the finished arrangement with a few more plants added in.

Small planter

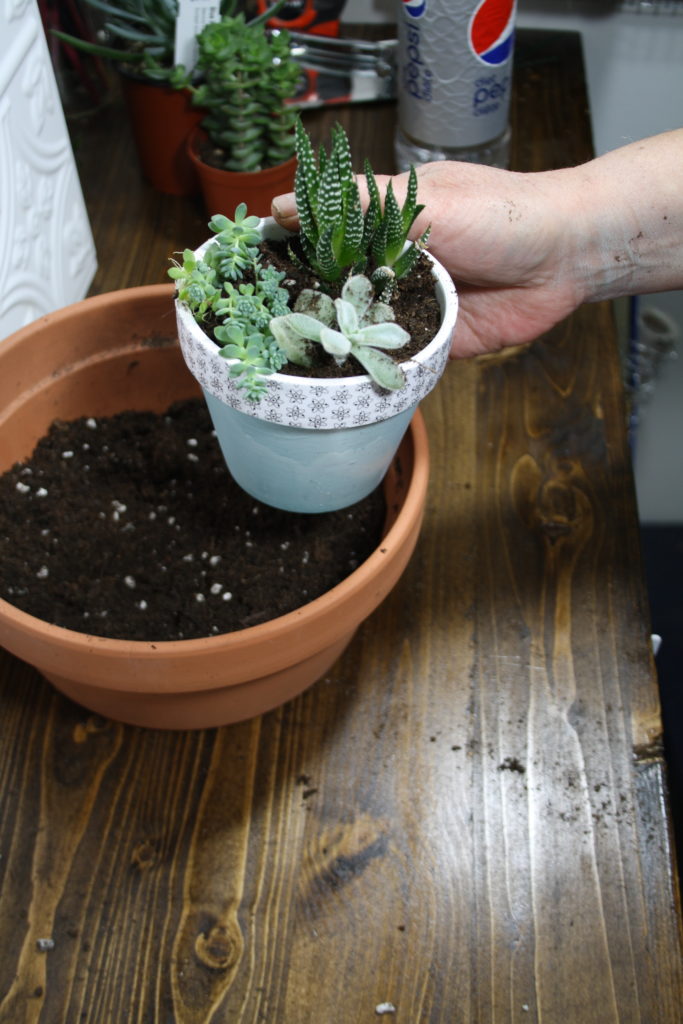
One of the smaller pots, still using the formula of thriller, filler, spiller. I love the way this little pot came together with the delicate blue trailer, the fuzzy leaves of the filler and the spiky dark green height behind.

Another small planter

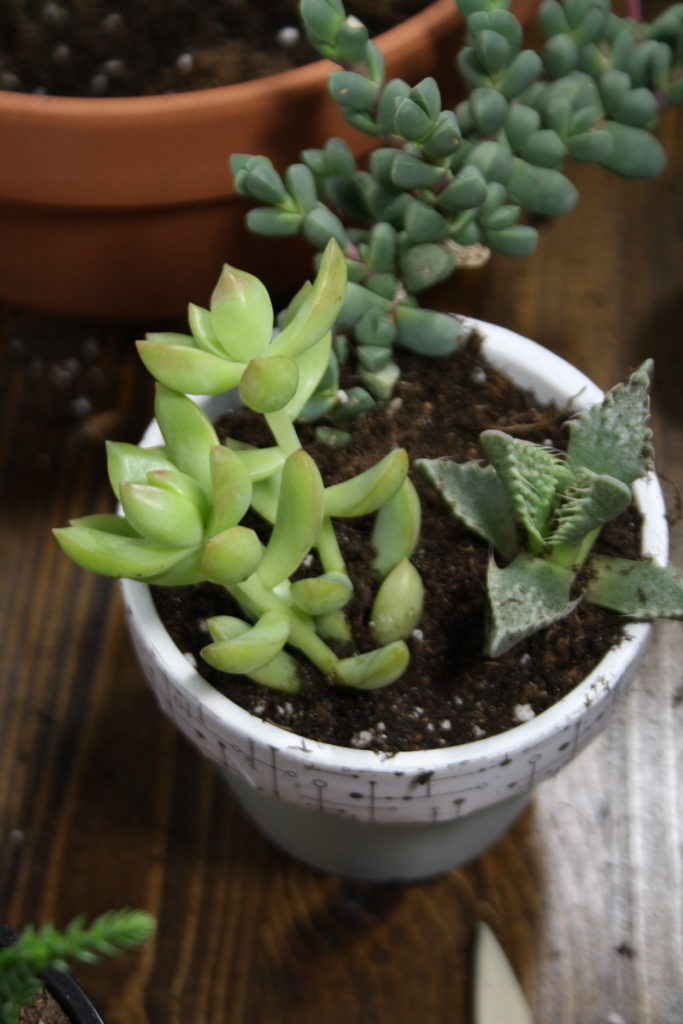
Here is another small pot. Check out Jaws in there!

Some of my collection

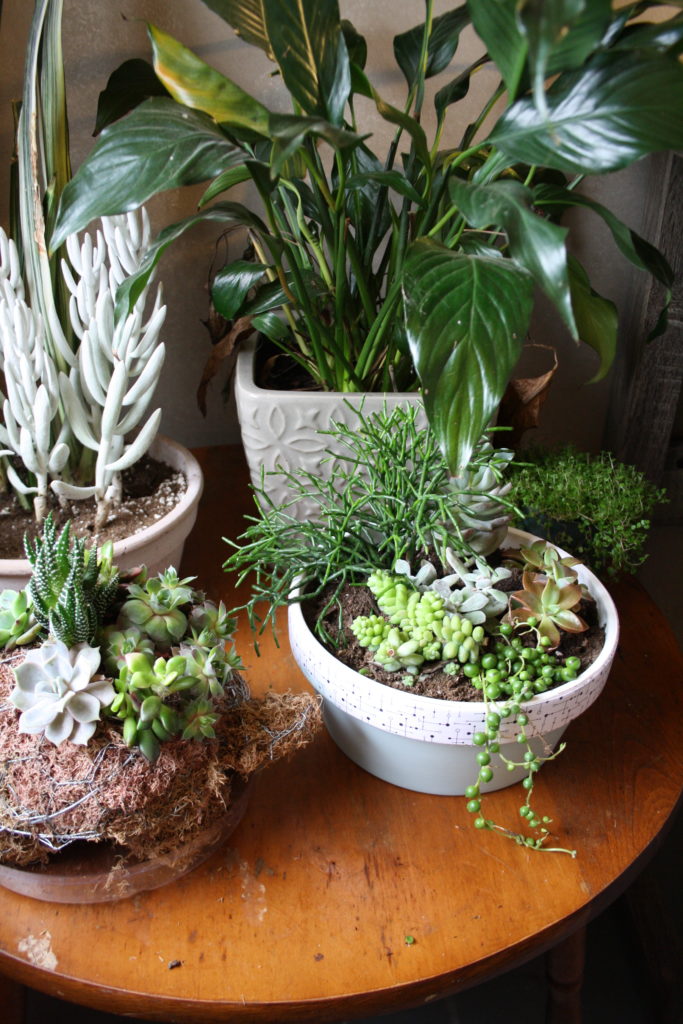
This little table used to be my play table as a kid. Now it sits beside my desk under a window.

the smaller pots in my wicker shelf

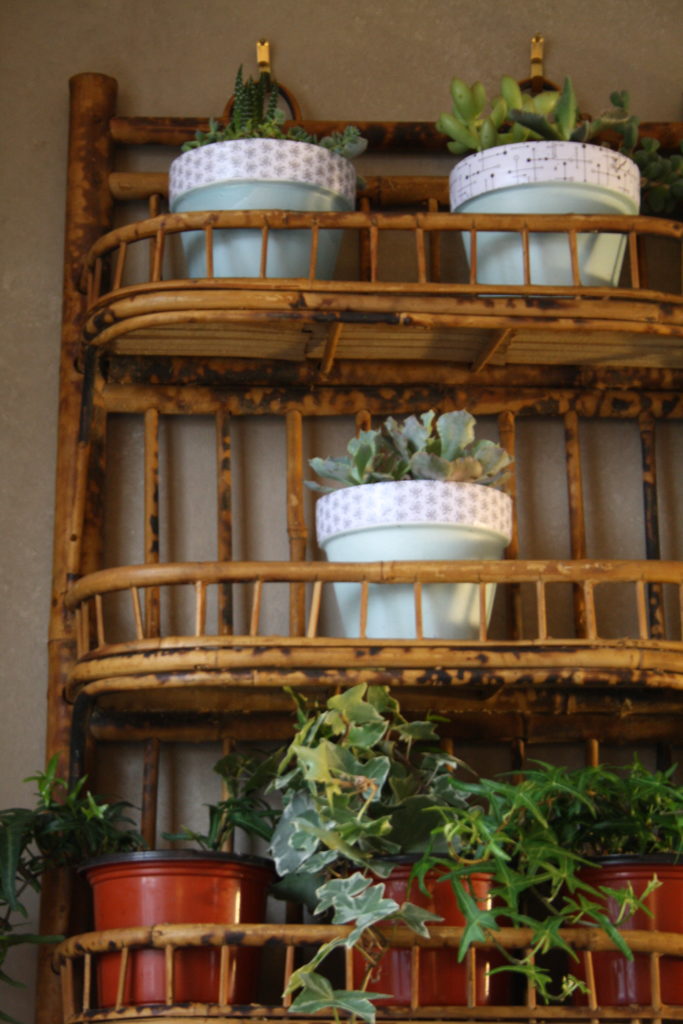
This little wicker thrift store shelf hangs above.

with the mini turtle

It’s also home to my mini turtle topiary.

All together now

these little pots make me happy

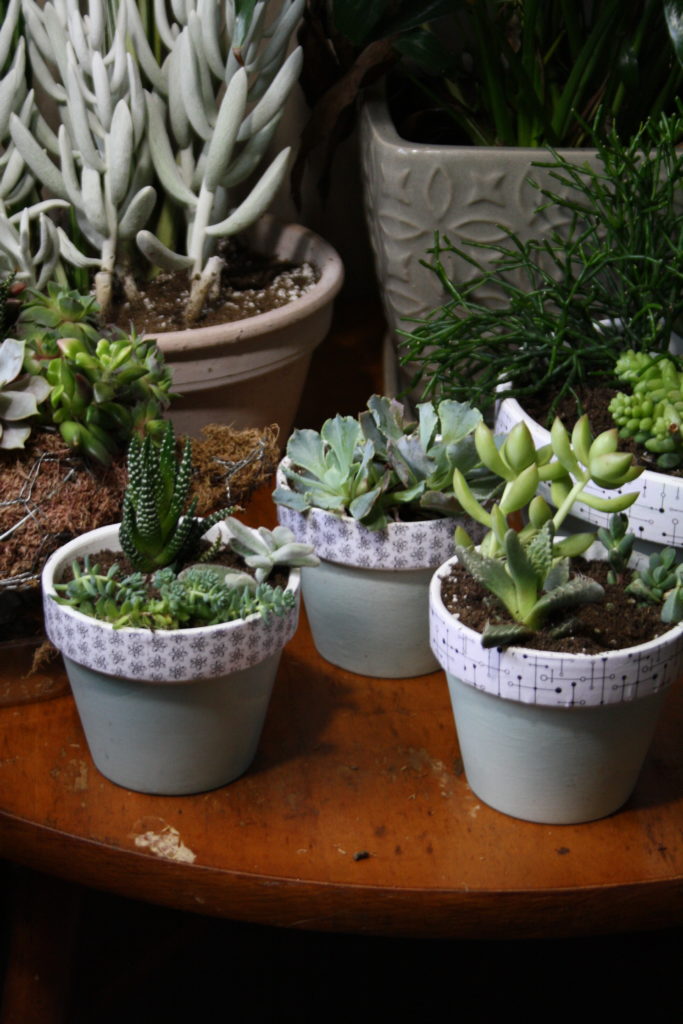
These little pots with their ‘Atomic’ patterned rims make me happy.

If you enjoyed this post, don’t forget to share it with your friends! For more just like it follow me on Pinterest, Facebook and Twitter or sign up for regular updates by email.

If you have ever thought about starting a garden or craft blog of your own see how easy it is >>here<<.

Save

Save

Save

Finally, Creative Space for Me!

Finding creative space in a tiny house is hard! I transformed my closet into a functional craft space just for me.

I’ve been desperately needing a creative space for myself, but with 3 adult sized people in less than 1,000 square feet where to find it?

In my closet!

Walk in closets are nice, unless you’re crying for space to fit everyone in a tiny house. So Friday, I pulled everything out of my closet.

Here’s the left side before.

The middle before. FYI that stack of vinyl floor tiles is the worst flooring ever.

Closet right side – before. I painted it white 18 years ago and hadn’t touched it since. Gross.

Believe me or not, but this closet was a bathroom. Tub, toilet and sink, it was the only bathroom in the house. You could rest your head on the sink while sitting on the toilet, which overflowed if you tried to flush while the washing machine was draining. Fun times!

I took everything off the walls, all the shelving and the closet rods. Then I patched holes and painted it all white.

Because there is a bedroom on the other side of the right hand wall, I used that wall for hanging clothing. The person who lives in that bedroom is a very light sleeper.

It’s a double rod but I really don’t have a lot of clothing. I used a thrift store basket for all of my flip-flops and sandals. The sky-scraper heels to the donation bin.

So the right side is all closety business and does its job. Big boring yawn! The fun stuff is on the other side.

Creativity to the left!

Ta-da! Pure creative space! No more hunting all over the place to find my supplies. No more taking over the kitchen table for crafts and having to clean up before finishing.

I am so happy I could sing and dance! But not really, because I don’t know how to do either.

Nearly all my crafting supplies fit on these two shelves. I can’t believe how much the tidier the rest of the house is now that all of this is gathered up in one place!

The top shelf is all about sewing and fabric.

The bottom shelf holds my crafting stuff.

And some topiary supplies!

Tucked into the corner, photo props and my rolls of chicken wire. I almost threw out the little accordion file until I realized it was perfect for patterns.

A thrift store lazy-susan is going to be so handy when I’m making topiaries! And it’s bright, thanks to the two LED floodlights on the shelf above.

Brushes, sculpting tools, and Sharpies all have a home.

Acrylic craft paint and some hand tools for cutting and shaping wire.

The work bench is a 16″ wide pine shelf that I stained at the same time as I was working on my ‘pegboard’. I love that pegboard! I can see everything I use the most often right there. You can see how I made it here – DIY Pegboard for Craft Room Storage. Other than the materials for the pegboard and the lights, I used supplies I already had on hand. I shopped my house for bins. So all told I spent $150-$200. Not too shabby.

So what do you think? Would you sacrifice closet space to gain creative space?

Linking:

Save

Save

DIY Pegboard for Craft Room Storage

Make this unique industrial style pegboard!

Pegboards are amazing for small spaces but I’ve just never liked the look of them. It’s all those holes, they make me think of dust and wonder if there spiders hiding in them. So when I was looking for a different storage solution for my craft supplies – like that damn rotary cutter I can never find – I had to get creative.

DIY Pegboard Materials & Equipment:

  • Wood for backing. I used two 12″ x 4′ pine shelves but you could easily use reclaimed wood instead.
  • Hardware cloth with 1/2″ x 1/2″ openings. Do not buy the prepackaged rolls. They are rolled too tightly and impossible to work with. Have it cut to length at the Hardware Store.
  • Washers & bolts for spacers.
  • Screws long enough to go through spacers into wood.
  • Clamp or two.
  • Long straight edge.
  • Drill.

Making the Pegboard:

I stained and sealed both shelf boards before starting. I thought about using a tea stain for a rustic look, but decided I wanted a deeper color. Once dry, I used two mending straps in the back to join the two shelves. I could have used pieces of wood instead, but it was cold and windy outside and I didn’t want to drag my saw out of the shed.

Eye Bolt and Hook to hang Hardware Cloth Pegboard

I started by drilling pilot holes in the top edge of my wood backing and then screwing in the eye bolts. We won’t even discuss those extra holes for the hooks in my recently patched, freshly painted wall.

Clamp the mesh to your work surface at each end with the curl facing up.

I only had one clamp, so I used a case of pop to weight the other end to keep the mesh from curling back up.

Using your long straight edge, start folding the cloth. I did my long edges first, it helps to straighten the mesh. Work your way up and down the fold line, gradually folding it inwards.

When you’ve completed the fold, crimp it tightly with pliers.

Repeat for all four sides then flip it over so the curl faces down, otherwise your mesh will sit right on the backing and leave no space between the mesh and backing for hooks.

Fasten the mesh, top and bottom every 12″ or so. Mark your screw placement, but only drill one pilot hole at a time. The openings in the mesh won’t always be where you expect them.

My first time staining and sealing wood – can you tell?

For each screw, it’s washer, mesh, washer, nut or spacer, washer, and then finally into the wood. Leave some play until all the screws are in.

That’s it!

Mount it on the wall and start hanging up your tools and supplies.

I just bend pieces of wire into hooks but you could buy S-hooks also.

A word about cost:

Unless you are using salvaged wood as your backing, and maybe not even then, just buying a piece of pegboard is cheaper. With the two pine shelves for backing (2@$18.49 ea – $36.98), stain ($8.99), and sealer ($6.99), plus the roll of hardware cloth ($1.99/foot), screws and washers the final cost was $100 – $120.

If you enjoyed this post, don’t forget to share it with your friends! For more just like it follow me on Pinterest, Facebook and Twitter or sign up for regular updates by email.

If you have ever thought about starting a garden or craft blog of your own see how easy it is >>here<<.

Save

Save

Save

Save

Save

Save

Save

Save

Save

Save

Save

Save

Make a Pretty Dish Soap Dispenser

This dish soap dispenser was an easy little craft for a Sunday afternoon. I’ve never had it together enough to put my soap away when I’m done with it. Plus, my guys are ‘wash your hands in the kitchen sink with dish soap’ guys. Seriously, it drives me nuts! They act like it’s the only sink in the house!

Even for myself I’ve sometimes wished for a soap dispenser at the kitchen sink. Maybe something a little prettier than the dish detergent bottle too. I was talking about it the other night, and my youngest pointed out the empty body wash bottled kicking around in the bathroom.

It’s almost exactly the same size as the dish soap bottle.

So I grabbed another piece of fabric from my stash and cut it into squares (one of these days I’m going to get some left-handed pinking shears) and started decoupaging.

I started from the bottom, clipping the fabric to fit around the curves.

I used white glue mixed 1:1 with water, and just kept working my way up to the top of the bottle.

Dish Soap Dispenser

After masking off the threads for the lid, I gave it all three good coats of acrylic sealer. I also painted the pump gold.

No more Sunlight bottle on the counter!

If you enjoyed this post, don’t forget to share it with your friends! For more just like it, follow me on Pinterest, Facebook and Twitter or sign up for regular updates by email.

If you have ever thought about starting a garden or craft blog of your own see how easy it is >>here<<.


Save

Save

Dollar Store Critter Makeover!

I am so happy with the way these 3 little frogs from the dollar store came out. I wanted to try fabric mache but didn’t feel up to making a form and all of that, so I bought 3 clay frogs from the dollar store for $2.50 each.

The fabric is from one of those fat quarter bundles and the colors suitably froggy. As for the frogs? Well let’s just say mass production and the rustic aged look don’t go together.

Covered in these gross warty spots and indifferently aged and scuffed.

I sanded off the worst of their sins, and going by how easy it was I’m going to assume these guys aren’t weather proof.

They all got slathered in a coat of white paint so I wouldn’t have to worry about any show-through with the lighter fabrics.

While the paint was drying, I cut the fabric into strips. Pieces 1″ by 2″ worked well for me with the occasional smaller bits for around the eyes and toes.

I used one of the geometric prints as the throat – in hindsight I might have chosen differently. I just used 1 part white glue to 1 part water and a paintbrush to apply it.

The green speckled is may favorite of the three, but all of them turned out surprisingly well. I was expecting a wrestling match to get the fabric and glue to behave but it all went together easy peasy.

The olive one looks nice too, I’m still a bit iffy on the mint green one.

If I were doing it again, I would have just done the entire frog in the same fabric.

Patterned napkins would have worked too, but I already had the fabric. All they need now is a coat of spray sealer and done.

Materials needed for this project:

  • White glue mixed 1:1 with water
  • fabric or paper strips
  • a paint brush
  • dollar store critter in need of a makeover

Someday I would love to try this technique on one of those homely little plastic turtle planters, I bet it would look great. What do you think?

If you enjoyed this post, don’t forget to share it with your friends! For more just like it, follow me on Pinterest, Facebook and Twitter or sign up for regular updates by email.

If you have ever thought about starting a garden or craft blog of your own see how easy it is >>here<<.

Save

Save

Save

Save

Save

Save