Mini Hosta Kettle Planter

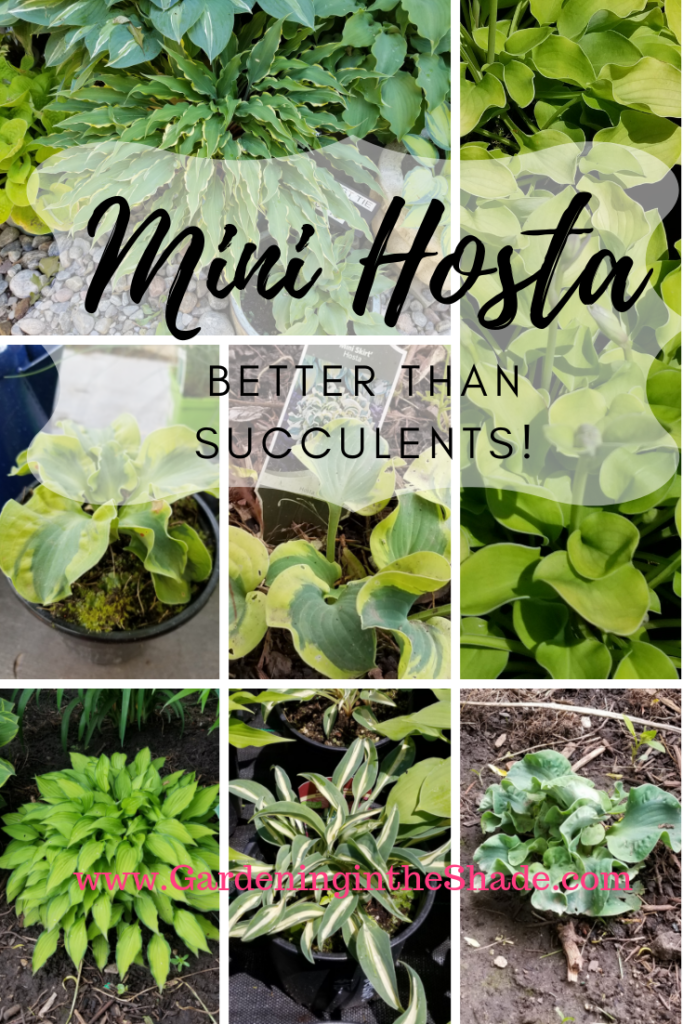
Sure succulents are cool, but have you tried Mini Hosta yet?

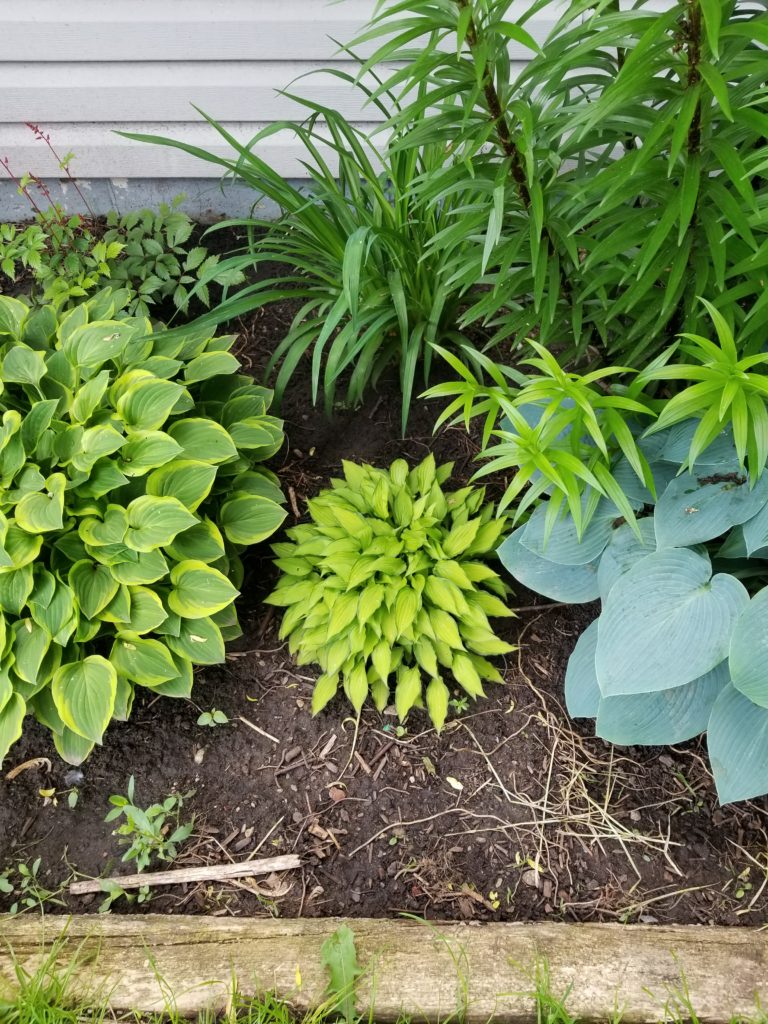
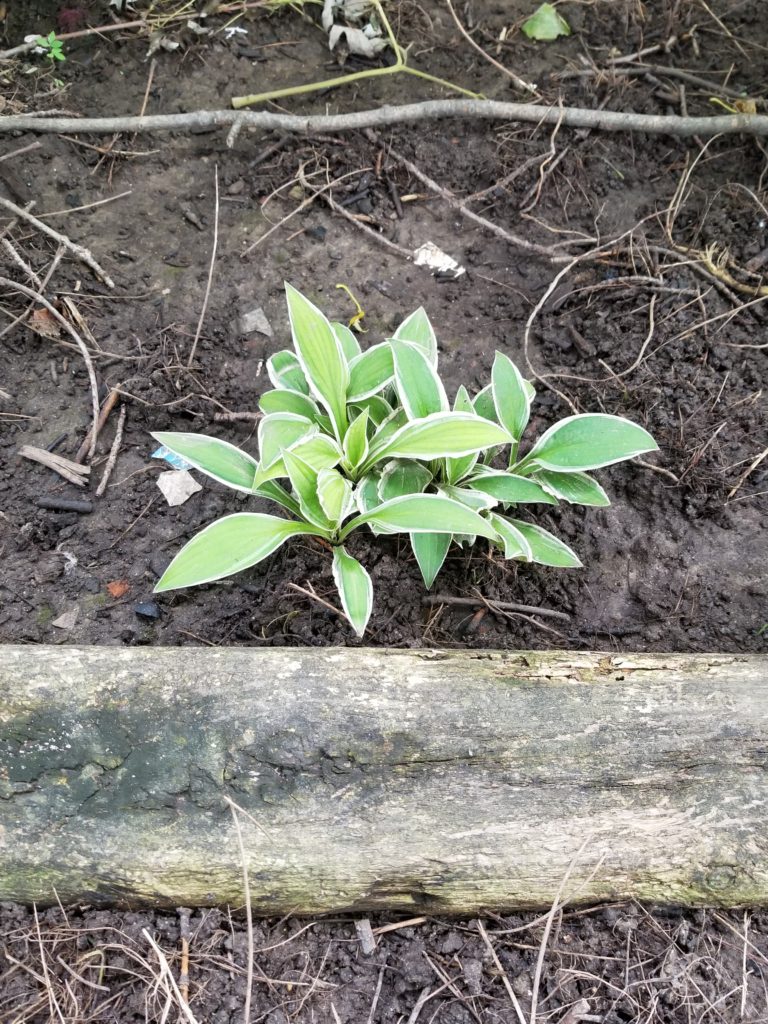
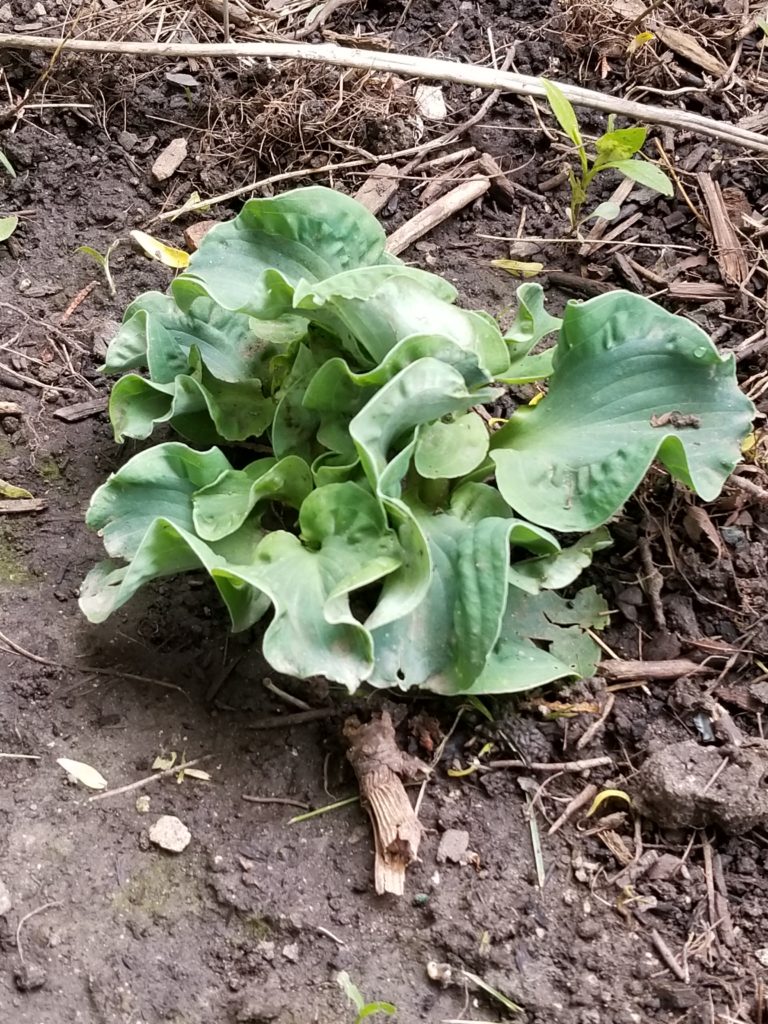
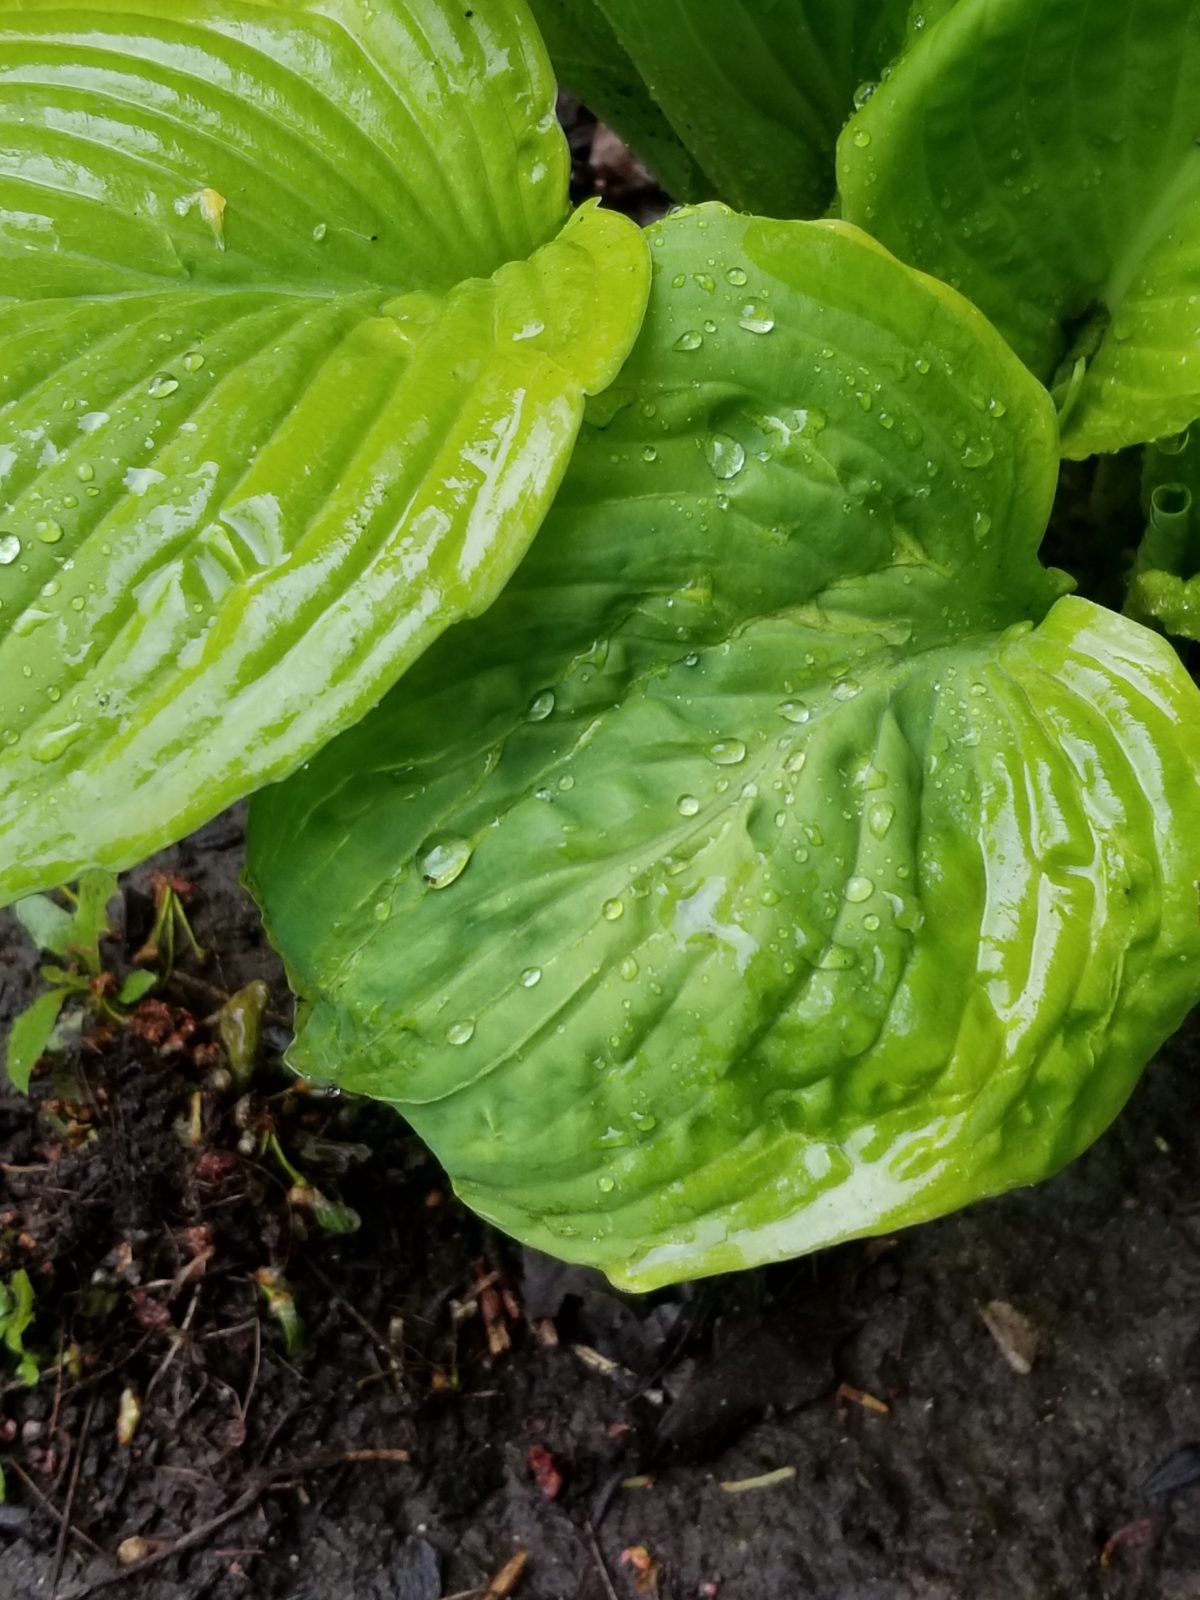
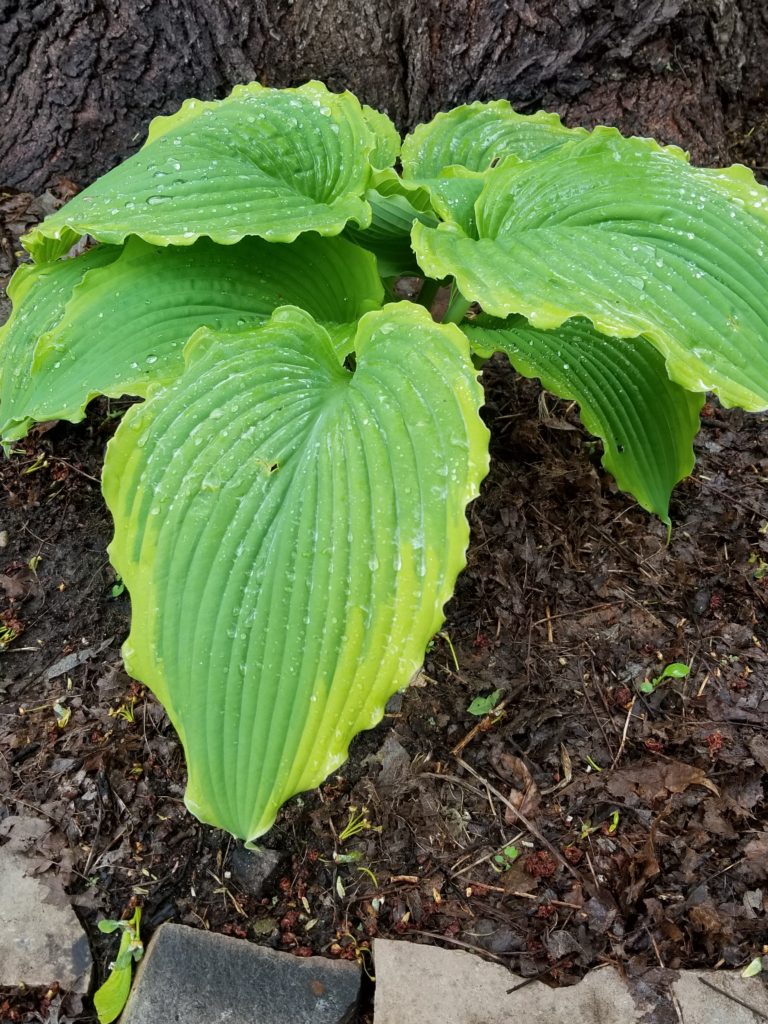
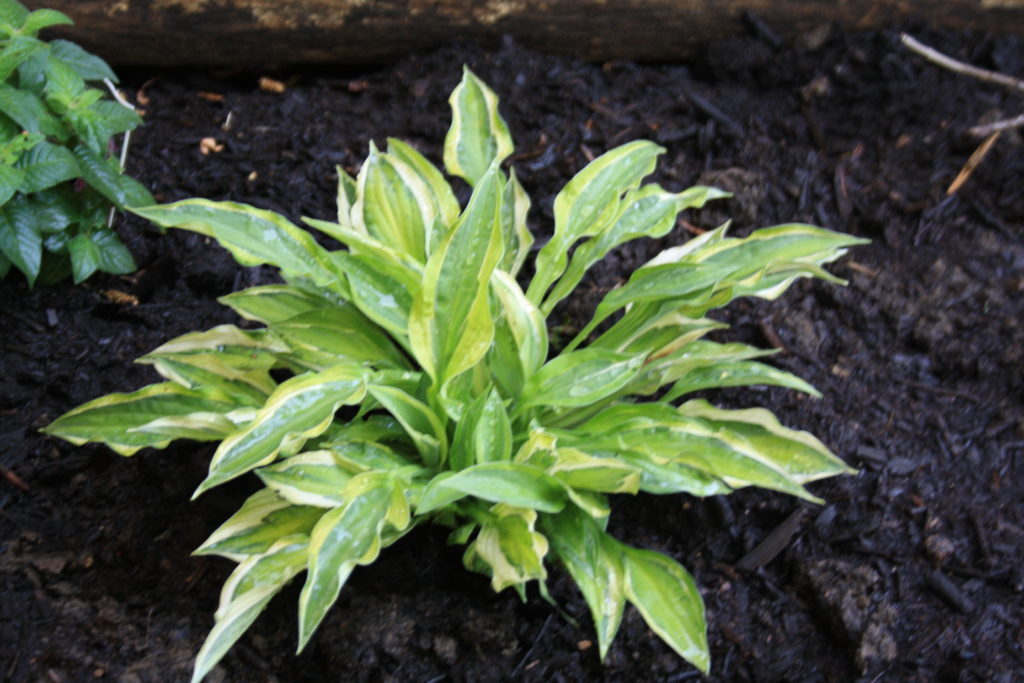
They come in blue, green, yellow, and all kinds of variegated combinations. Some are really tiny and some are just small, leaves might be long and narrow or short and round.

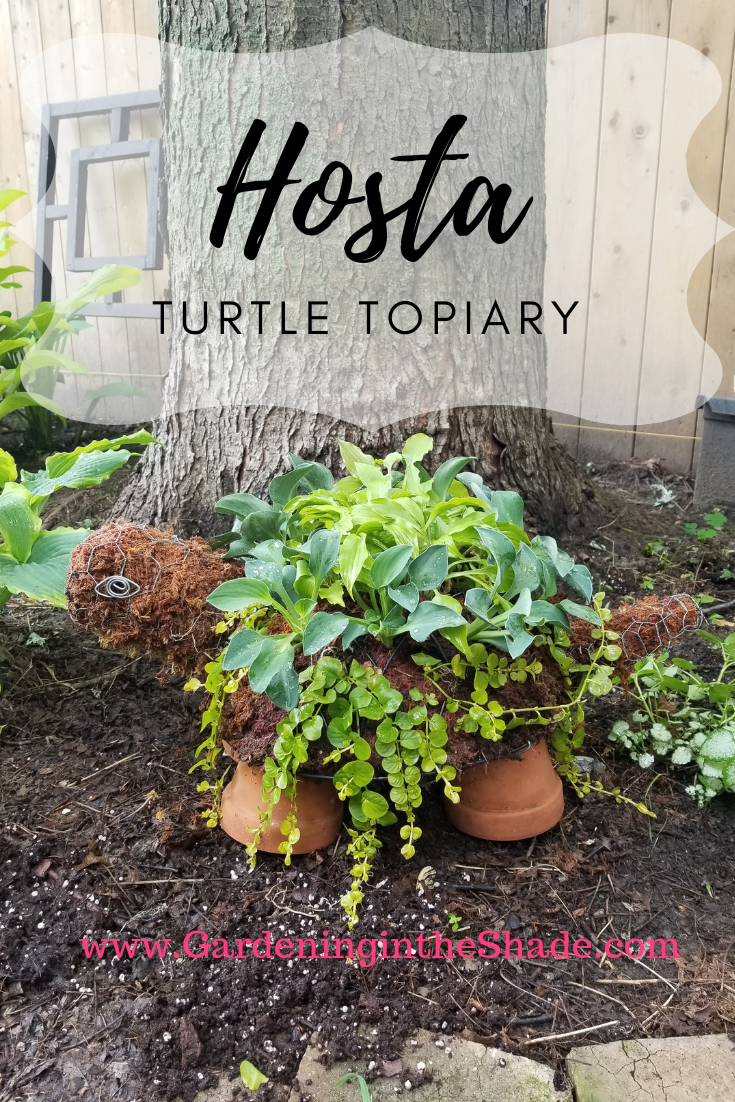
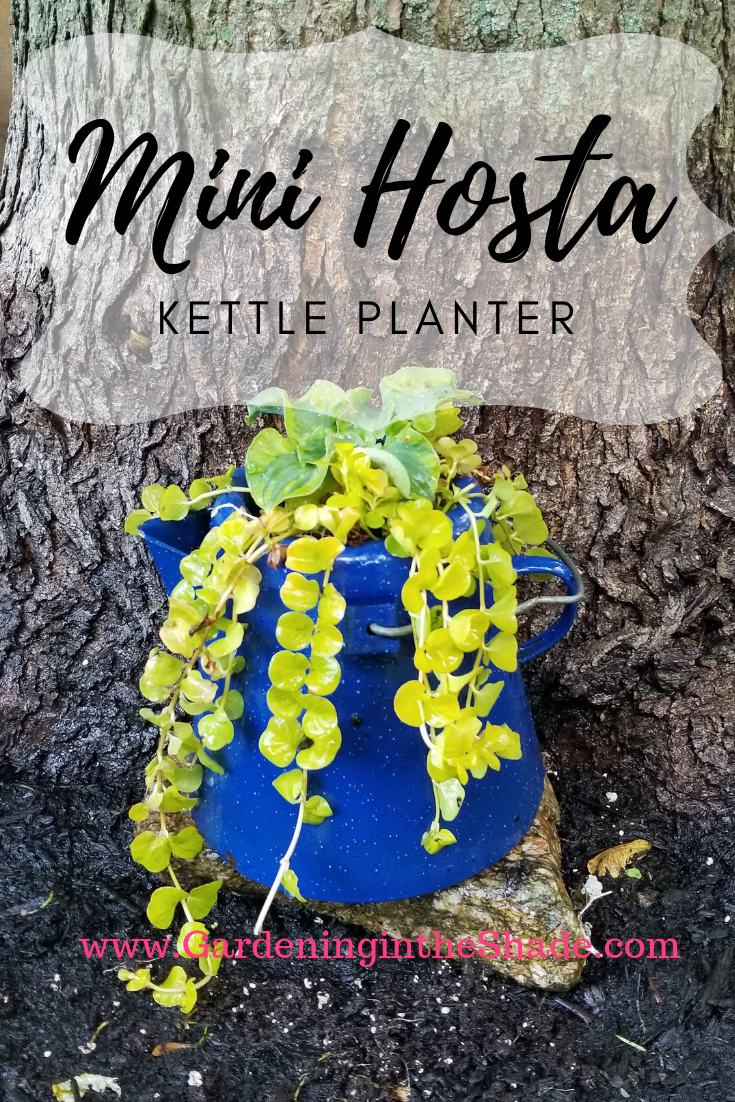
Miniature Hosta are just as collectible as succulents. Well really, all hosta are collectible, but miniatures have nearly as many adorable planting options as succulents. Check out my up-cycled enamel kettle planter!

Mini Hosta Planter

I found this blue enamel kettle at Value Village and decided it would be perfect for a small planter. Most of the time I prefer large planters, but for a miniature, this is a large planter.

Hosta are a perennial but they do very well in planters. Some people have hosta that are in the same planter for years, they just store it in an unheated building over the winter and bring them out when the pips are ready to emerge.

Benefits of Hosta in Pots

  • you can control the moisture more easily in a planter.
  • they’re portable, you can move them where you like without touching a shovel.
  • perfect for tenants who want a lovely garden but don’t want to leave behind their collection if they move.
  • if you worry about HVX, pots and planters are effective quarantine for new plants.

The Mini Hosta Kettle

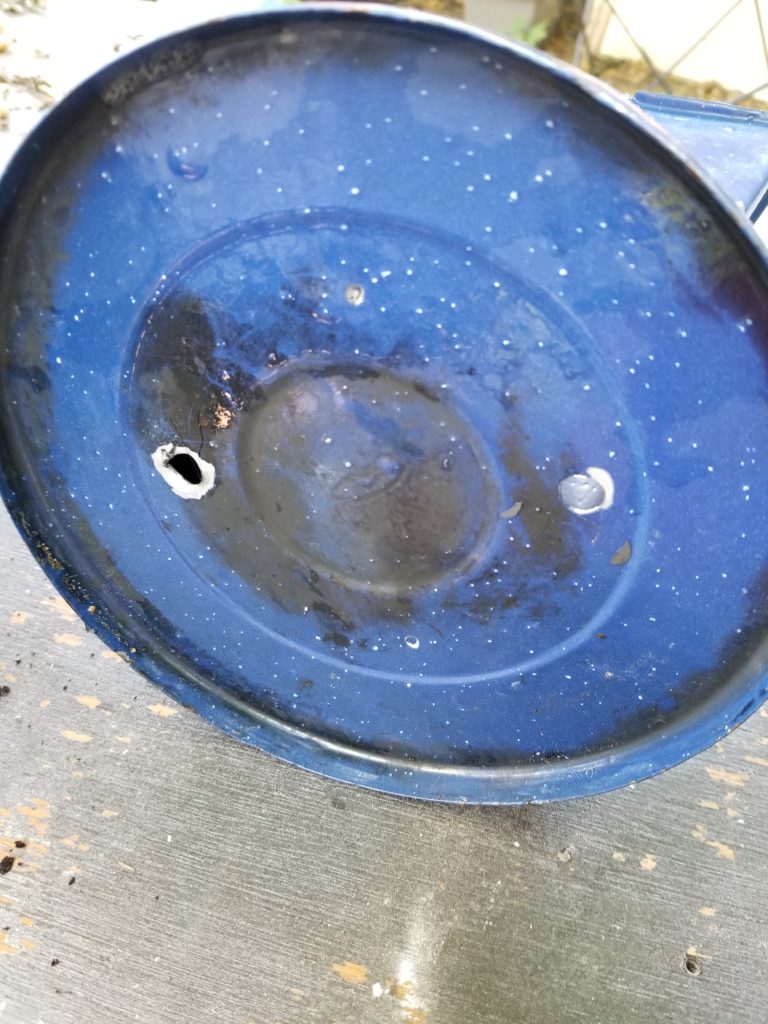
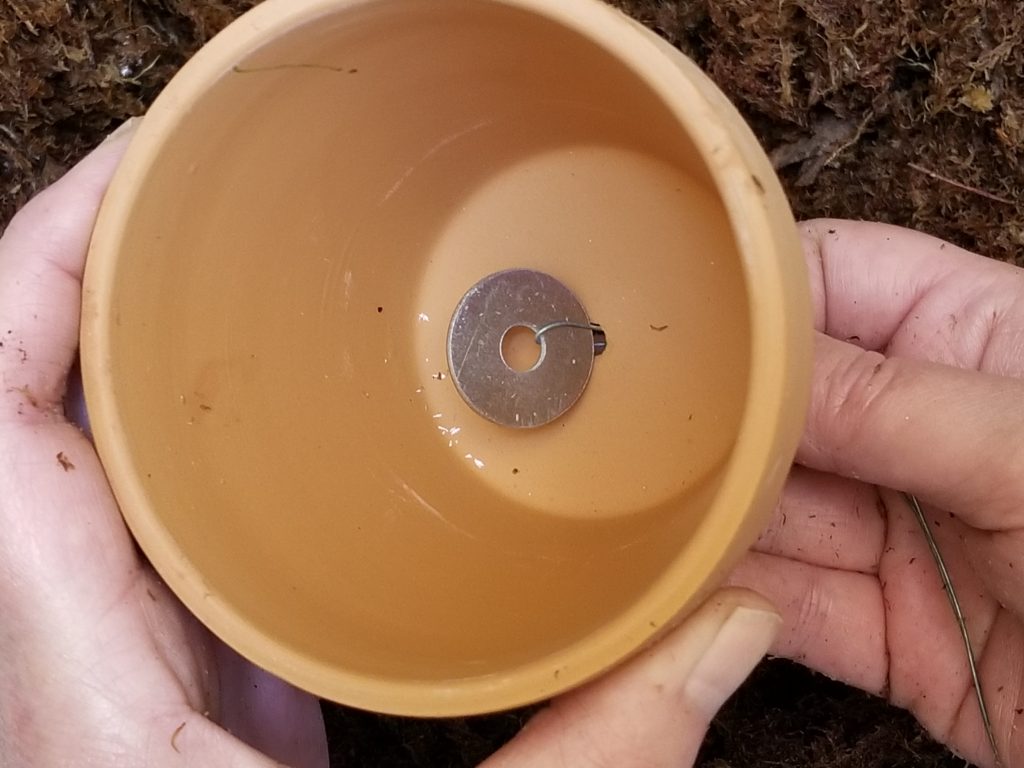
This kettle won’t be used to make tea ever again after I drilled a couple of drainage holes in the bottom.

Mini Hosta 'School Mouse'

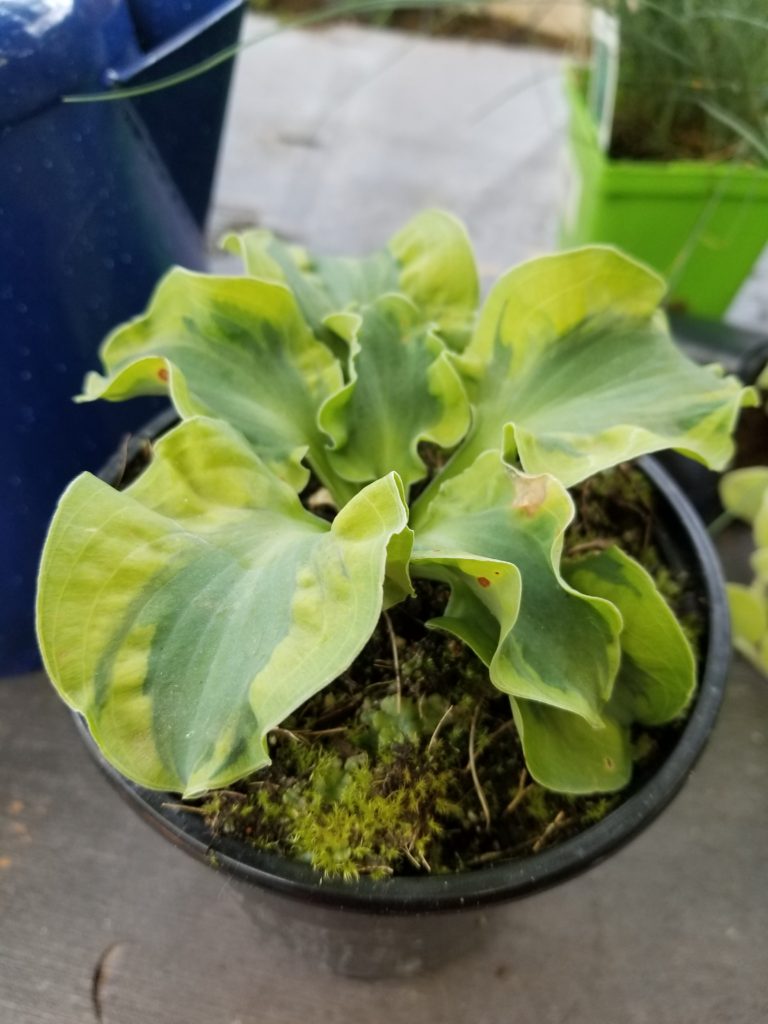
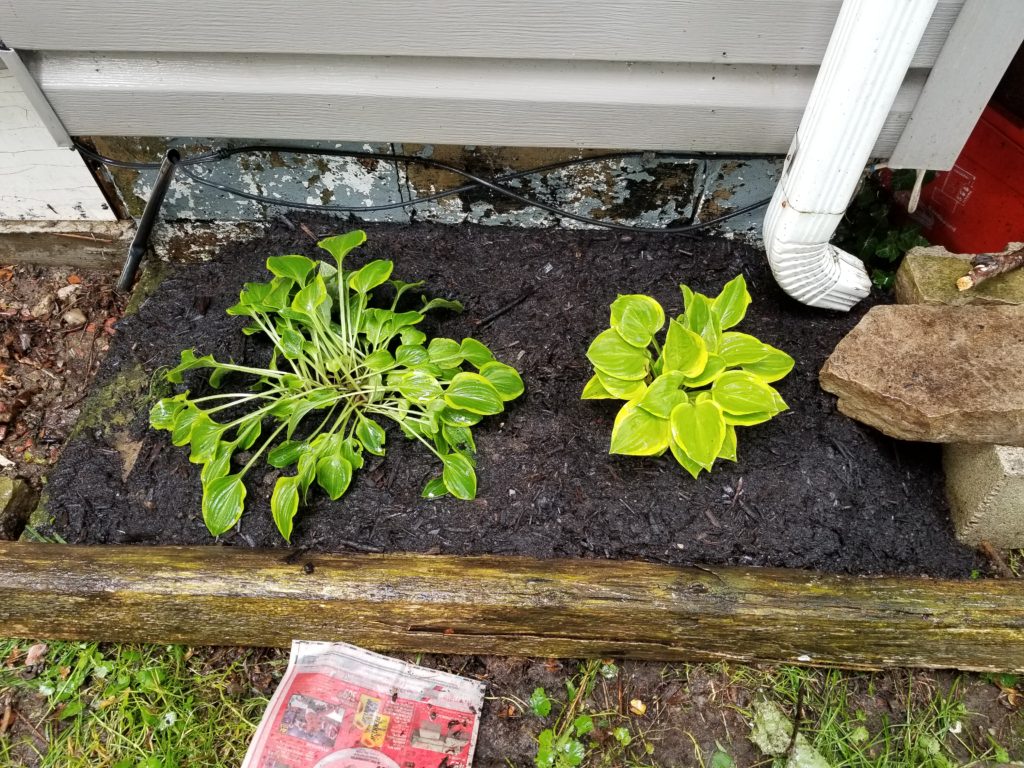
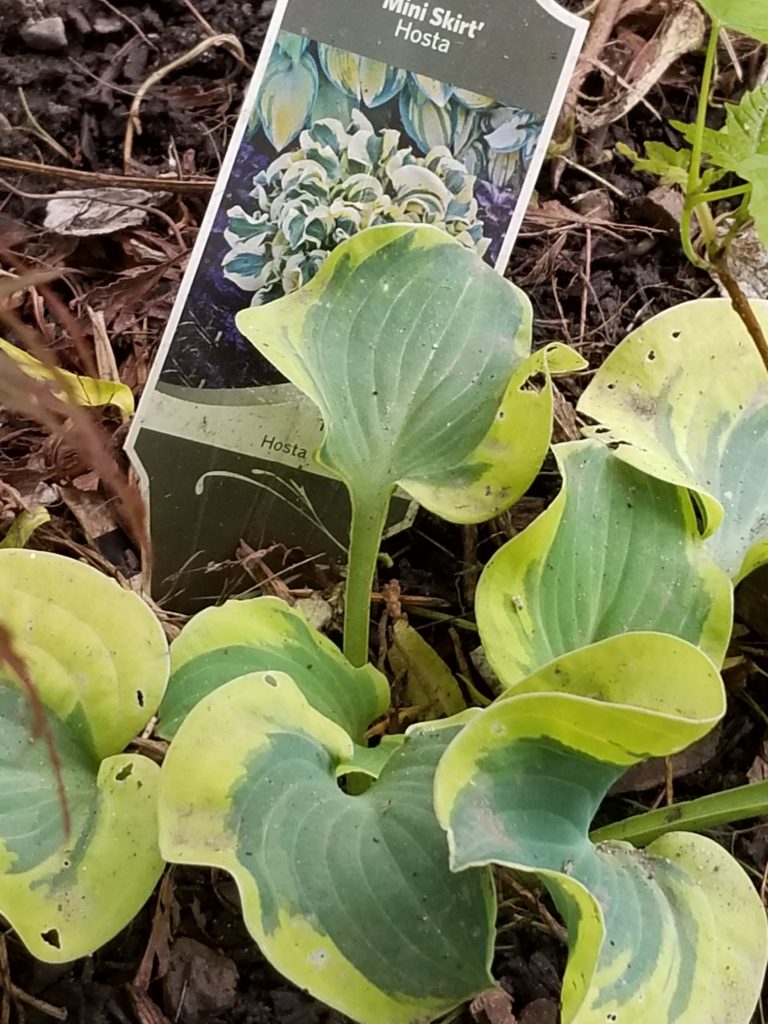
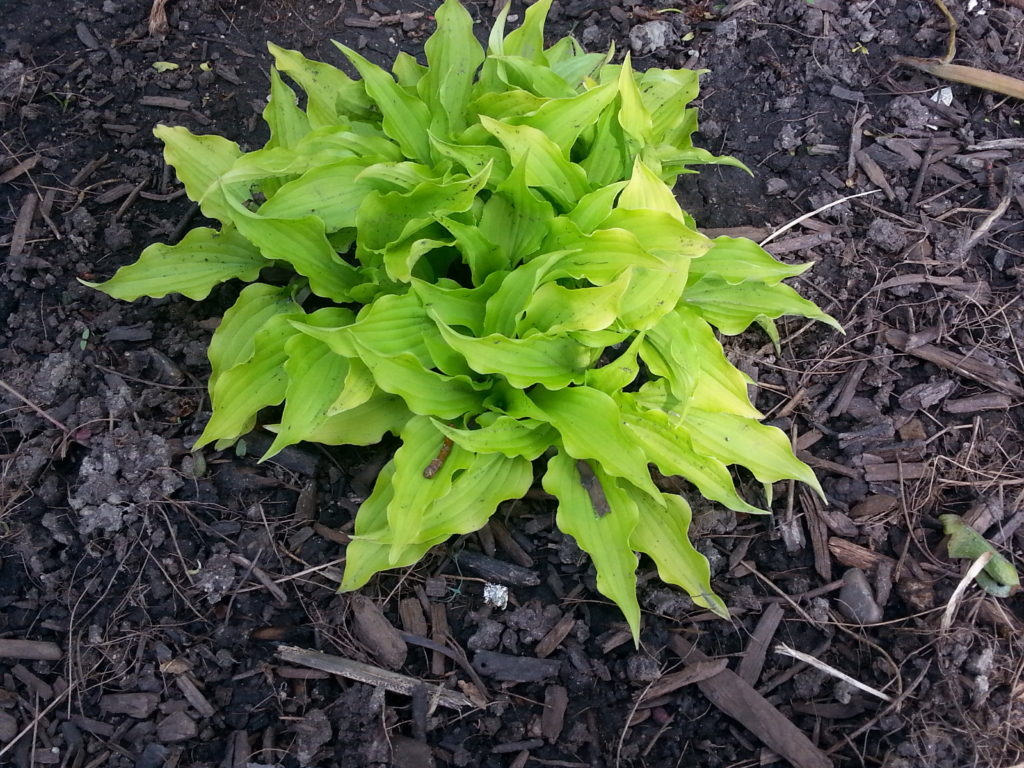
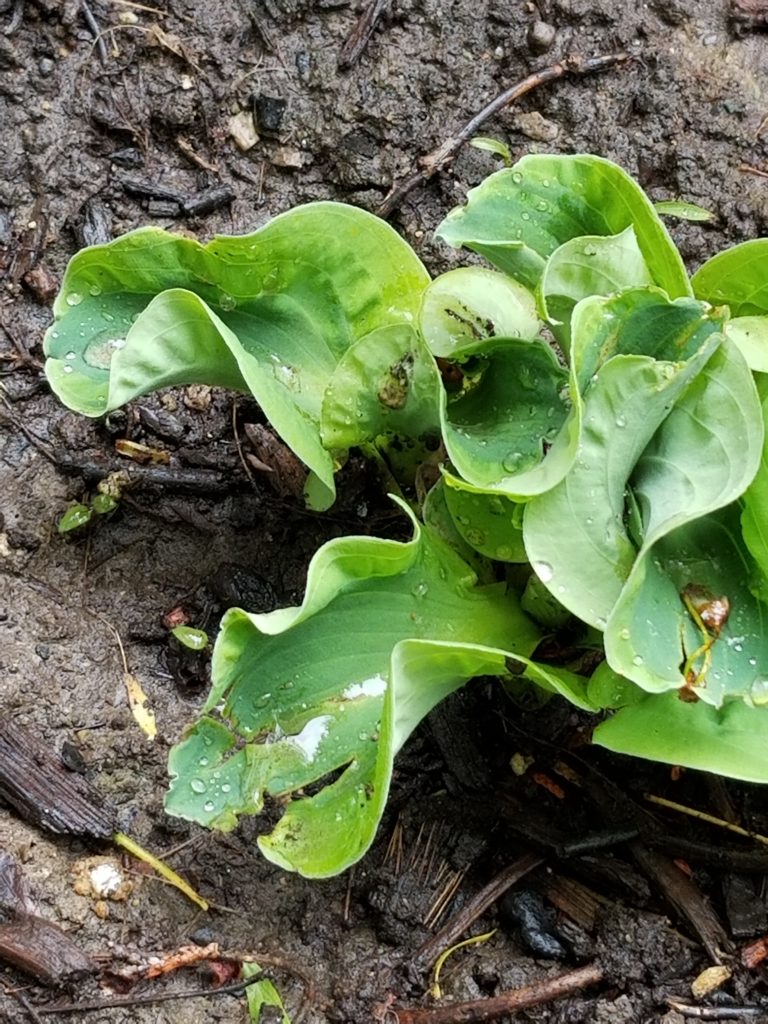
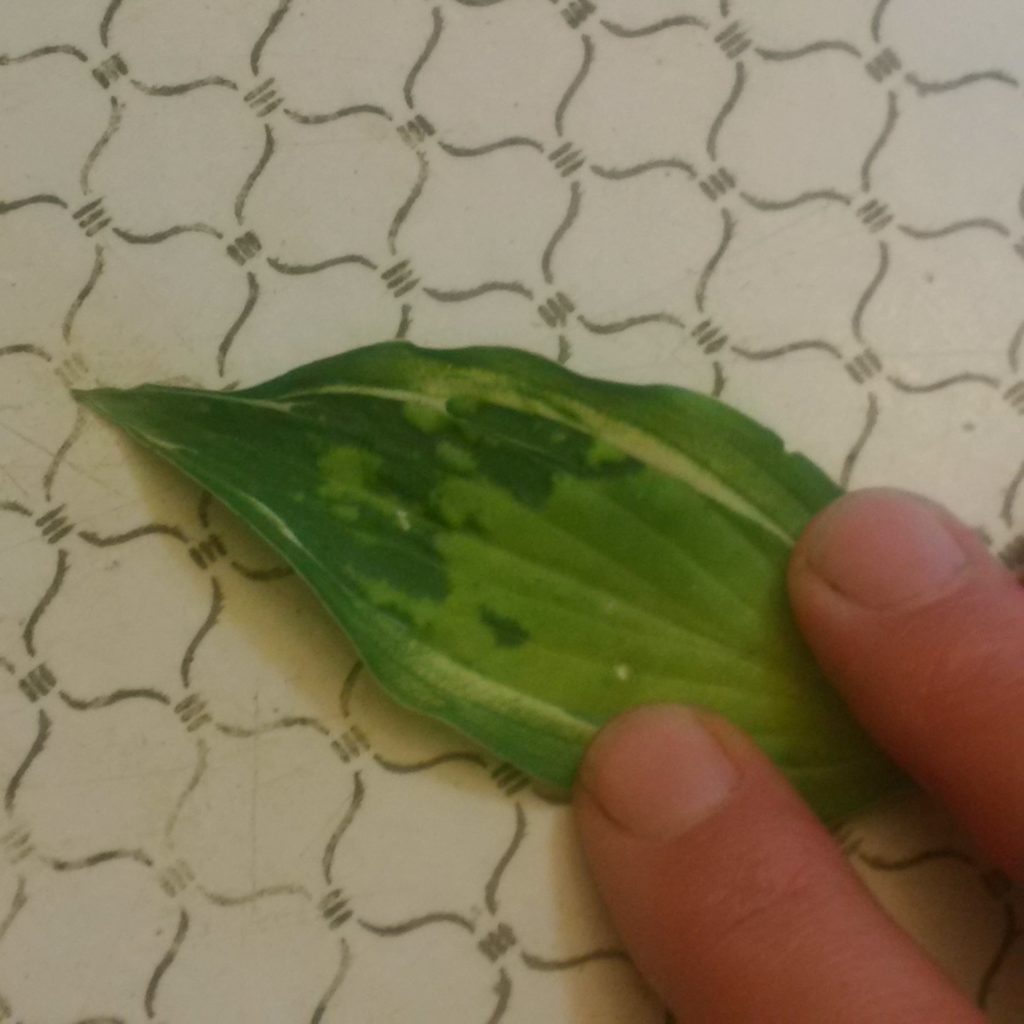
Hosta ‘School Mouse’ is the star of this planter. See the green stuff growing on the top of the soil? That’s something that happens sometimes in greenhouses, scrape that off before transplanting.

Mini Hosta 'Church Mouse'School Mouse was an impulse buy, but notice how similar it is to ‘Church Mouse’? I love those ruffled twisty leaves.

Mini Hosta Kettle Planter

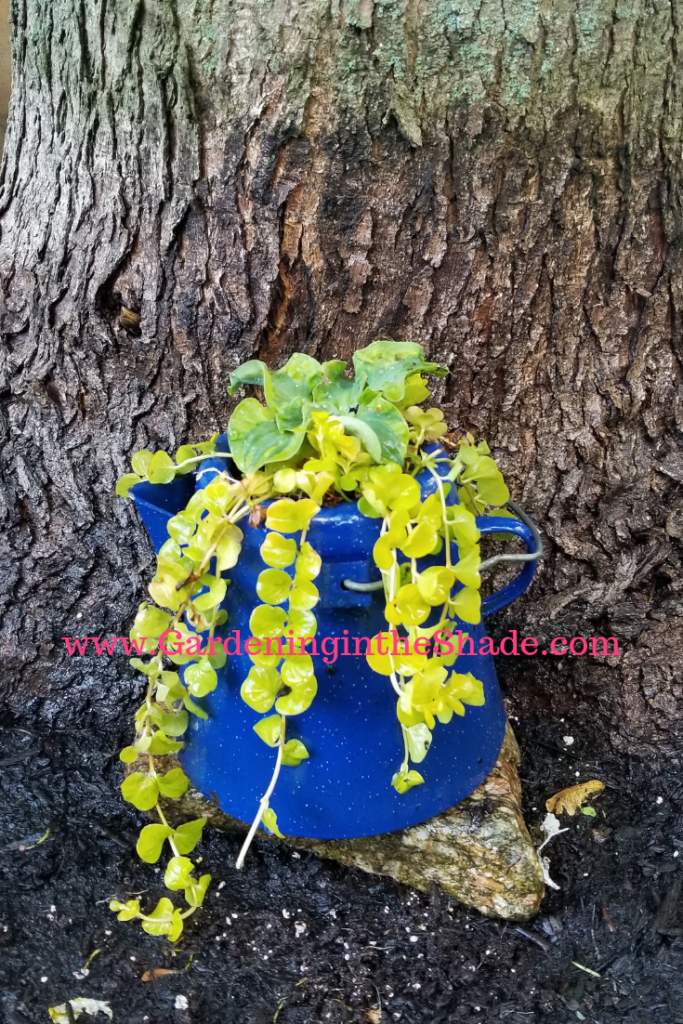
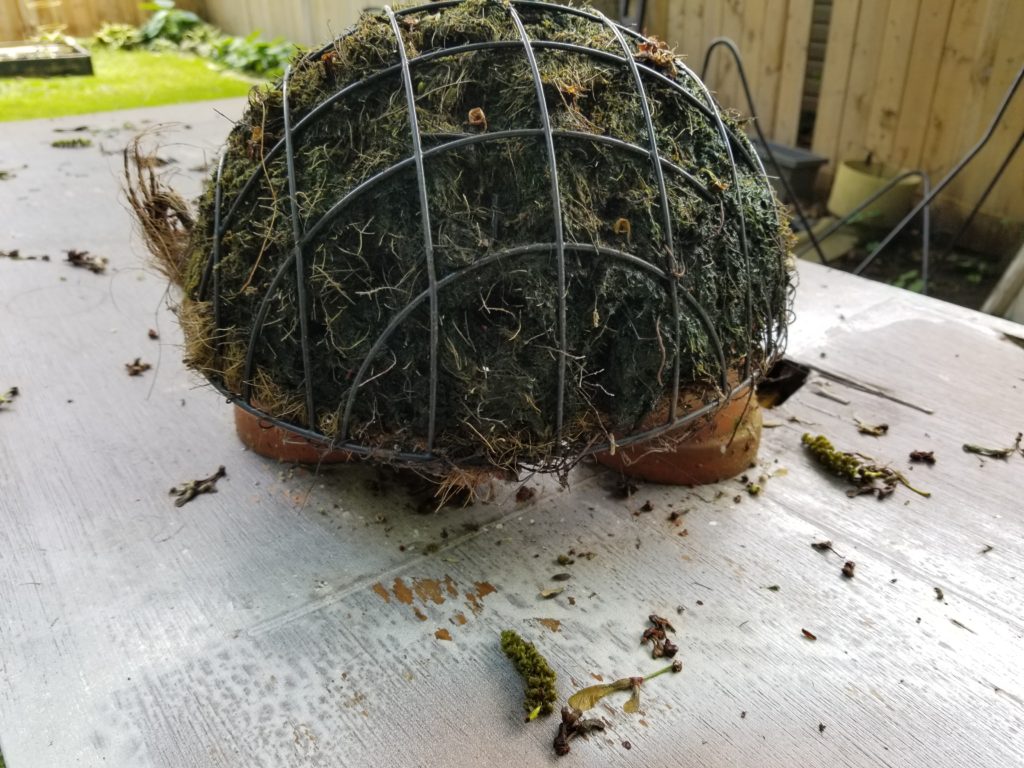
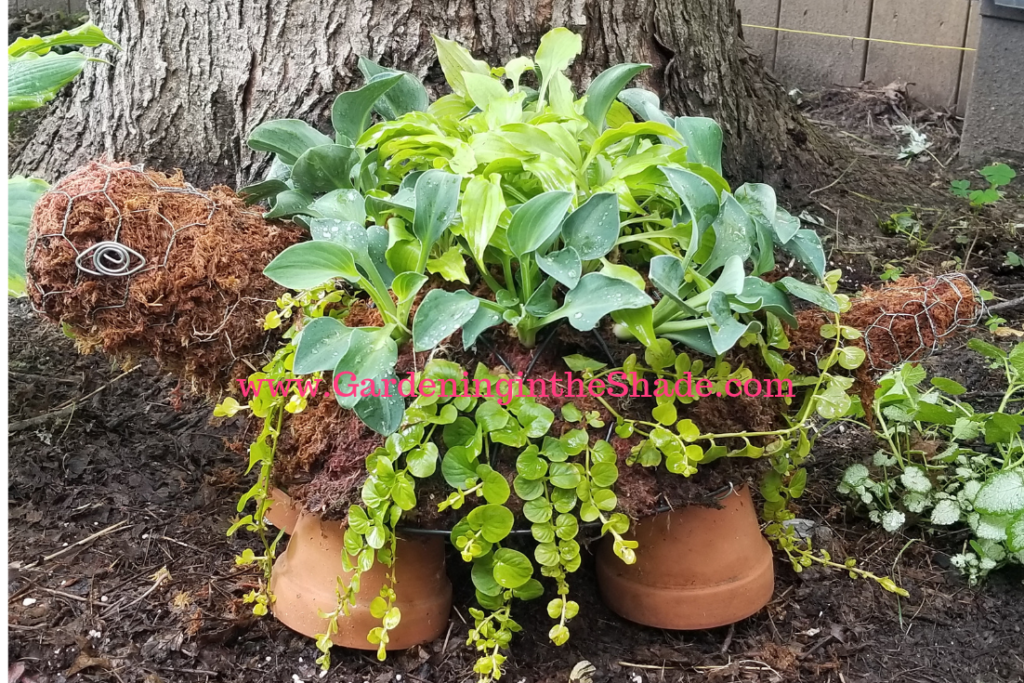
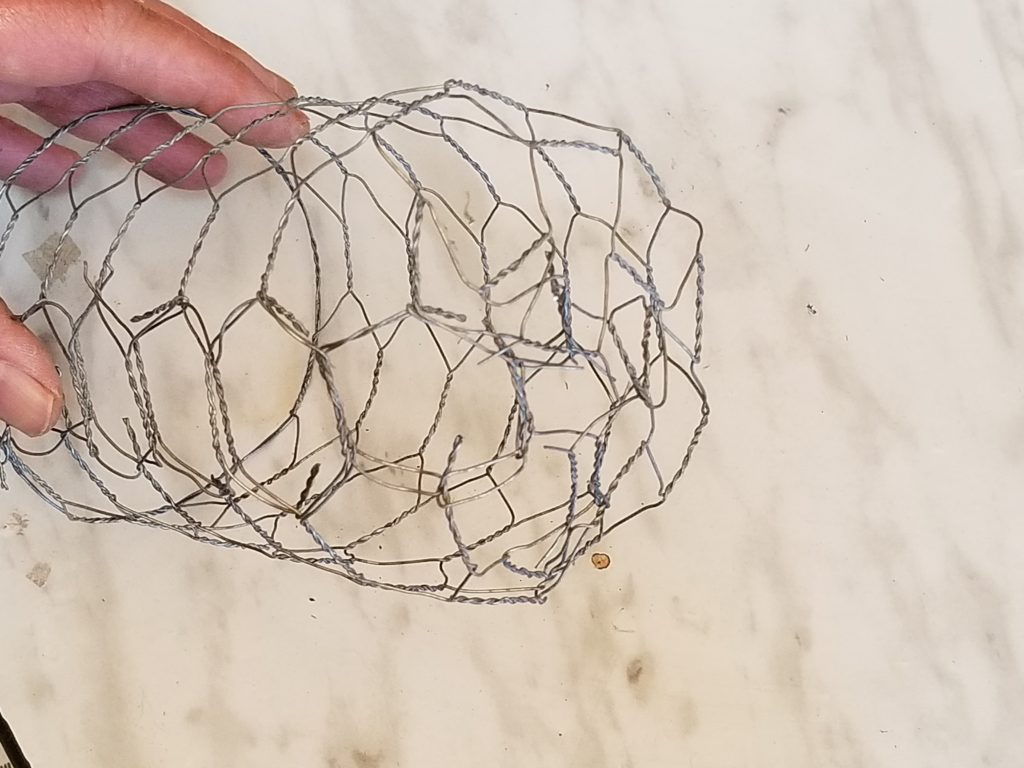
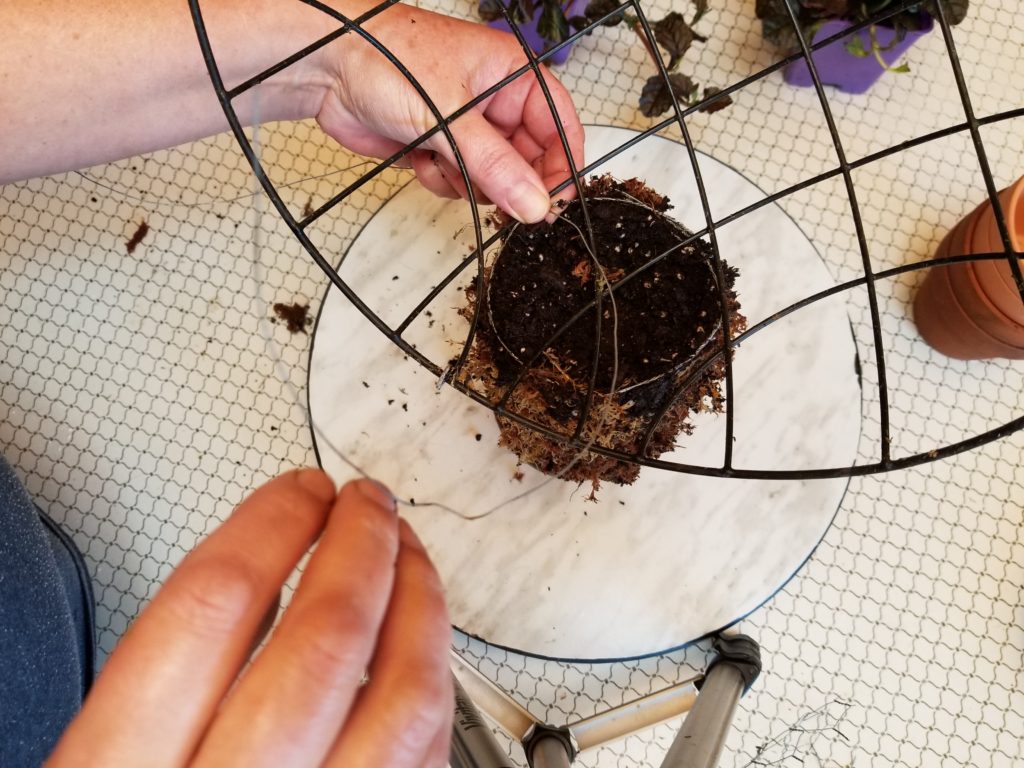
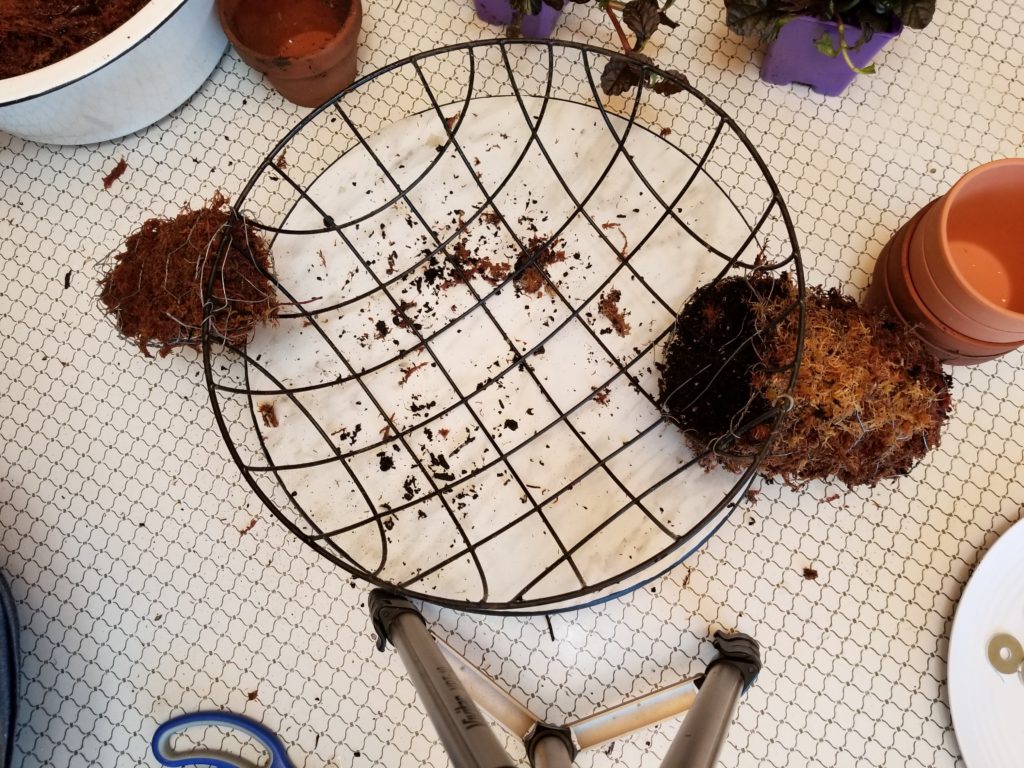
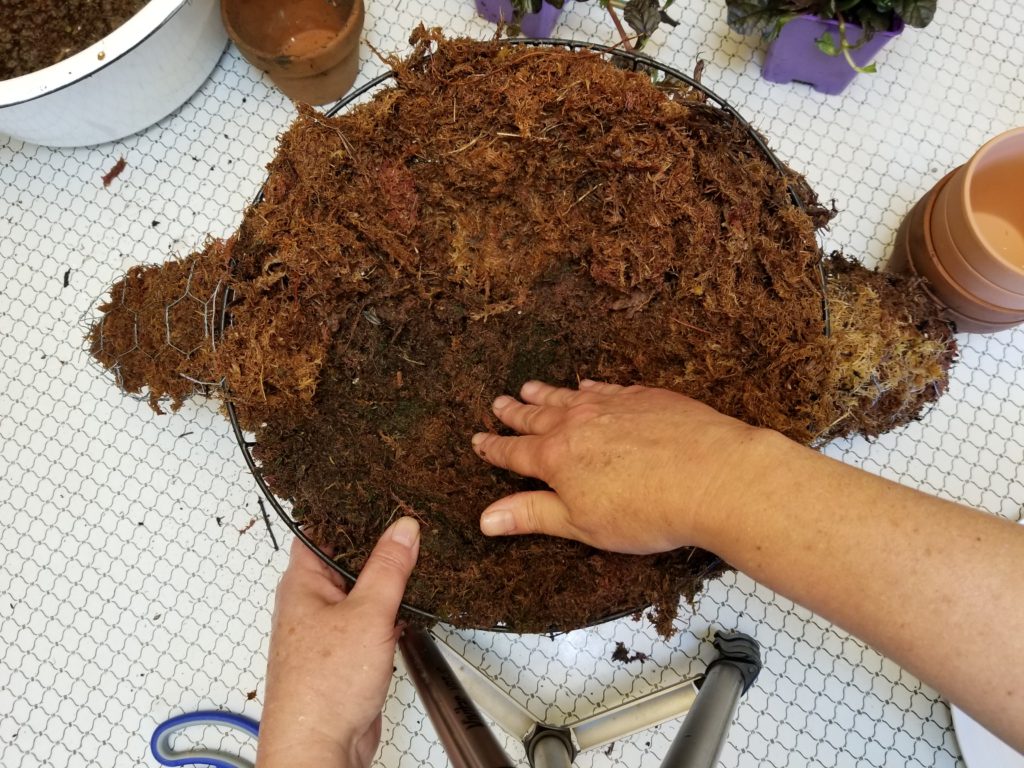
I added some creeping jenny (Lysimachia) as a trailer and there it is – a planter that is just as adorable as a succulent. Still don’t believe me? Take a look at the Hosta Turtle I made last week.

So what do you think? Could you get hooked on Mini Hosta?

Shade Planter in Red

I have so much still to plant. The constant rain throughout May really put me behind, but I’ve got one planter finished. I have this one sitting under the maple tree where the dry shade is making it hard to keep plants alive.

I used a tall egg-shaped planter that holds a lot of soil. And it’s full, I do not use empty bottles or anything in my planters. They get soil from top to bottom because that large volume of soil makes it easier to keep up on the watering. The weight also prevents tip-overs.

Fuchsia

The thriller in this planter is the upright fuchsia with tri-color leaves.

This Kimberley Queen or Australian Sword Fern gets a supporting role.

This next plant has the neatest looking leaves, white and green on the tops and red on the backs. It wasn’t labeled but I believe it is a Calathea, a tropical plant, taking the place of filler.

Then we’ve got this nice coleus. It wasn’t labeled either but the colors went with everything else and it’s also a ‘filler’. There’s also some asparagus fern, for the ‘spiller’. 
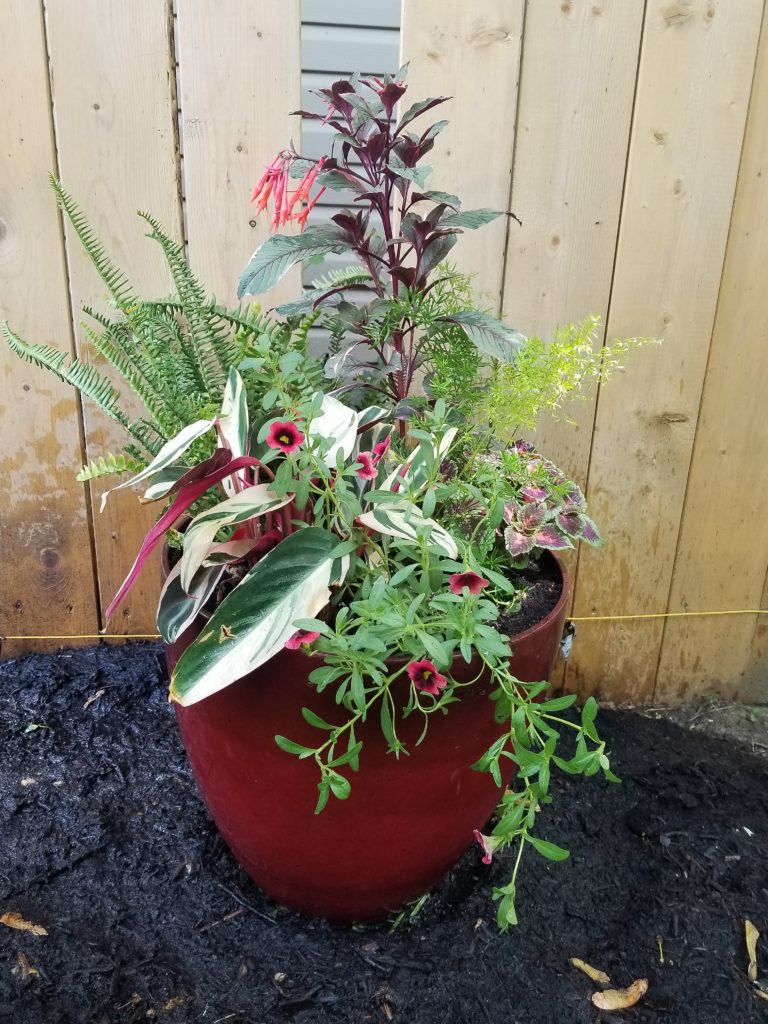
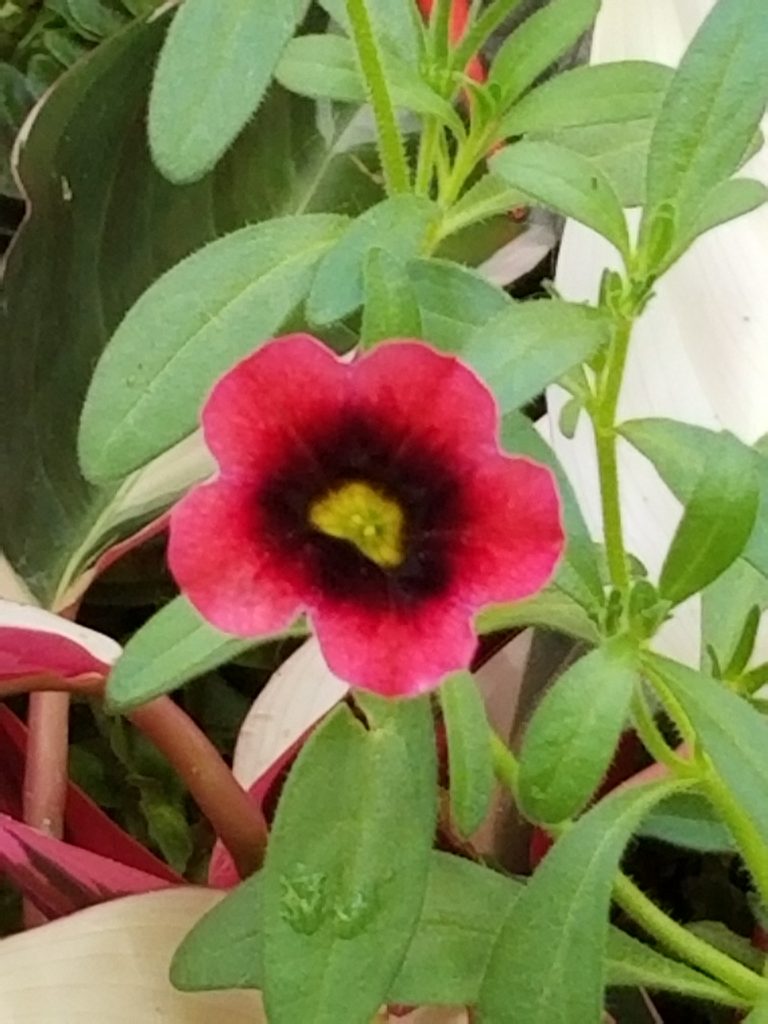
And finally, another ‘spiller’ some Calibrachoa Superbells – Watermelon Punch. I’m not positive on that though – I lost the tag.

So that’s one done! Now on to the rest.

Sunday, and a Side Yard freshen up.

Sunday mornings are for cleaning out and refilling hummingbird feeders.

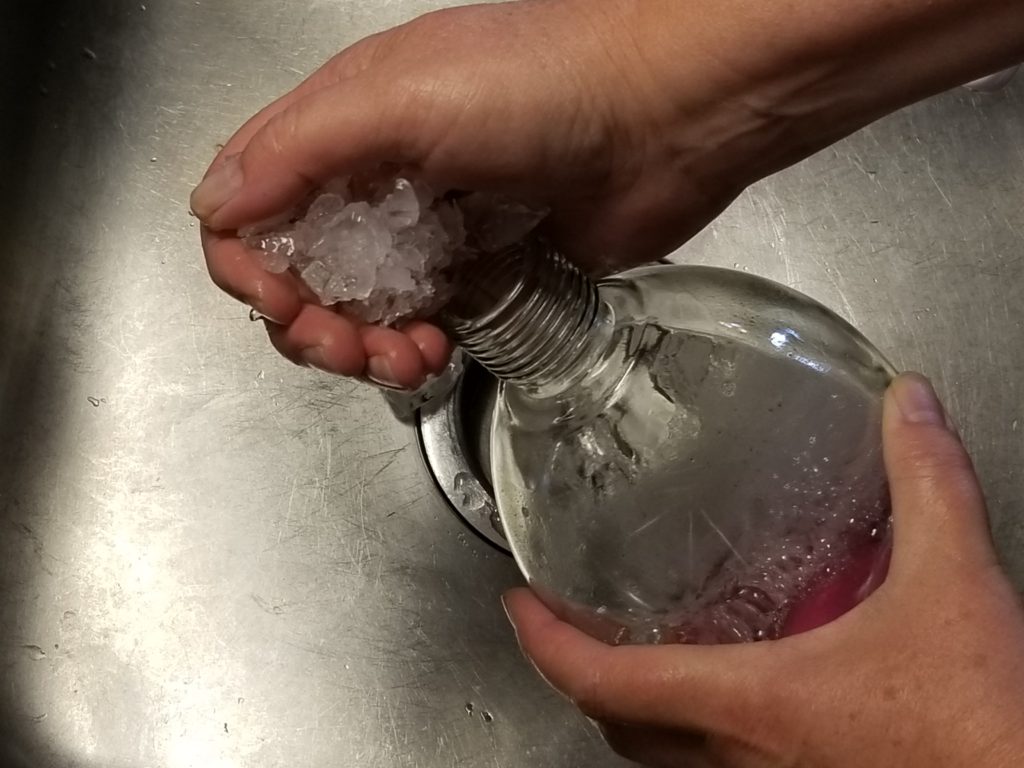
If you happen to have a feeder with a narrow neck that won’t fit a bottle brush, there’s a simple way to scrub it out. Fill with enough crushed ice to swish around and add salt. Swish the bottle around, the ice agitates the salt and the salt scours the inside of the bottle.

Decent weather finally meant two loads of compost from our local landfill. At $13.50 a cubic yard you can’t go wrong, even if your back would beg to disagree. If it weren’t for compost, I would not garden. The ground in my yard is horrible clay, if I plant gardens direct in the soil there’s no chance of keeping up with the weeds. The compost stays loose so it’s nothing to walk by a flower bed and pluck out the weeds.

This was the first thing I tackled. Most of what you see is not my property, I have an alley way that runs up the side of my house. My oldest parks there and has a habit of offloading his junk in that area. Something that drives me bonkers because it’s what you see as you drive up to my house.

So I hauled off all the crap and added a new garden. I used newspapers as a weed barrier. Truly you should never use the rolls of landscape fabric you can buy. It usually works well for a year or two, but then it causes nothing but headaches. Gardens are not static, things die or get too big. You need to be able to get a shovel in there and move things around as time passes. Not so easy to do if you’ve got a layer of landscape fabric in there. Worse, weeds will start growing above the fabric and it just ends up a mess. Newspaper makes a good barrier to the weeds below, and with good loose soil above weeds aren’t such an issue.

So this is just a narrow bed, tucked under the eaves. It has just one kind of hosta planted – Golden Tiara. Once it fills in over the next couple of years, it will create a lovely bank of foliage. And when it flowers all at the same time it will be gorgeous. You can get an idea of the effect I’m going for >>Here<<

They don’t look as if they are all the same variety at the moment, but as they grow it will come together. I might add some Red Dragon Wing begonia for color this year – if I get to it.

Back to spreading compost!

Mini Hosta Turtle Topiary

We’ve had so much rain this spring, I really haven’t accomplished much in the garden. But we finally had some sunshine on Sunday so I made a Hosta Turtle.

Fred the turtle was looking pretty rough after the winter this year. He’d been kicked around and was missing a leg, along with his tail and his head. None of the Hens and Chicks were left, thanks to boy dogs peeing on all the things, so today he got a do-over with a twist.

I meant to try this a long time ago – a Hosta turtle. It works out perfectly, because under the maple tree where he’s located there are too many surface roots. I had a Hosta ‘Sun Power’ there, but the maple tree roots eventually choked it out.

Miniature Hosta

All hosta are highly collectible, from the giants right on down to the miniatures.


The one above has a narrow green edge around the leaves. Here it is pictured next to Golden Tiara to give you an idea of the size.

Miniature in green with a white edge on the leaves.

The blue crinkled leaves of Church Mouse

Mini Skirt, showing cream for early spring it will brighten to white and blue as the season goes on.

I used a few pieces from this mini-Hosta from the garden. I don’t know which variety it is but it’s quite small, along with some Blue Mouse Ears.

Materials:

You can buy a lot of the supplies at the dollar store. The sphagnum moss can be a bit harder to find, try nurseries, any place that sells orchids may have some. Sometimes you’ll find it in the reptile section of pet stores – it’s used for bedding.  I’ve included some links below that may be helpful but please note – they are affiliate links.

  • 4 – 4″ Clay Pots
  • 12″ Wire Hanging Basket
  • Plastic saucer or plate to fit bottom of basket. I used a melamine plate from the dollar store and drilled drainage holes.

Directions:

Form the larger piece of chicken wire into a tube and close one end.

Fill the head with moss.

Use the florist wire to attach the head to the basket.

Repeat with the smaller piece of chicken wire to make a tail.

Line the basket with moss, leaving a space for the potting soil, then set aside.

If you haven’t already, drill your bottom plate or plant saucer. You will need one hole for each leg plus some drainage holes.

Thread a washer onto some florist wire and up through the bottom hole of the clay pot.

Thread the wire up through your bottom saucer/plate. Secure all 4 of the feet. You can see that rather than have them attached at 12, 3, 6, and 9 o’clock, it’s more 1, 5, 7, and 11 o’clock.

Fill the turtle shell with potting soil.

Use florist wire to secure the saucer in place.

Plant your Turtle!


Notice I’ve only planted Hosta at the top. Had I planted them along the sides, they might have looked fine for this season but I don’t think it would work when they re-emerge in the spring next year. Hosta know up from down, so the new spring growth would all head for the top. Other than that, plenty of people overwinter Hosta in pots so I think this will work out fine.

I added some creeping jenny for the bottom half of the shell – just so you know, it will root down where it touches the ground and it is a perennial.

Like the look of Mini Hosta and looking for more planting ideas? Check out some of my other ideas here – Mini Hosta

Sharing this post at DIY Show Off!

Is This HVX!

We’ve had a crappy spring this year where I’m at. Cold, wet and not much sun so the Hosta look kind of yucky. People who have heard of HVX but haven’t seen it in person start asking “Is this HVX?” Since it’s way too crappy outside to do anything else, I thought I might share a couple of Hosta pictures from my yard and talk about HVX a little more.

My Garden Challenges

In the fall I got new human neighbors and my dogs got a new canine neighbor. Who’s a good boy!

Not my dog! He started running up and down the fence and peeing on all the things, trampling an entire row of Hosta into oblivion instead of them dying down naturally in the fall.

Spring comes and my boy dog still has a hate on for the boy dog next door. They’ve done so much leg lifting the ground smells like dog pee and I’ve got Hosta pips coming up. I had to do something so I put the underground pet fence back up. It keeps him away from the fence and put a stop to the peeing frenzy. More important, it kept him from breaking all of the emerging pips off of the Hosta planted along the fence.

Why are you telling me this?

By now you’re probably starting to wonder what my point is right? Well my point is there are a lot of reasons other than disease that can cause your Hosta to look less then their best. There are a few things that might damage the emerging pips – weather, late frost, trampling by humans or pets – and that damage will show in the leaves as they unfurl. As the leaves unfurl, less than ideal conditions – too much rain, too cold – can make your hosta look kind of ugly.

Probably Not HVX

So now I have a row of Hosta that have been peed on, stepped on, under water and haven’t seen too many warm days yet. Let’s take a closer look at them.

This one is Spartacus. Spartacus is out of the ‘pee zone’ so it’s looking pretty good this spring.  I should move it soon before the maple roots choke it out, but other than that Spartacus is fine.

Sun Power is looking pretty good too, it is out of the ‘pee zone’ too.

But then here is Guacamole and it really looks sad. Crinkled leaves, blotchy color, it just isn’t nice at all right now. If you had never seen Hosta Virus X in person, you would maybe start to panic right now. Especially if you’ve been collecting Hosta and have a lot of time and money invested in your collection.

When you look closely at this leaf and see the way the tip is damaged, that’s most likely because it’s been trampled by boy dogs trying to establish who is top dog. Or it could be because some varieties of Hosta have a harder time unfurling their leaves when the weather is less than favorable. Either way, this is not HVX damage.

The sickly looking color in the leaves could be due to the cold, the wet, or just the long winter months of dog urine. But there is no ink bleed – dark areas ‘bleeding’ out from the veins – so again this is not HVX.

This one is Church Mouse. The picture is from last year, right after I planted it. The leaves are supposed to be rippled like that, but notice how even the blue coloration is.

This is the same plant as it emerged this spring. Kind of sad looking isn’t it? Church Mouse didn’t get peed on or trampled. It just doesn’t like this cold wet spring we’re having so it looks yellow and sickly.

Definitely HVX

This is a plant – Hanky Panky – that had HVX.

This is a close-up of one of the leaves. Notice the blotches of dark green disrupting the normal variegation. Hard to see in a photo, the tissue is depressed because the plant cells have collapsed. It looks almost scalded.

It’s probably not HVX

HVX is one of those things – once you’ve seen it, you know you’ve seen it. So if your hosta came up a little sickly looking this year, keep an eye on them, but if it was fine last year most likely it’s not Hosta Virus X. Just continue to practice good garden hygiene and avoid activities that could spread the sap of one plant to another.

For more on Hosta Virus X – Hosta Virus X, What you need to know