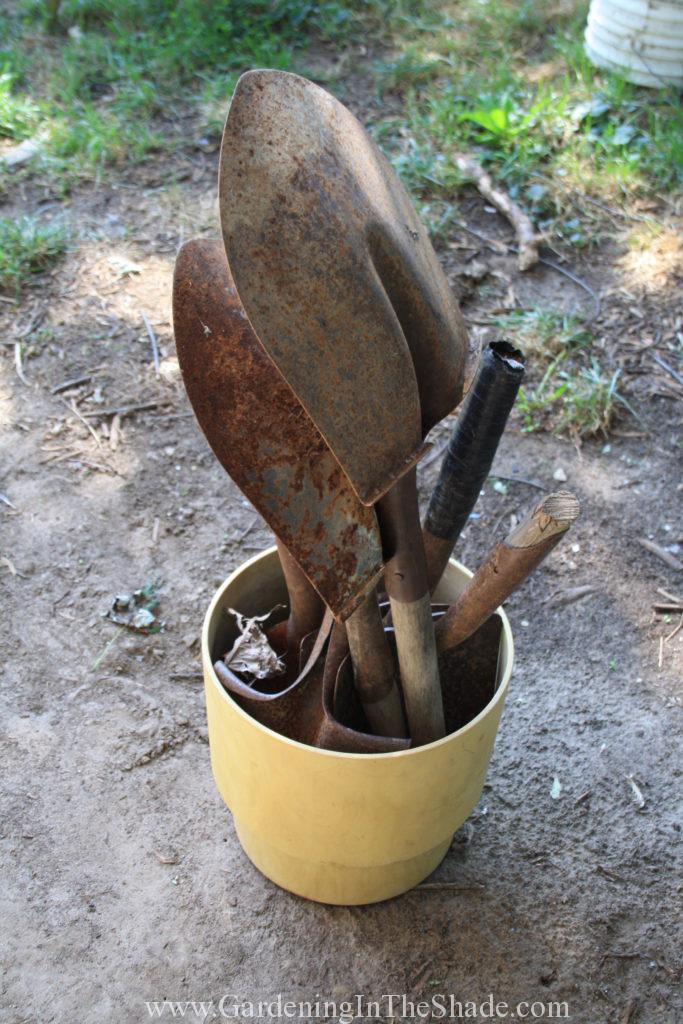
It’s hard enough to find a use for one broken shovel, never mind six of them. But I did! I made a broken shovel waterfall with them, no welding necessary! Let me tell you how I did it because it is so freaking amazing I hardly believe I made it.
The Idea
We have a problem in my neighborhood with irresponsible dog owners leaving their dogs outside to bark. After 4 years of it I finally called by-law enforcement which has diminished the problem some. The problem is after being annoyed for so long, it’s almost impossible to ignore even reasonable barking.
Planting the hedge was step one in my efforts at noise abatement. But since it will be a few years before the hedge is big enough to pull its weight, I decided a water feature would be step 2. I wanted the tinkle of a water feature to help distract from the barking. Except it had to be unique, it had to be DIY, and it had to be amazing. Nothing I saw on the internet was working for me, and then I remembered those broken shovels!
The Broken Shovel Waterfall
Every waterfall has three main parts. A reservoir or basin of some sort to hold the water, something for the water to spill over, and a pump.
 The Basin
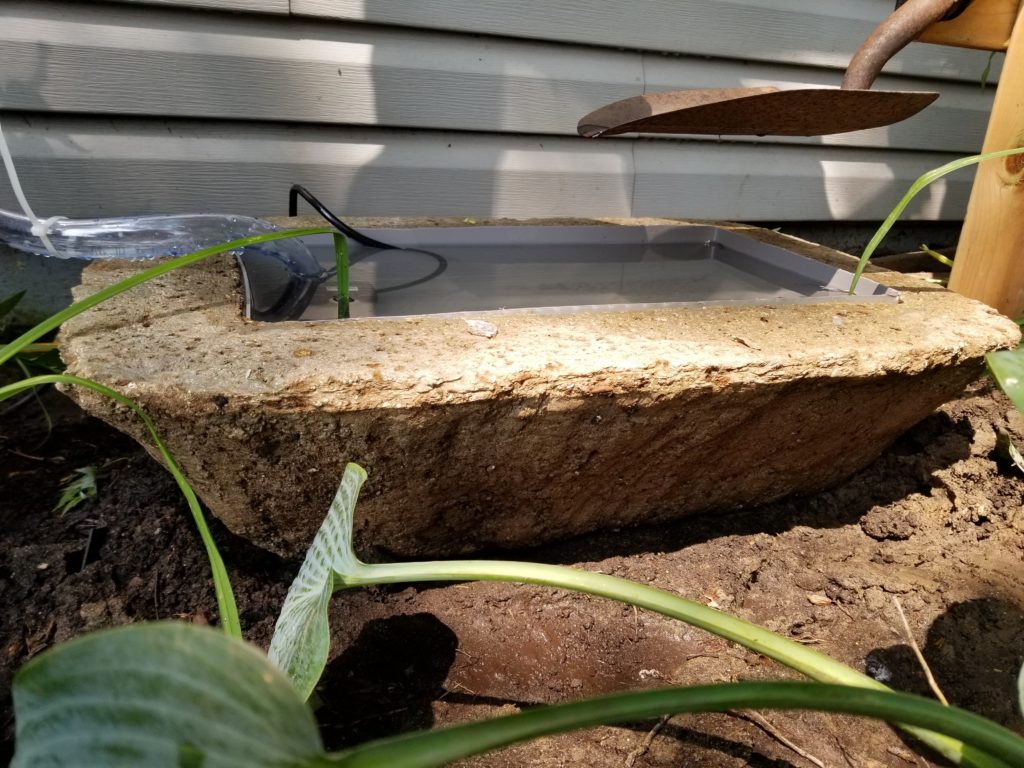
I considered using a buried reservoir, but decided a disappearing fountain wasn’t what I wanted. An old galvanized wash-tub would have been lovely but they are rare to find and expensive when you do see them. I’ve seen a shovel waterfall on Pinterest that uses a wheelbarrow, but that wasn’t for me either. In the end I decided on a hypertufa trough.
That was hiccup number one. I had searched on the internet a bit, saw others used hypertufa for water features and assumed all would be well. Except hypertufa is very porous and water would only stay in my trough for a few hours at best. For now I’ve solved that problem by putting the plastic bin I used for my form back in the trough. I painted it gray to make it less obvious – I think I would prefer it black.
 The Waterfall
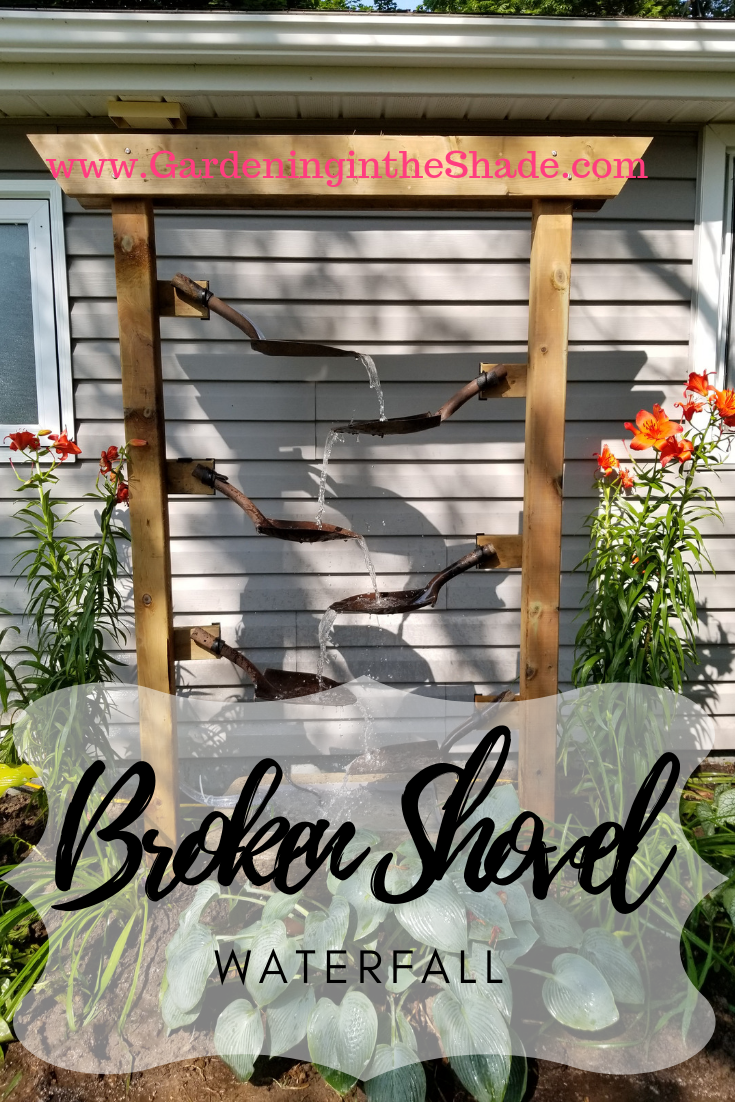
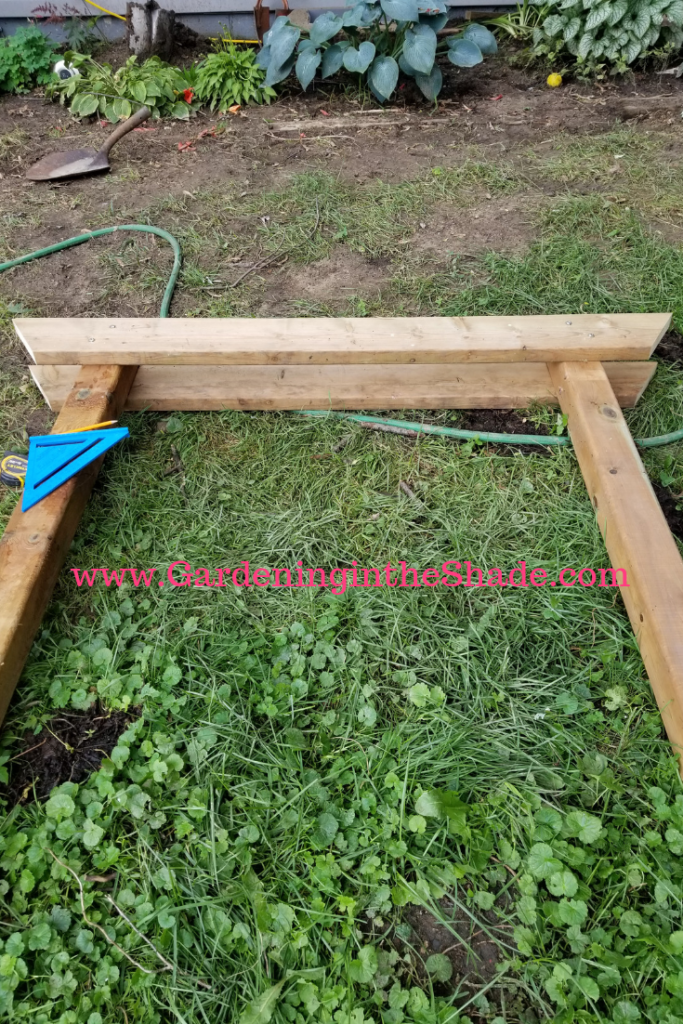
My next issue was how I would support my shovels for the water to spill over them. I considered a few options like old bi-fold doors or building a fake picket fence. My main fear was that if I didn’t choose wisely, my broken shovel waterfall would look like I tried to throw every project ever seen on Pinterest into one. In the end I decided a simple arbor was the way to go.
I dug the holes for the posts on Saturday, despite a heat wave that had the ‘feels like’ temperatures flirting with 100. There were also biting flies, vicious mosquitoes, the stickiest mud I’ve ever seen and a thunderstorm. I got a blister even. But the holes were dug and the arbor assembled.
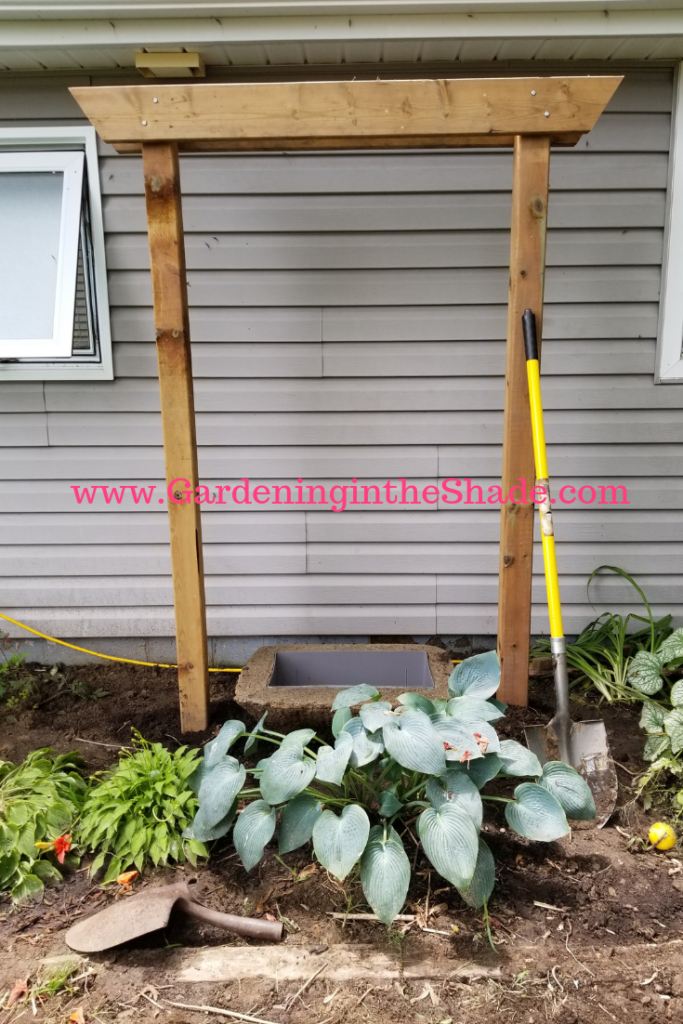
On Sunday, my youngest helped me get the arbor up. After everything was level, we just tamped soil around the posts. Next was attaching the shovels. It took me a long time to come up with a way to attach the shovels. At one time I considered removing the old handles and replacing them with dowel. Removing the handle from a shovel is not an easy job so I was happy to not need to do that. I used pipe hangers instead, the shovels balance in them perfectly.
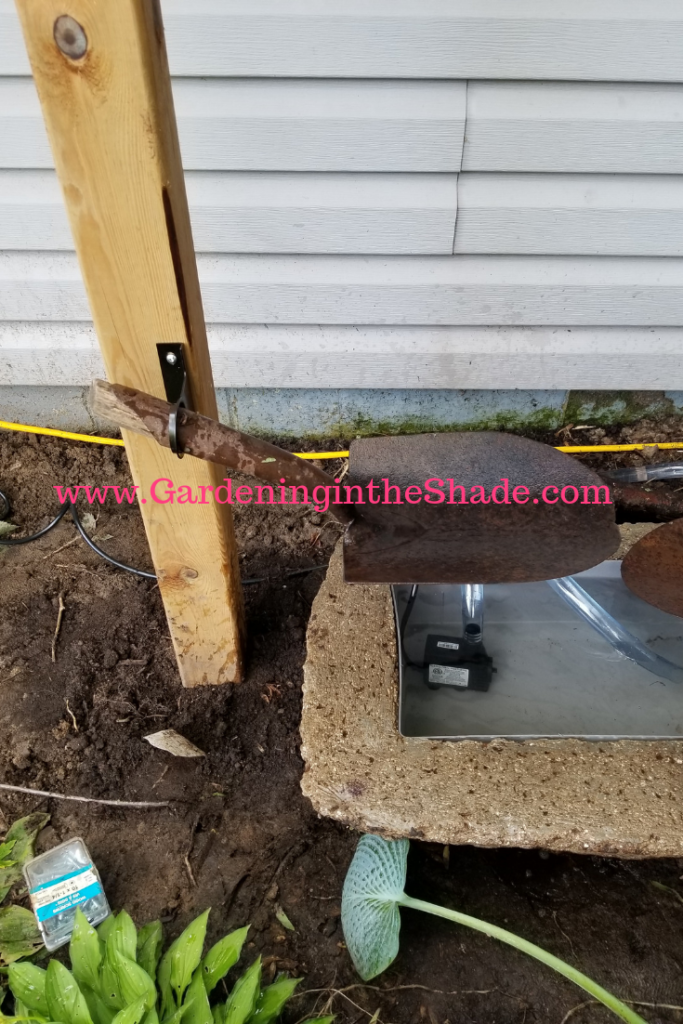
I first tried attaching the shovels to the front of the posts. The problem with that was they weren’t long enough to have the water spill from one shovel to the next below.
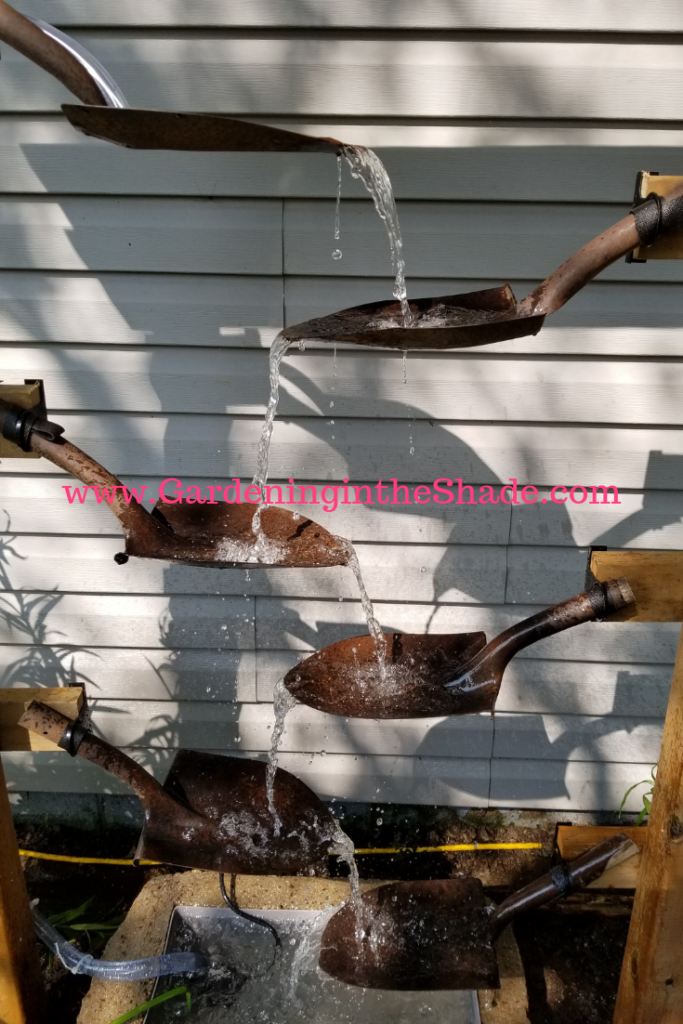
I solved that problem pieces of 2 x 4 on the back of the post. It works out perfectly and keeps the shovel from listing to the side.
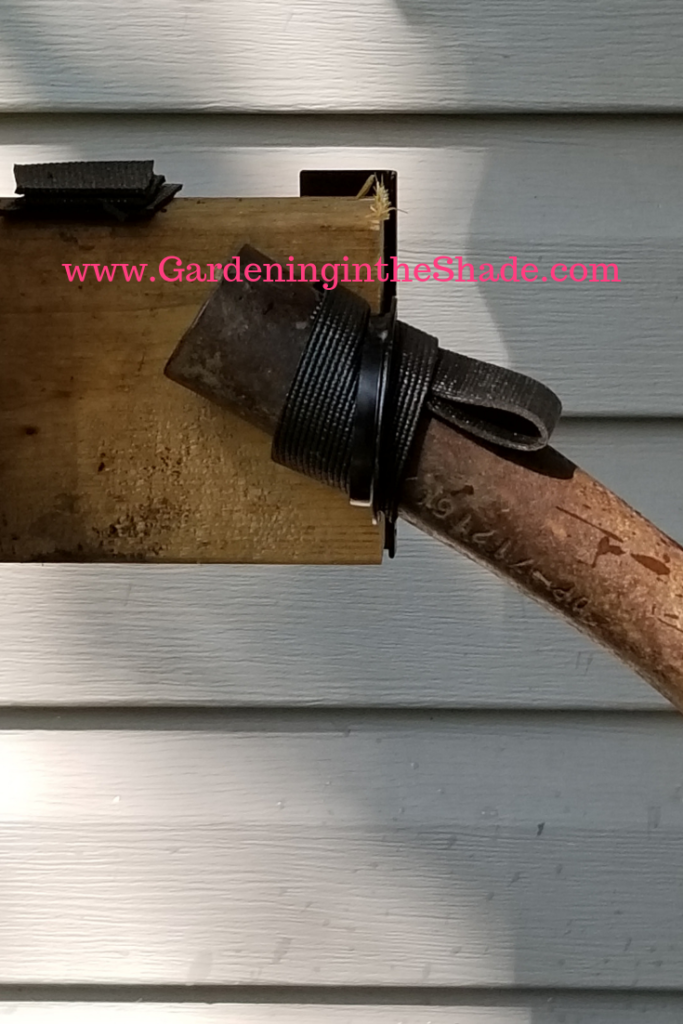
I used pieces of black shelf liner to stabilize and ‘tune’ the shovels so the water would fall from one to the next below.
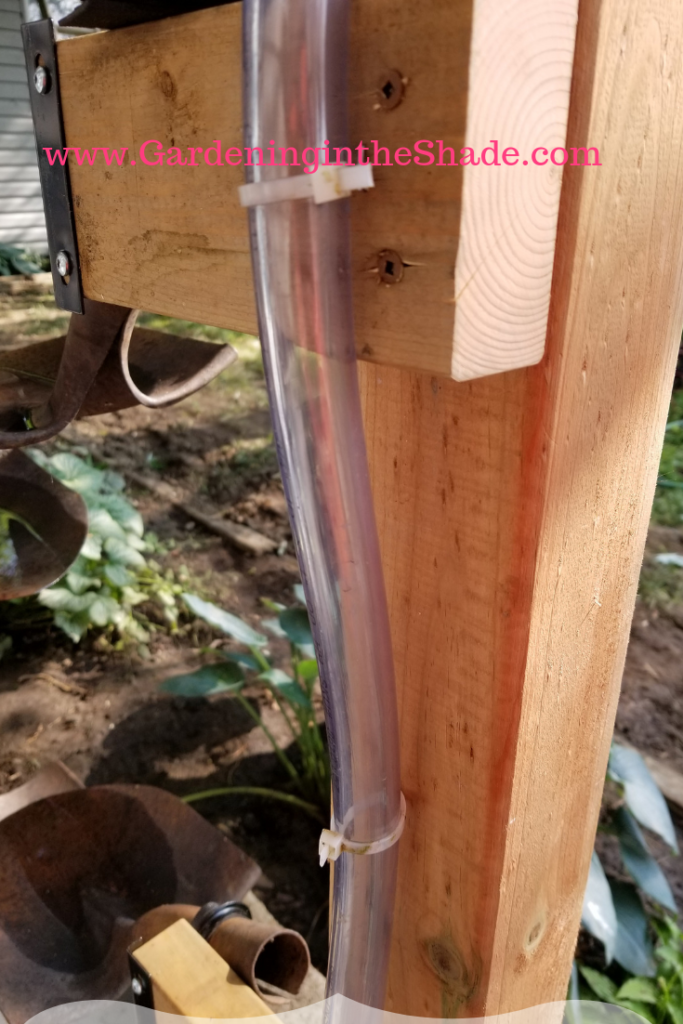
The tubing needed for the pump was a bit of a disappointment. I hadn’t realized it would be so large and hard to hide. It is attached to the back of the post with zip ties that I stapled to the post.
The pump
I used a pump that was rated for 5 feet of lift. I wish I had gone with the next size down even though it was only rated for a 3 feet of lift. This pump just had too much water flowing through even at its lowest setting. I’ve had the pump since the end of May so there’s no returning it. Rather than buy another pump, I cut a small hole in the hose below the water line. This lets some of the water divert right back into the basin and reduced the flow to a better rate.
Broken Shovel Waterfall
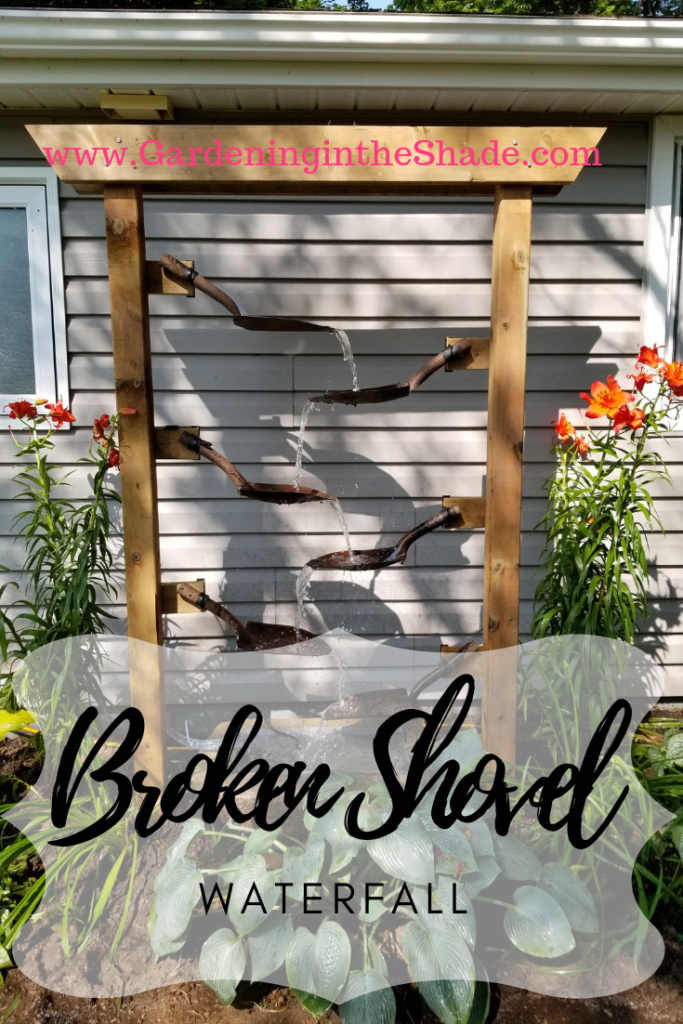
I can’t even tell you how excited and happy I was last night when I finally got everything running and could see that it was really going to work. I just kept saying “My waterfall turned out so freaking cool!” on repeat and annoying my boys.
Here is the space before the waterfall.
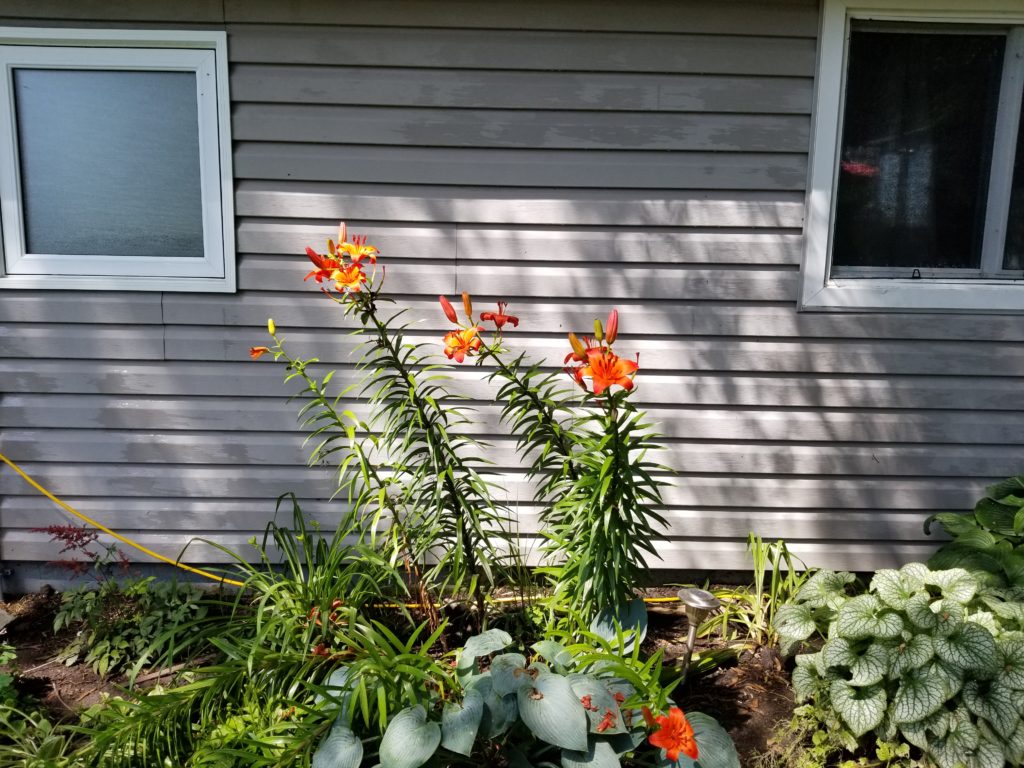
And here it is after.
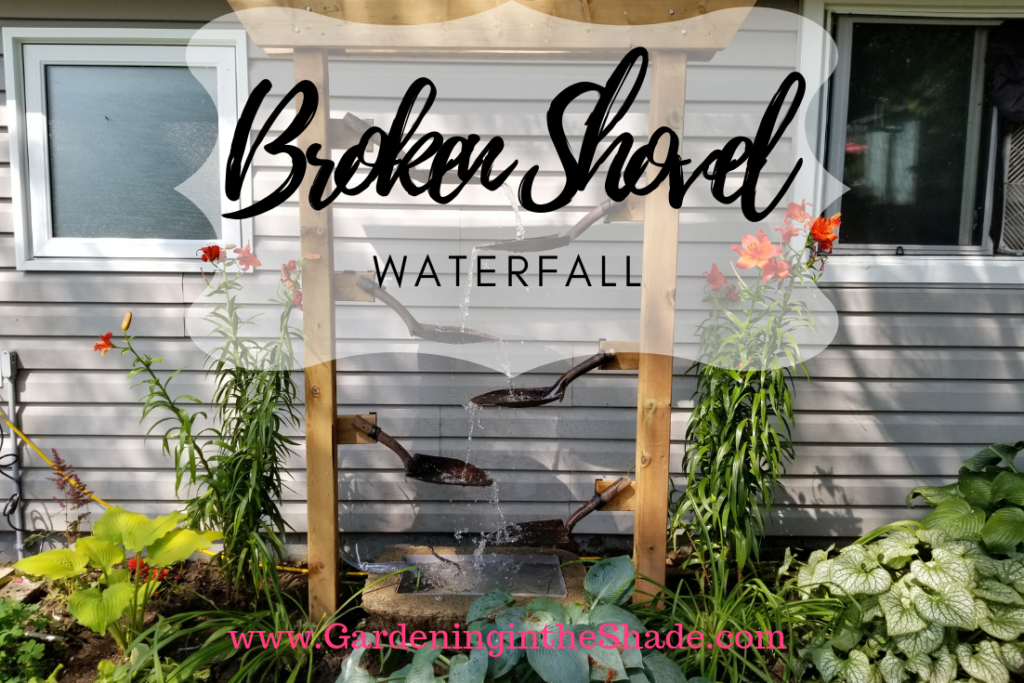
I think the space is much improved. For now, I have the pump unplugged – everything is just so muddy from the rain and me playing around to get the water flow right. Once the ground dries up some the little bit of splashing won’t be a problem and the plants will love it. Those poor gangly lilies finally have something tall to lean up against. Maybe I’ll be able to find some slightly shorter ones to help balance them out.
What do you think? Would you build a waterfall out of broken shovels?

 The Basin
 The Waterfall
Vanessa – i love this and am going to make one next summer. Could you provide the dimensions of the arbor and how many gallons of water does your trough hold?
Carla from Kansas
Hi Carla, I’m so happy you like my waterfall! I did end up burying a child’s wading pool under the trough because it truly didn’t have the necessary water capacity on its own. The side supports are 8 foot long 4×4 with around 1 1/2 foot in the ground. The top is a 10 foot long 2×6 cut in half. I hope that helps!
What a fantastic project!!!
Thank you!
I’m always on the lookout for something new, interesting and cool. Your shovel waterfall is all that and more, I love it! Pinned.
Thank you!
So incredibly unique! I love the sound it makes as well but rusty shovels…. well, you know how to get this junker! 😀
Thank you so much! I had those shovels hanging around for so long because I just had to have them when I saw them.
Incredible job! Did you use cement for the posts or just put them in the soil as is?
I just tamped soil around the posts for this project.
How cool is this?! I love this idea!
Thank you so much!
This is awesome! I’ve pinned and shared. Much love to you!
Thank you so much!
This is such and AWESOME garden feature!! I love this to bits!! Would love to do this in our yard one day!
Thank you so much for sharing your amazing project with us over at Waste Not Wednesday!
Thank you so much!
Hi Vanessa!
I’m stopping back by to let you know that you are one of this week’s features at Homestyle Gathering. Thanks so much for sharing at HG! I hope to see you back each week!
>>> Kim
Thank you so much!
Your shower waterfall is such a smart idea and looks just lovely in your garden, Vanessa! So thankful to have you this week at Tuesday Turn About!
Thank you so much Julie! I’m always glad to join your link party and see what everyone else has been up to.
Wow I LOVE this, just up my street. Well done
Thank you! I’ll admit I had reservations while I was hatching up the plan but it came out pretty good.
That is SO COOL!
Tania
Thank you so much! I really like it too.
Vanessa, this is FABULOUS! I love it! Thanks for sharing at Vintage Charm. Pinning!
Thank you! It was so exciting to have it work out.
This is awesome! Pinning and showing my husband;)
Thank you so much! I really am happy with how it turned out.
Oh my goodness, this is brilliant! What a fabulous idea for repurposing broken shovels. My husband and I made a pretty cool water wall for our backyard but I LOVE the character and rustic charm of yours! Pinned 🙂
Thank you! I’ve seen your water wall and it’s gorgeous!
Hi Vanessa!
Your broken shovel waterfall project is so creative – I love it! I couldn’t imagine 4 years of barking dogs…ugh. I’m glad the problem has diminished some for you. I hope the waterfall will help drown out the noise. I would for sure build a waterfall out of broken shovels. Not only is it nice to listen to, but it’s so pretty to look at too! I found you by way of Tuesday Turn About. I would love for you to share this project at Homestyle Gathering Link party via Serving Up Southern. The party opens every Tuesday @9 AM and is open through Saturday until 7 PM. I hope to see you there!
>>> Kim
I would love to share and see what others are up to.