Santa Cruz, San Francisco Begonia top-level, Big Begonias in Rose and Pink lower level
Last year, after the fence went up I threw together this raised bed for the corner that was too shady for vegetables but still needed something. Once the monsoons we had last year started, I was grateful it was a raised bed or everything would have been underwater and probably rotted.
I planted top-level with Santa Cruz (the red) and San Francisco (the coral-pink color) a 2016 Intro, and the bottom with begonias from the Big series, Rose Green Leaf and Pink Green Leaf.
Santa Cruz and San Francisco are both boliviensis type begonias, so they’re perfect for hanging baskets or planters. The leaves are smaller than Dragon Wing and not as glossy, while the plants themselves are a bit more compact.
For 2017 Santa Barbara with a white flower joins the collection, you can see it above mingled with Santa Cruz and San Francisco.
Santa Barbara – a new intro for 2017.
I have three Santa Barbara to try this year. I added them to a sorry-looking palm that I have and nearly lost them because there were no drainage holes in the planter.
Of the three, one is fine, one is maybe and I’m doing my best to salvage something from the third one.
The bed below has 3 each of the Santa Cruz and San Francisco along with 3 large-leaved hosta in the top-level. The bottom level has 3 each of Big Rose Green Leaf and Big Pink Green Leaf.
Santa Cruz and San Francisco top-level, Big series begonia in Pink and Rose.
Everything was planted in a mix of fresh soil and compost but never fertilized. Once the plants were established I rarely watered or weeded either. This bed gets a couple of hours of morning sun and shade for the rest of the day. It’s roughly 10′ across the front and each side of the triangle is about 85″
All of the colors in the Sun City Collection will handle sun or shade, and they are heat and drought tolerant. They’ll reach a height of roughly 12″, Long after my petunia were sad and scraggly, these were still gorgeous and worthy of a spot in your planters and hanging baskets.
It was so hard to pick just one title for this instant patio planter project, because I had so many contenders. Here are just a few of the ideas I discarded
No Place to Hang a Plant? No Problem!
Hanging Baskets That Don’t Dry Out!
I Like Big Pots and I Cannot Lie!
The last one is my favorite.
Anyhow, if you have ever experienced any of the following, this project is for you.
You are hosting a spring party and none of your planters are pretty yet.
You bought a hanging basket on impulse and then remembered after you got home you don’t have anyplace to hang one.
You wanted to buy a hanging basket because it was beautiful, but you didn’t because you have no place to hang one and now you’re sad.
You buy hanging baskets every year and then before you get to enjoy them, the weather turns scorching and even though you water twice a day, every single plant shrivels and dies while you are at work.
Step 1 – buy a gorgeous Hanging Basket at your garden center.
I have this beauty sitting on an upside down pail so none of my spillers get broken. You can see in the photo evidence of my favorite patio pastime.
So you could take the easy route and just drop that hanging basket into an urn or tall planter – pot and all.
And you can see it will look nice if you do that, but only for a while unless you dedicate yourself watering. See first photo for evidence that I prefer to enjoy my patio in other ways.
If you do take the easy way out buy a premium planter, one that comes in a bigger and deeper pot will last longer. And for Pete’s sake, at least remove the hangers from the pot. It’s easily done and looks so much better than having a purposeless hook in the middle of your planter.
The problem with going the easy way is unless you water twice a day, your planter will still shrivel up and die as soon as you get some hot weather. By the time you bring it home, there isn’t enough soil left in a 12″ hanging basket to sustain the numbers of plants that it holds. The planter above has 8 plants in it! Plus, plants in greenhouses grow best with a light fast draining soil which isn’t always the best for at home. Instead you need to…
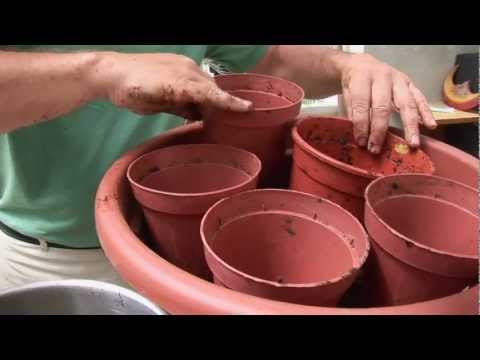
Step 2 – prepare a BIG planter with soil.
Use good soil that has lots of organic material in it. Soil that will hold moisture well and is easy to re-wet if it happens to dry out.
Somehow, between finding out the battery on my camera needed charging and the sudden monsoon that happened during this project, I missed taking a photo of this step so here is an awesome video instead. He likes big pots too.
You really want to have that planter prepared perfectly before you go to the next steps – trust me!
Step 3 – remove the hangers from the pot.
You will have to carefully reach through the foliage to do this, but basically you push the each strand down as far as it will go with one hand to unclip the hook part. With the other hand reach under the rim of the planter and spread the clips apart and while keeping them spread out, pull it up with the other hand. Or if you’re going to throw the pot away, just cut the hanger off.
Step 4 – the tricky part!
If you still don’t have your planter ready with soil and a planting hole, you’re gonna regret it!
Carefully thread your hand into the center of the planter. You will need to flatten your palm against the soil without crushing any plants. Spread your fingers out as much as you can.
Step 5 – Flip me over and..
Very rarely will it ever just ‘pour out’. Keep the top of the plant balanced on one hand while you pull the pot off.
Remove the drainage saucer. The root ball on this one is gorgeous, but it was in a 12″ basket that was nice and deep instead of the typical 2 for $25 10″ basket.
Step 6 – replant it.
Carefully flip the plant into the planting hole you have prepared in your planter. Gently reach under the foliage and tamp soil around the root ball.
Presto – Instant Gorgeous Patio Planter!
Step 7 – move the planter to it’s new home.
This one is going over by my mailbox where the dogs can’t reach it, because according to my dogs, blue flowers are the tastiest.
The Who, What and How Many!
This planter contains:
4 Yellow Begonia
2 Coleus of a mounding or trailing type.
2 Asparagus ferns
2 Lobelia
2 Bacopa
It won’t last all summer, or at least not all of it will. As soon as we have a hot spell, the Bacopa will ‘stall’ or stop flowering. They always do when it’s hot. Some varieties are better in heat (the Betty series of bacopa will still have at least some flowers), but Bacopa is not a heat lover. Even worse, without flowers there is nothing attractive about Bacopa. Lobelia, depending on the variety, can also stall. The coleus, begonia and fern are most likely to last through August, but remove any flower spikes from the coleus – they are not attractive.
The planter I used is a shabby old plastic planter I spray painted black last summer. After a winter under the deck, it was looking shabby again so I spray painted it in a deliberately blotchy pattern with brass and copper colored spray paint. The metallic paints give the planter a nice gleam in it’s super shady spot. It looks even nicer now that those stupid little flies are gone again.
If you enjoyed this post, don’t forget to share it with your friends! For more just like it follow me on Pinterest, Facebook and Twitter or sign up for regular updates by email.
If you have ever thought about starting a garden or craft blog of your own see how easy it is>>here<<.
I get it, plastic planters are kind of cheap and tacky. I know this because I see gorgeous high-end pots and planters all the time while I’m working. It always leaves me with a bit of the I wants and I really would love to throw fiscal responsibility out the window but I can’t.
Last year I managed to eke another year from some of my planters by spray-painting them, but they were starting to look pretty shabby again. One even had a hole cracked just under the rim which would have made watering a pain in the ass.
I’ve also considered DIYing some planters. I even bought fiberglass resin and cloth along with two cans of spray paint – that cost $70 and I didn’t even have anything to use as a frame yet. I reconsidered that plan and returned the supplies.
So with the planting season right around the corner and plant samples already scheduled to arrive I ended up going to Wal-Mart and buying the dark brown planters I used for my Dramatic White & Black planters.
For now, I just remind myself that there are good reasons to use plastic planters.
Plastic Pots are economical
I’ve always felt that when it comes to planters, bigger is better.
Bigger pots hold more soil so they don’t need water as often.
Bigger pots are less likely to tip over in the wind. I used to have huge hibiscus trees (back when my yard still got a little sun) that I was able to overwinter in a greenhouse. They were enormous plants (shrubs really) so they needed enormous pots to keep them upright.
Bigger pots hold more plants. With bigger pots I can cram in a lot more foliage plants and go for a lusher look.
The bigger the pot, the more money it will cost. By going with plastic pots my 20″ planters were just under $10 each and I have four of them. A ceramic planter of the same size would run closer to $60 each.
Plastic Pots are easier to store
I have one 10 x 8 shed to store everything. The Christmas Trees, the Shop Vac, my tools, my son’s tools, our lawnmower, power washer, weed trimmer and all the other stuff that goes with home and vehicle ownership. Plastic pots are easy to nest without damage. Ceramic isn’t. Some of my pots don’t even make it to the shed – I just tuck them dirt and all under the deck for the winter and they’re ready for the next season.
Plastic Pots are lightweight
Along with bigger comes heavier. Even using plastic my large planters are heavy enough, I don’t want to consider how heavy the equivalent would be in ceramic.
Plastic Pots are durable
They’re durable enough to last a few years and if by chance one does get broke they’re cheap enough that it won’t break my heart.
Eventually I would love to have nice unique planters, but for now there are just too many other things around here clamoring for my money to sweat it out over not having expensive planters.
I’ve said it before – I love Non Stop Begonia. For shade gardeners looking for something more than pretty foliage, the flowers on Non Stop begonias are high impact. It’s kind of like they’re the shade equivalent of Geraniums.
There’s a huge range of colors to choose from either with green leaves in the Non Stop series, or in the dark-leaved Non Stop Mocca series.
Last year was my first year growing them.
I tried the Mocca Bright Orange, with chocolate-colored leaves and those amazing bright orange flowers.
And I tried Non Stop Joy, a beautiful clear yellow that’s perfect for hanging baskets. I have seen Non Stop Joy advertised as having 100% double flowers, but even though it tends to a higher number of double flowers, it isn’t 100%. Non Stop begonias never are, because they have both male and female flowers, and it is impossible (or at least very difficult) to completely breed out the male or single flowers.
It was instant love, so I added Mocca Cherry to the collection too. There was never a time over the summer that these plants didn’t have flowers.
Non Stop Begonia Care & Habit
Nonstop and Nonstop MOCCA are both available in a range of colors.
Nonstop Begonias will grow in sun to partial shade – a huge plus in my mostly shady yard.
They grow 8-9″ tall with a well branched mounded habit.
Suitable for Pots, Hanging Baskets, Mixed Containers and Landscape.
Plants are usually sold in pots 4 1/2″ and up. They are showy enough that for the home gardener, the higher price is still a good value.
Non Stops are a tuberous begonia
They are day length sensitive, so starting them from seed might be tempting but providing 12 hour days for them is rarely practical outside of the greenhouse. Without the correct amount of light, they stop growing and eventually disappear, so unless you know how to save the tubers they won’t over winter.
For more information on Non Stop and Non Stop Mocca Begonias, visit the breeder website –Benary.
True story – way back when I started working in the wholesale ornamental plant industry, I used to enter customer orders. Some customers would send their orders with tray counts and I would have to convert them to units for our order entry system. So along comes this one order and the customer requested say 9 trays each of red and yellow Non Stop Begonia. So I multiplied 72 ( the number of plants in each tray) by 9, lost my mind for a minute, and multiplied by 9 again. It was a huge and extremely expensive error.
If you enjoyed this post, don’t forget to share it with your friends! For more just like it follow me on Pinterest, Facebook and Twitter or sign up for regular updates by email.
If you have ever thought about starting a garden or craft blog of your own see how easy it is>>here<<.
I broke every rule when I planted this soothing silver and green planter so I’m hoping it doesn’t wind up teaching me a lesson. The first broken rule is of course – I’ve mixed full sun plants in with shade plants. What really worries me though is that I completely forgot to think about the water needs of each plant.
Silver Green Planter – The Inspiration
It all started with a gorgeous white and green snake plant I spotted at one of my local garden centers. I absolutely had to have it. I knew snake plants do well in low light, but I didn’t realize at the time how susceptible they are to over watering.
Then I added an Artemisia Silver Brocade, a full-sun perennial with pretty silver green, almost white foliage.
And just because I’ve never had one and I feel it is a sorely underappreciated plant, I threw in a PW Flambé chrysocephalum, an annual calling for…? You guessed it – full-sun. It’s also susceptible to crown & stem rot when grown in cool, damp conditions, say like a jam-packed planter? But it does have that silver green foliage along with the unusual bright yellow flowers.
I added a silver and green variegated pothos slip to the mix and then threw it all into this square pot. Aside from the woeful lack of research I put into my plant choices, something else was missing. So I headed off to a local greenhouse that grows and sells tropical plants, and promptly purchased a bunch of 4″ plants I didn’t need, along with the ones I used to finish this planter.
Silver Green Planter – The Plants:
A & B are both snake plants. The taller, vertically striped white and green one that started it all, and a second shorter one (to the right in the top photo above with silver and green horizontal variegation. If I manage to not drown the poor things over the summer, both will do well over-wintering indoors.
C is a Dracaena. Another tropical/houseplant that does well in my house. Shown to the left in the top photo above. It’s basically just a fancier relative of the spike that appears in just about every geranium planter ever seen.
D is the Artemisia Silver Brocade, a full-sun perennial, and E is the Flambé, a full-sun annual.
F & G are both varieties of pothos. F is a white (not cream or yellow) variety called Glacier while G is a silver and green variety sometimes called Satin Pothos.
Silver Green Planter – The Planting Diagram
At the moment it’s a pretty planter, but it will be interesting to see how it does over the summer and what is still alive in the fall. I think the biggest concern will be making sure I don’t over-water this planter.
If you enjoyed this post, don’t forget to share it with your friends! For more just like it follow me on Pinterest, Facebook and Twitter or sign up for regular updates by email.
If you have ever thought about starting a garden or craft blog of your own see how easy it is>>here<<.
This website uses cookies so that we can provide you with the best user experience possible. Cookie information is stored in your browser and performs functions such as recognising you when you return to our website and helping our team to understand which sections of the website you find most interesting and useful.
Strictly Necessary Cookies
Strictly Necessary Cookie should be enabled at all times so that we can save your preferences for cookie settings.
If you disable this cookie, we will not be able to save your preferences. This means that every time you visit this website you will need to enable or disable cookies again.