Sunday and weekend chores

We’ve been knocking off some of the more tedious chores the past two or three weekends. Things like cleaning out the shed (my boys), cleaning the eaves troughs (me) and washing siding (also me).
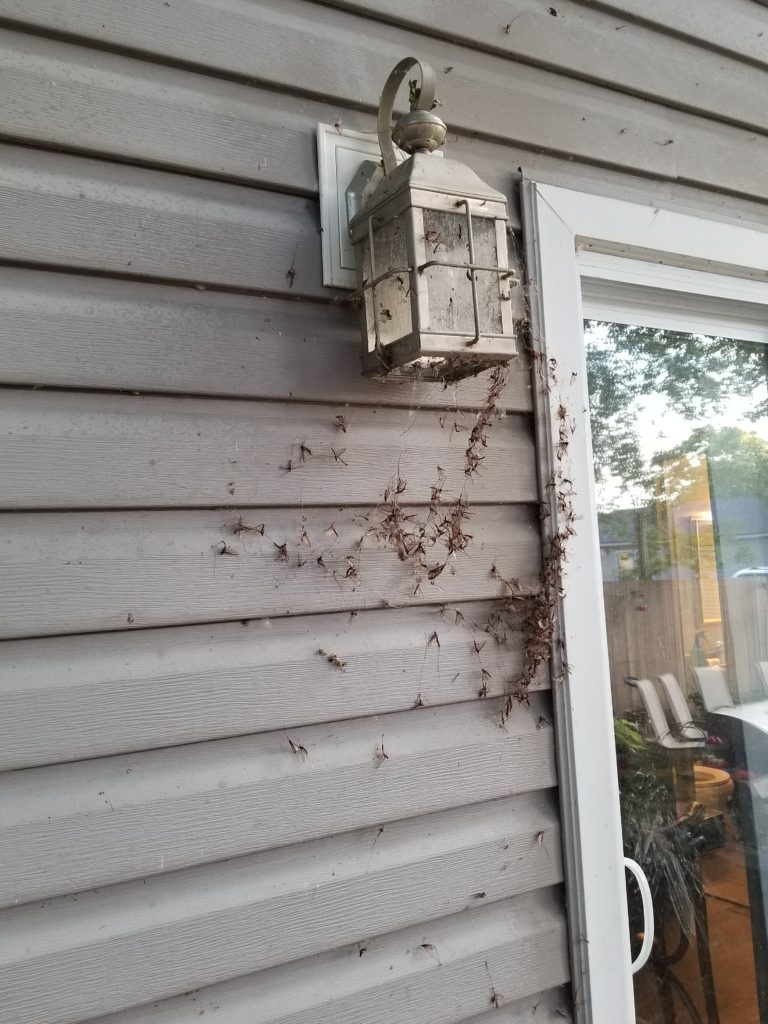
All that is left for the siding is the front of the house and deck. Then it’s bye-bye swag of yuck. Fish flies seem to be done in my area, even if they’re still going strong elsewhere – like this ball game that had to be called because of fish flies – Windsor ball game called on account of fish flies
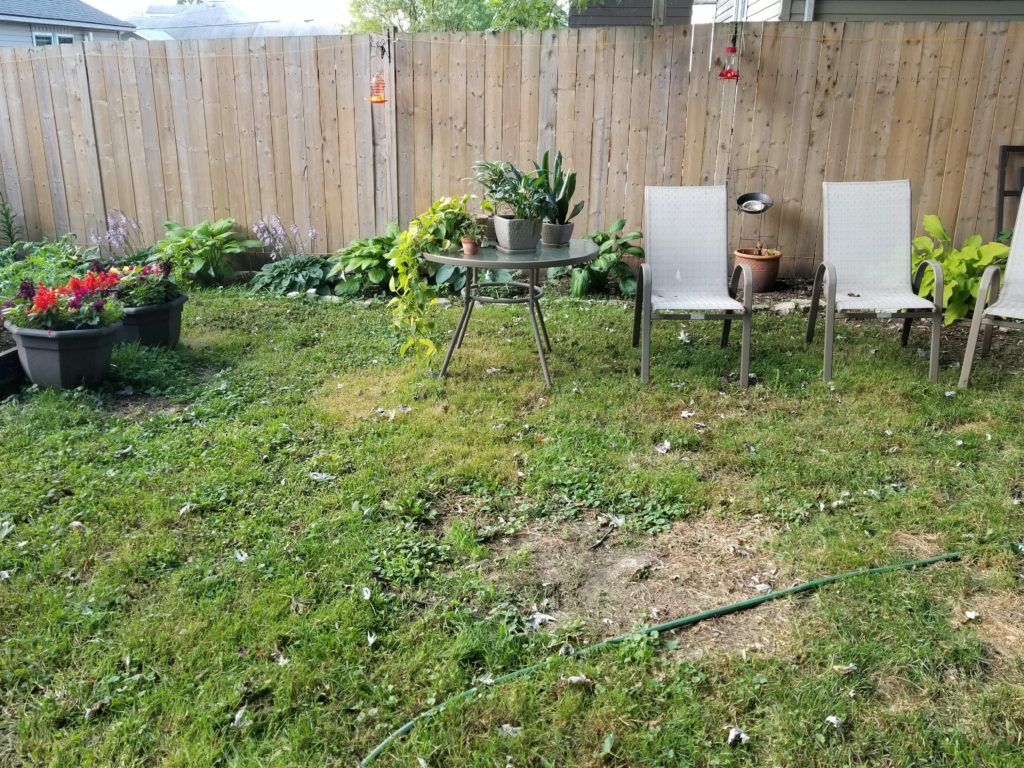
Yesterday I scrubbed down all the outdoor furniture – I’ll move it back once the front of the house is respectable again. This is actually where I hope to someday move my patio so I can sit with my coffee in the morning and admire my gardens. Maybe watch some hummingbirds and orioles at the feeders.
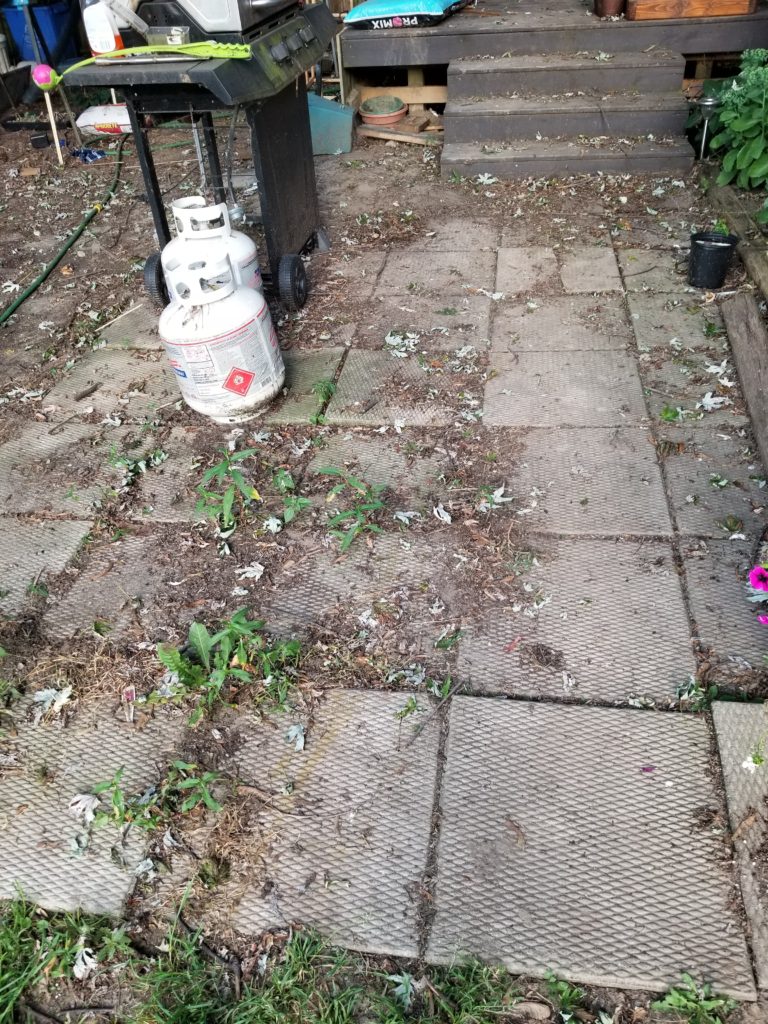
Right now it’s off the deck and just isn’t working. First because it wasn’t installed properly – it should have had a bed of sand underneath to level it out. Second, because of the location. It should be a path there to elsewhere rather than a destination.

Ho

What’s blooming?
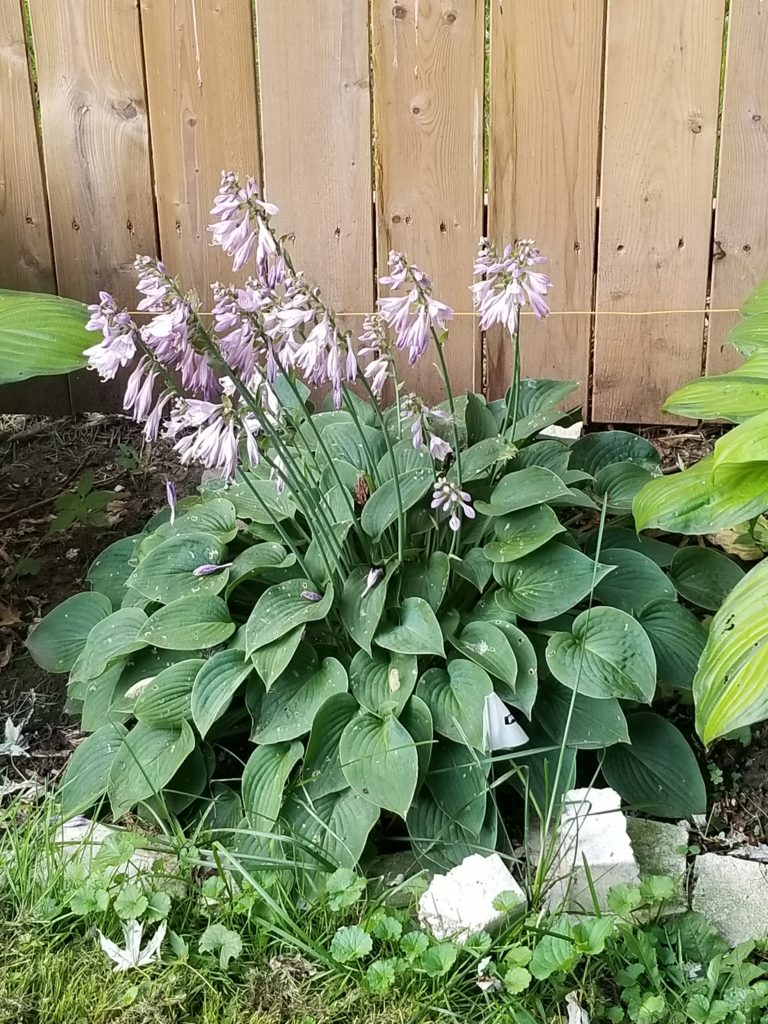
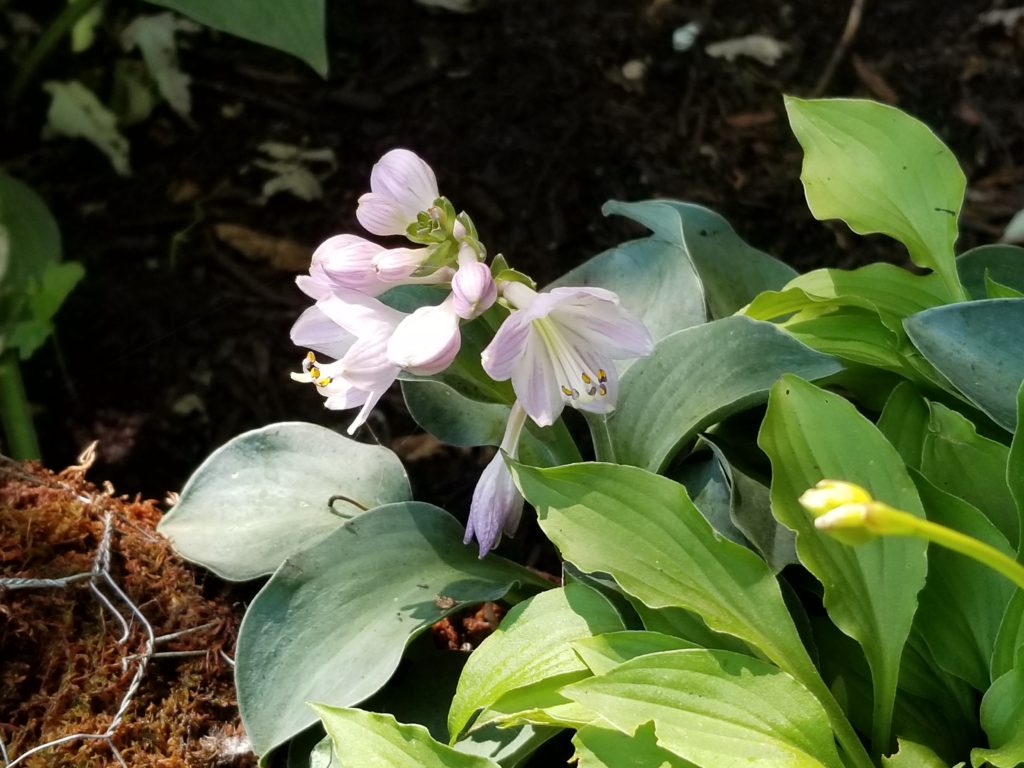
Hosta ‘Blue Cadet’ is in flower and doing it gloriously. Blue Cadet is a spreader so even in my relatively young gardens, there’s quite a bit of it. As you can see, it is generous with the flowers too.
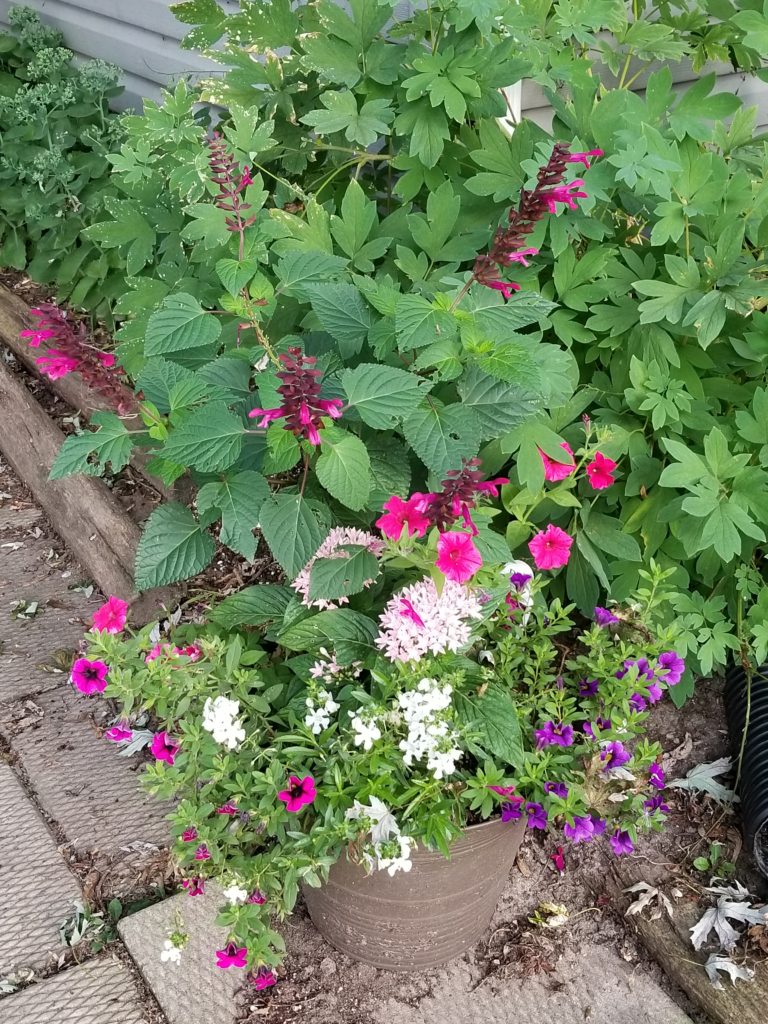
This is another one of my planters that is finally all in bloom. Other than the Angelonia it is entirely PW varieties. Salvia ‘Rockin’ Fuchsia’, Penta ‘Sunstar Pink’, Supertunia ‘Vista Paradise’, Calibrachoa ‘Superbells Compact Blue’ and ‘Superbells Blackcurrant Punch’. The Penta doesn’t really fit, but it had to go somewhere!
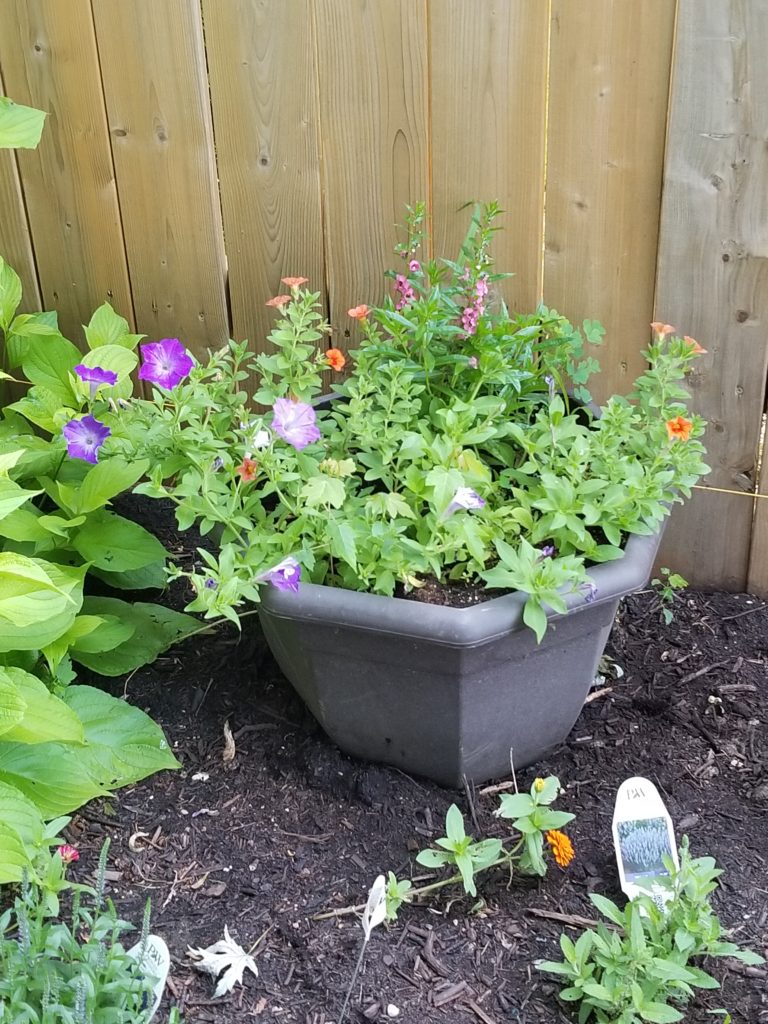
I hesitated to share this one because the color of the petunia doesn’t photograph accurately – at least not on my phone.  The petunia is Wave Lavender Sky Blue along with Angelonia ‘Serenita Rose’ and Calibrachoa ‘Kabloom Orange’. The Petunia is really more blue – almost fluorescent it’s so bright and the Calibrachoa is really a far more intense orange.
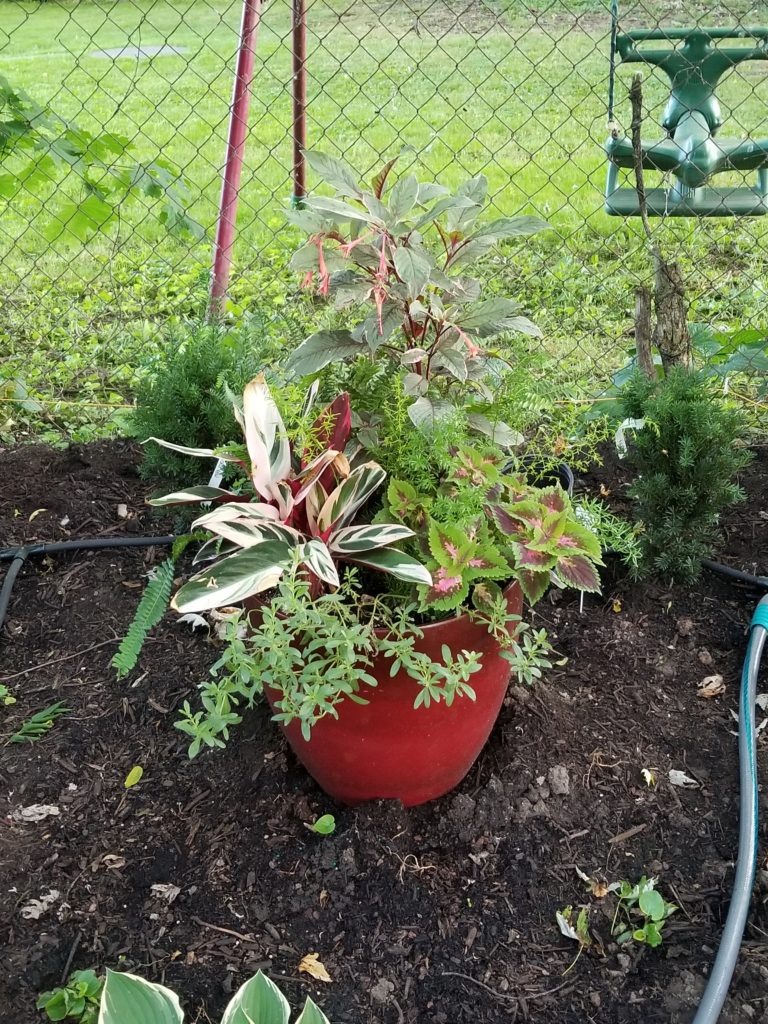
As expected the Calibracho in this planter has stopped blooming. There really isn’t enough sun for it here, but that’s why foliage is so important for shade gardens. I mean honestly, with all that color who needs flowers?

And then it rained…

We had a hard rain last weekend that really knocked around some of my plants.
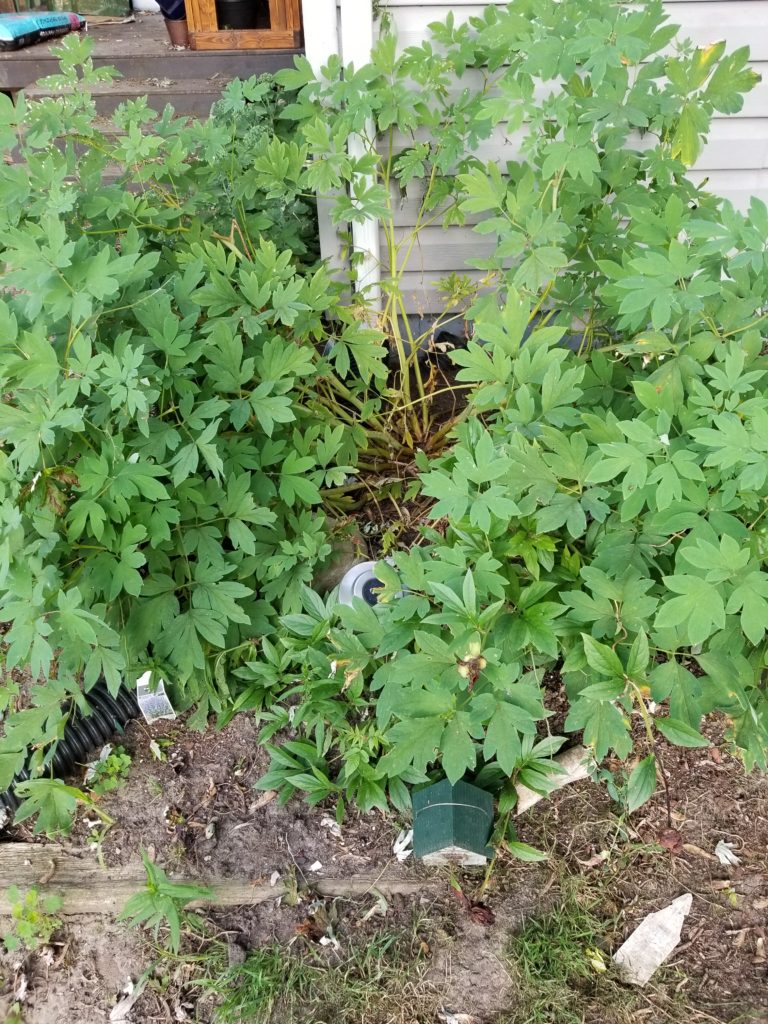
The bleeding heart split down the middle and will need to be cut back. Thankfully I still have a few annuals I can stick in the gaping hole it will leave.
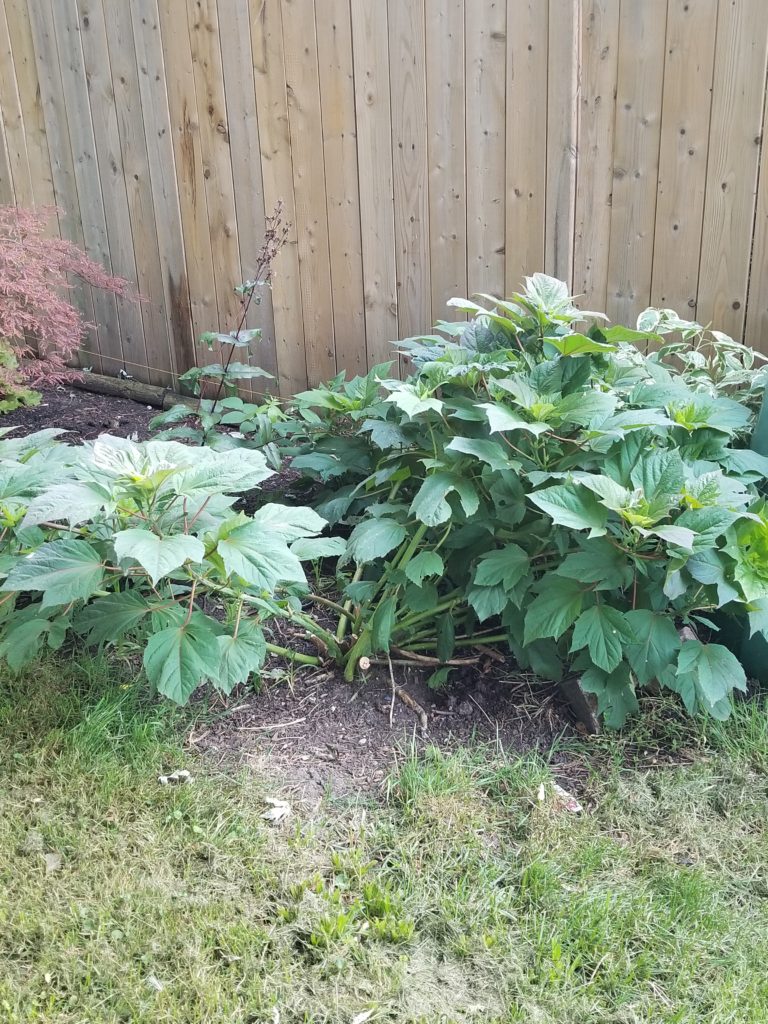
My hibiscus took a beating too. Hopefully next year I’ll remember to put a plant support around it. I think when they are planted in full-sun they can take a bit more wind and rain, but there’s no such thing as full-sun in my yard so it’s in part-sun and making do.

The Waterfall!

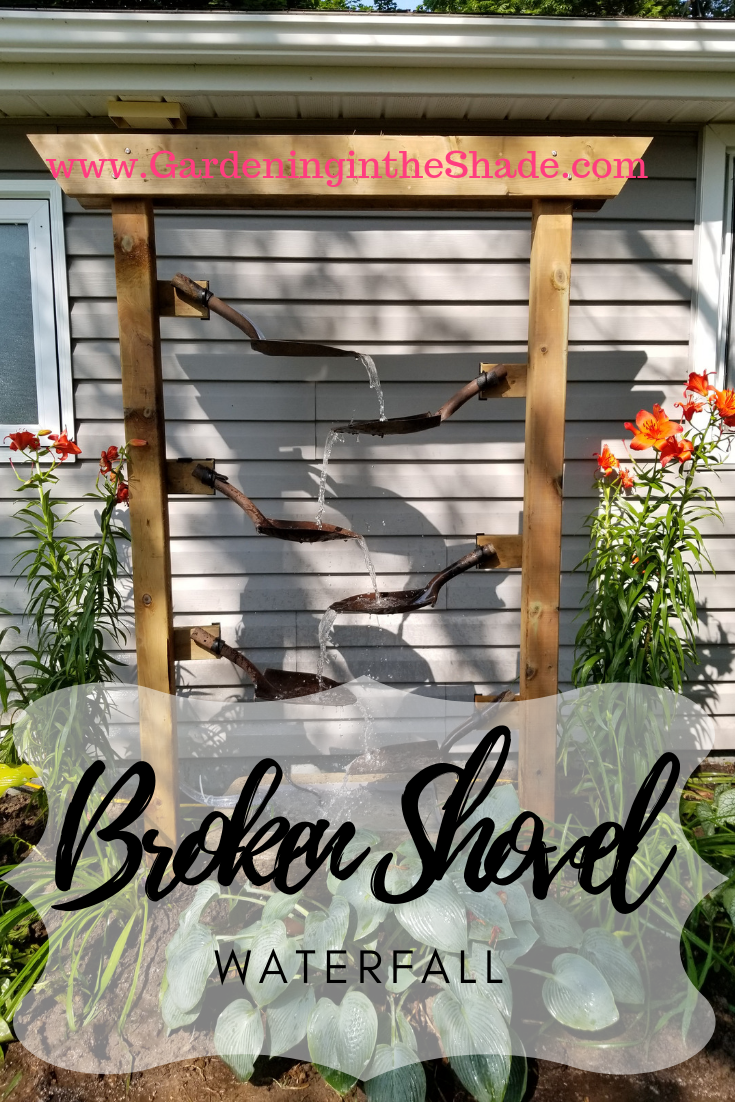
In case you somehow missed my bragging all week, I made the most awesome waterfall last weekend.

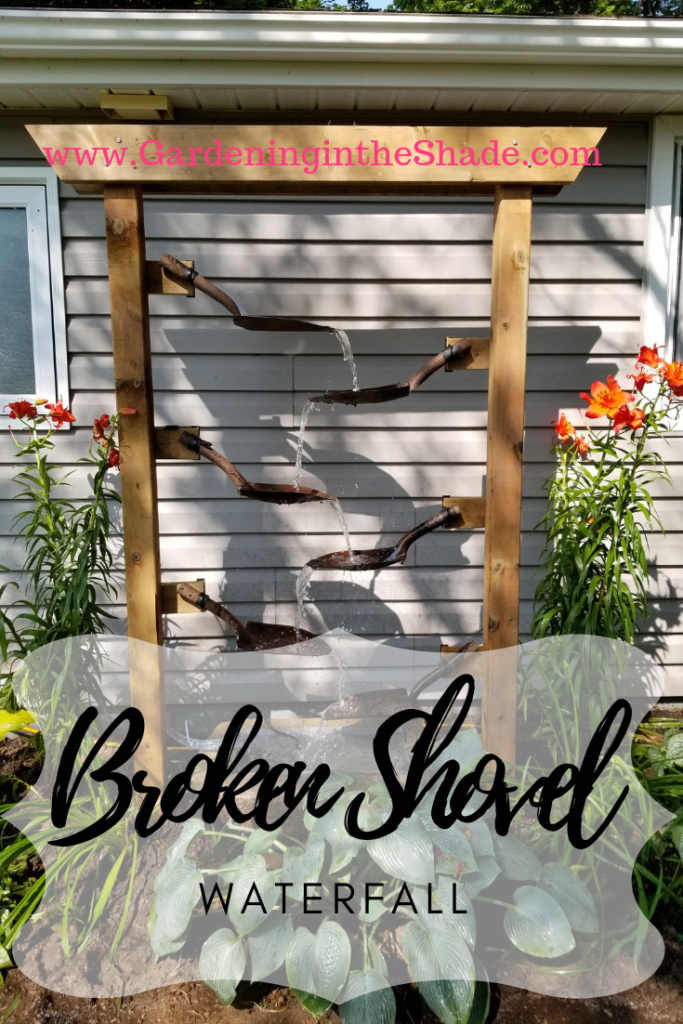
It’s made with broken shovel heads and honestly I love the thing. You can see how I made it here>>>Broken Shovel Waterfall – With No Welding!

Have a fabulous Sunday!

Broken Shovel Waterfall – With No Welding!

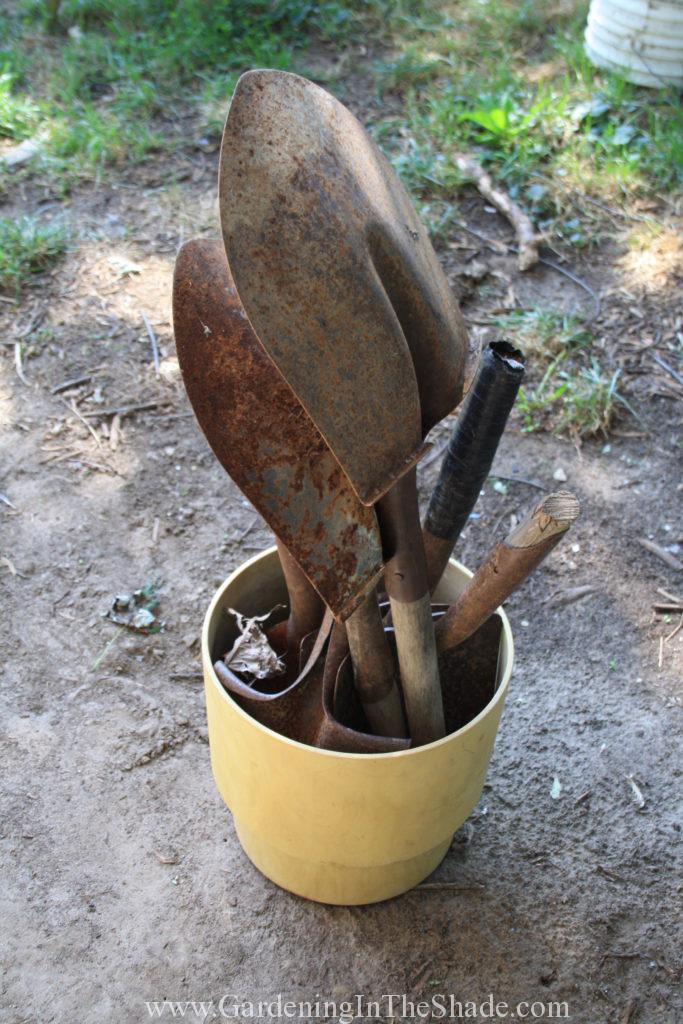
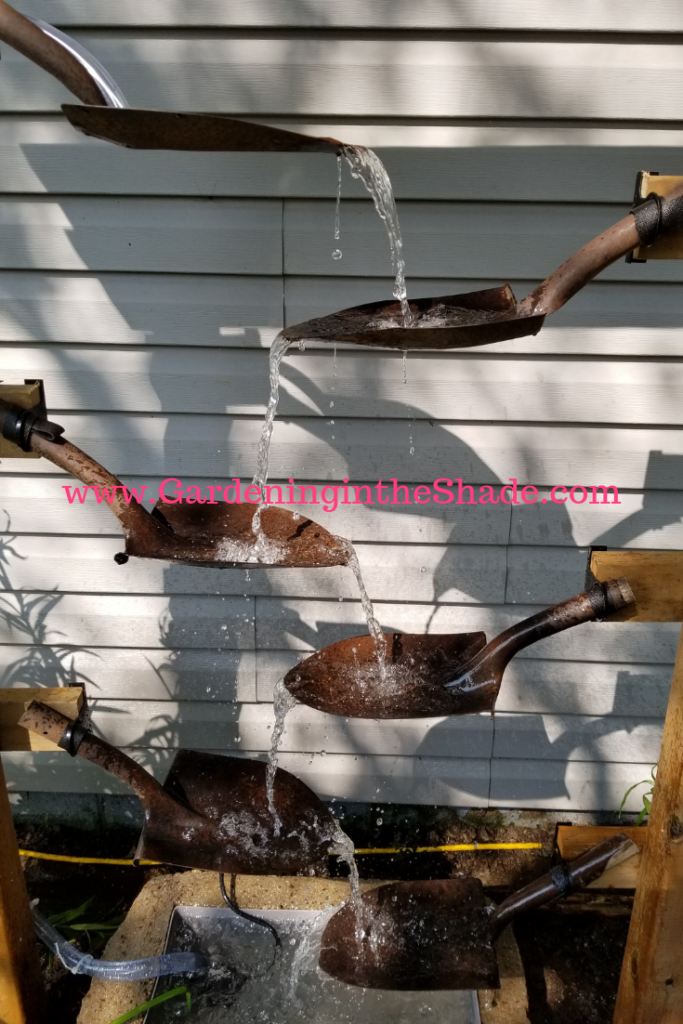
It’s hard enough to find a use for one broken shovel, never mind six of them. But I did! I made a broken shovel waterfall with them, no welding necessary! Let me tell you how I did it because it is so freaking amazing I hardly believe I made it.

The Idea

We have a problem in my neighborhood with irresponsible dog owners leaving their dogs outside to bark. After 4 years of it I finally called by-law enforcement which has diminished the problem some. The problem is after being annoyed for so long, it’s almost impossible to ignore even reasonable barking.

Planting the hedge was step one in my efforts at noise abatement. But since it will be a few years before the hedge is big enough to pull its weight, I decided a water feature would be step 2. I wanted the tinkle of a water feature to help distract from the barking. Except it had to be unique, it had to be DIY, and it had to be amazing. Nothing I saw on the internet was working for me, and then I remembered those broken shovels!

The Broken Shovel Waterfall

Every waterfall has three main parts. A reservoir or basin of some sort to hold the water, something for the water to spill over, and a pump.

The Basin

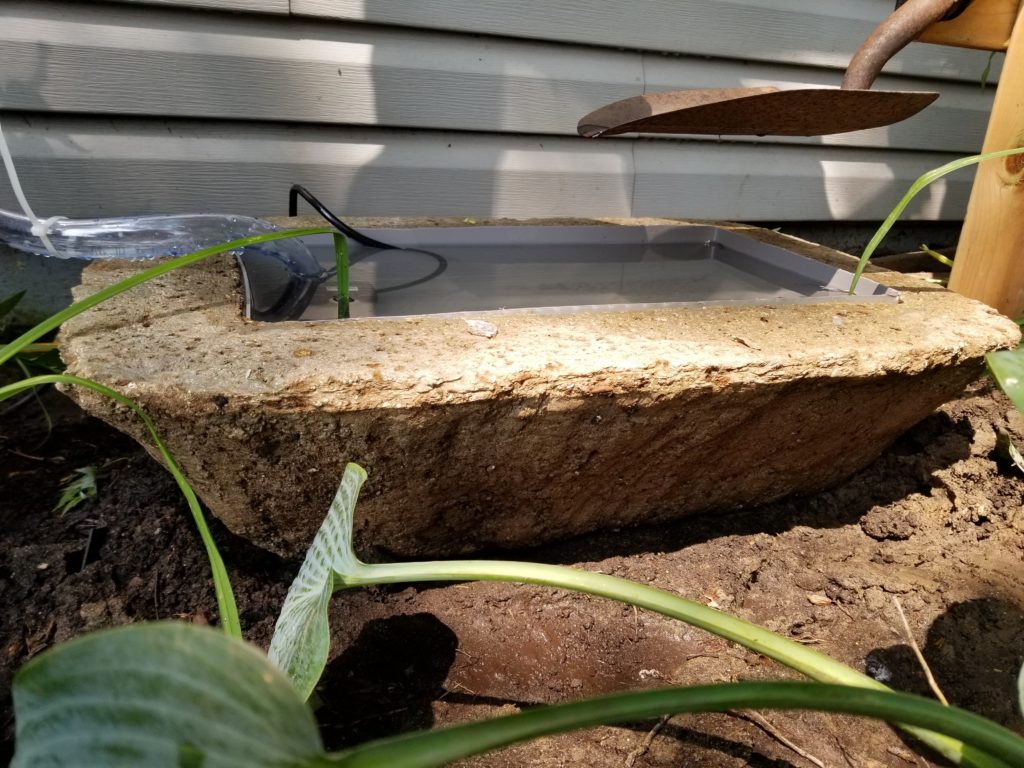
I considered using a buried reservoir, but decided a disappearing fountain wasn’t what I wanted. An old galvanized wash-tub would have been lovely but they are rare to find and expensive when you do see them. I’ve seen a shovel waterfall on Pinterest that uses a wheelbarrow, but that wasn’t for me either. In the end I decided on a hypertufa trough.

That was hiccup number one. I had searched on the internet a bit, saw others used hypertufa for water features and assumed all would be well. Except hypertufa is very porous and water would only stay in my trough for a few hours at best. For now I’ve solved that problem by putting the plastic bin I used for my form back in the trough. I painted it gray to make it less obvious – I think I would prefer it black.

The Waterfall

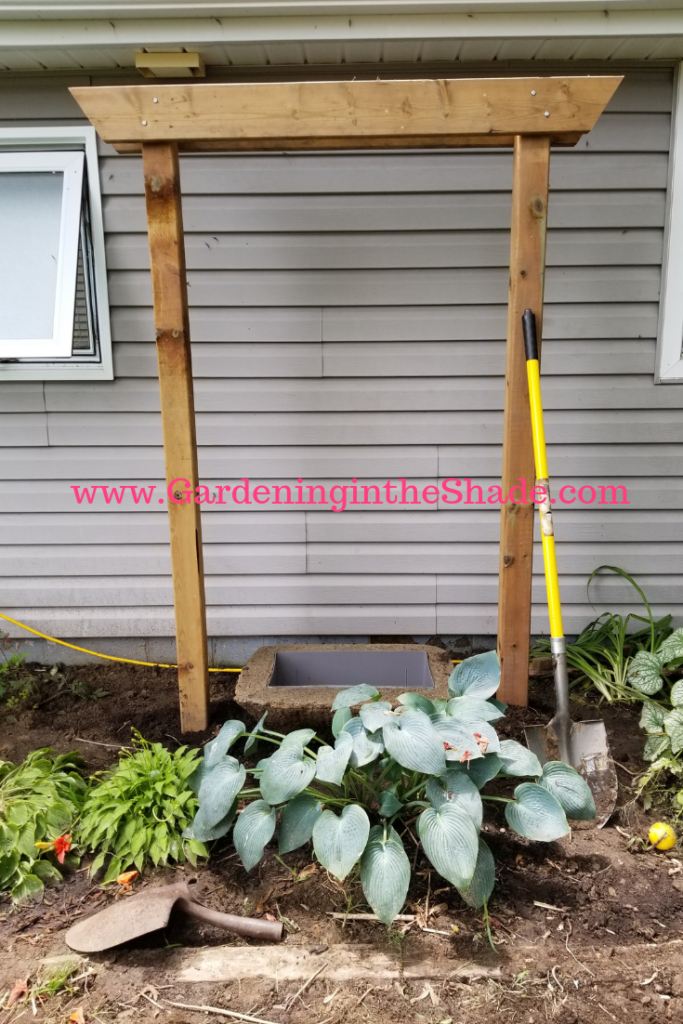
My next issue was how I would support my shovels for the water to spill over them. I considered a few options like old bi-fold doors or building a fake picket fence. My main fear was that if I didn’t choose wisely, my broken shovel waterfall would look like I tried to throw every project ever seen on Pinterest into one. In the end I decided a simple arbor was the way to go.

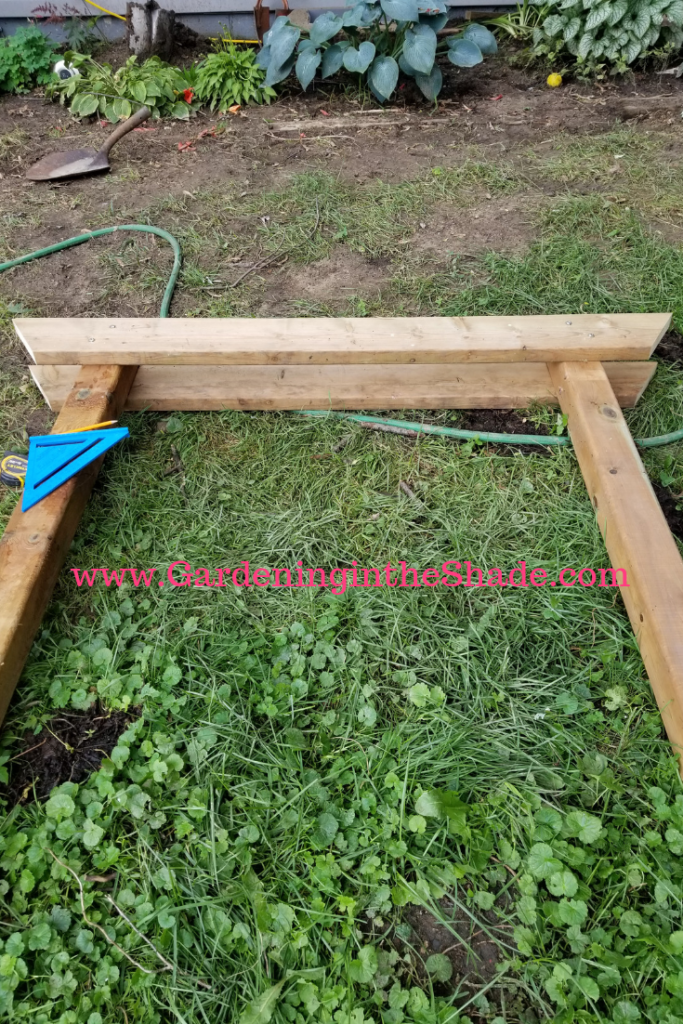
I dug the holes for the posts on Saturday, despite a heat wave that had the ‘feels like’ temperatures flirting with 100. There were also biting flies, vicious mosquitoes, the stickiest mud I’ve ever seen and a thunderstorm. I got a blister even. But the holes were dug and the arbor assembled.

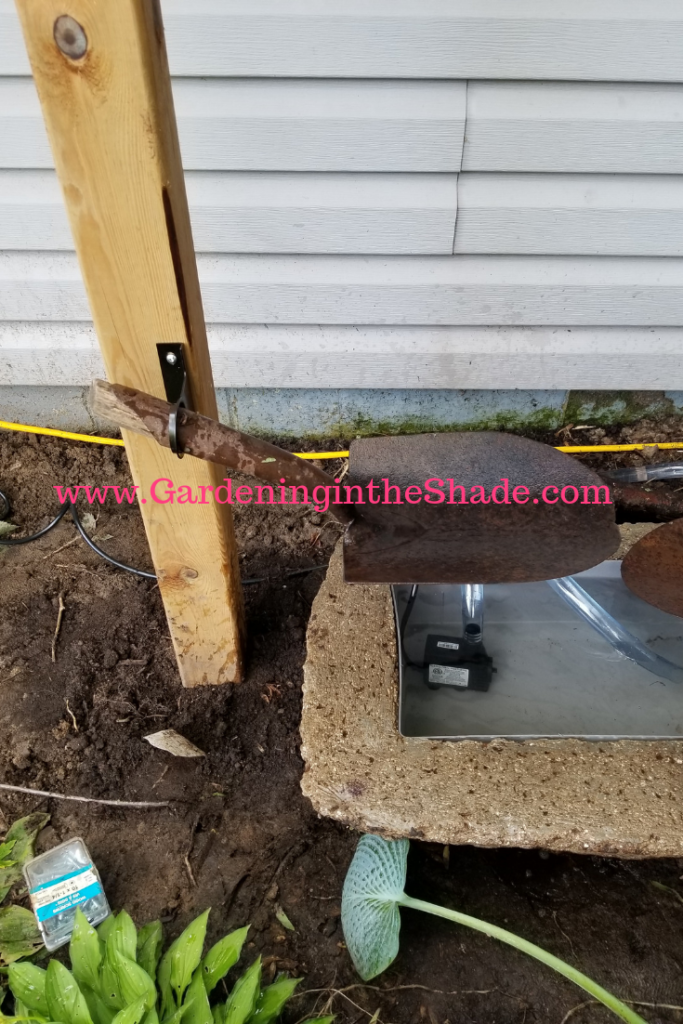
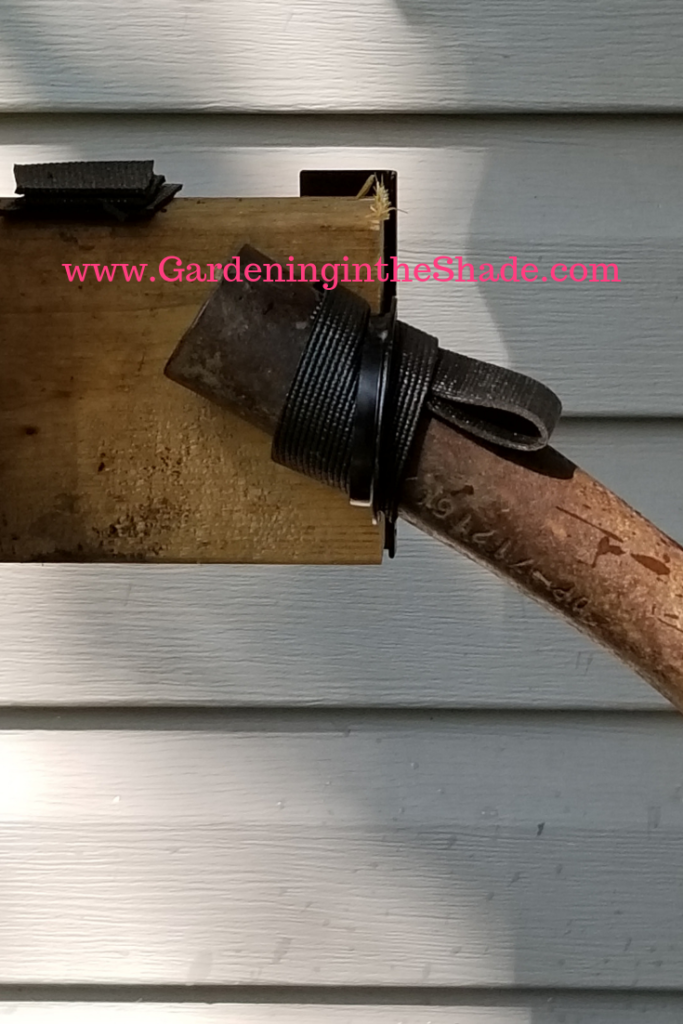
On Sunday, my youngest helped me get the arbor up. After everything was level, we just tamped soil around the posts. Next was attaching the shovels. It took me a long time to come up with a way to attach the shovels. At one time I considered removing the old handles and replacing them with dowel. Removing the handle from a shovel is not an easy job so I was happy to not need to do that. I used pipe hangers instead, the shovels balance in them perfectly.

I first tried attaching the shovels to the front of the posts. The problem with that was they weren’t long enough to have the water spill from one shovel to the next below.

I solved that problem pieces of 2 x 4 on the back of the post. It works out perfectly and keeps the shovel from listing to the side.

I used pieces of black shelf liner to stabilize and ‘tune’ the shovels so the water would fall from one to the next below.

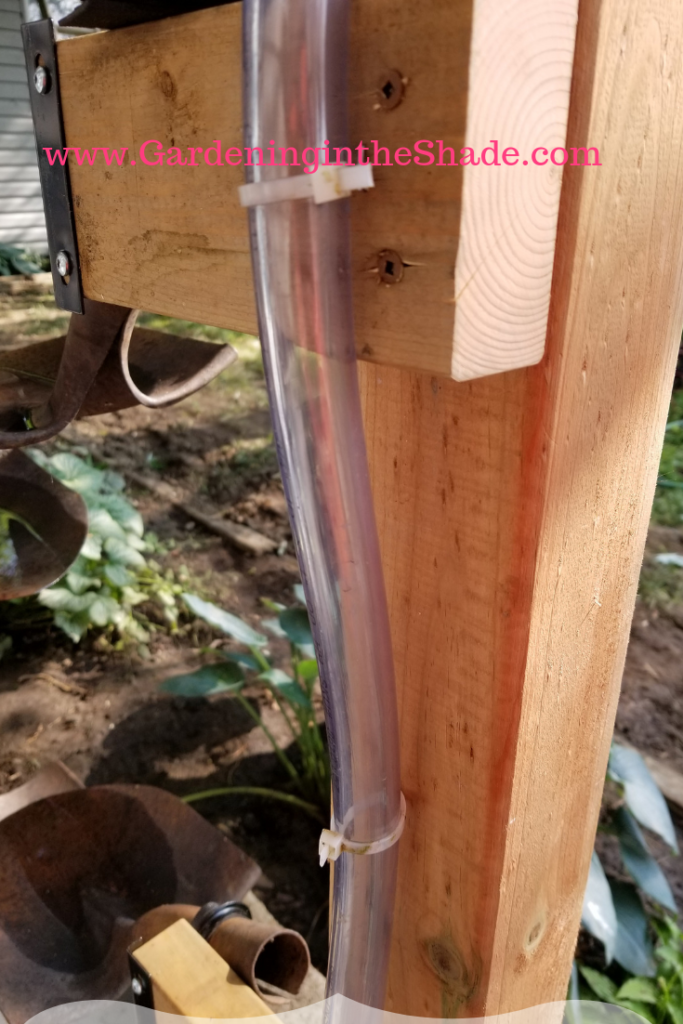
The tubing needed for the pump was a bit of a disappointment. I hadn’t realized it would be so large and hard to hide. It is attached to the back of the post with zip ties that I stapled to the post.

The pump

I used a pump that was rated for 5 feet of lift. I wish I had gone with the next size down even though it was only rated for a 3 feet of lift. This pump just had too much water flowing through even at its lowest setting. I’ve had the pump since the end of May so there’s no returning it. Rather than buy another pump, I cut a small hole in the hose below the water line. This lets some of the water divert right back into the basin and reduced the flow to a better rate.

Broken Shovel Waterfall

I can’t even tell you how excited and happy I was last night when I finally got everything running and could see that it was really going to work. I just kept saying “My waterfall turned out so freaking cool!” on repeat and annoying my boys.

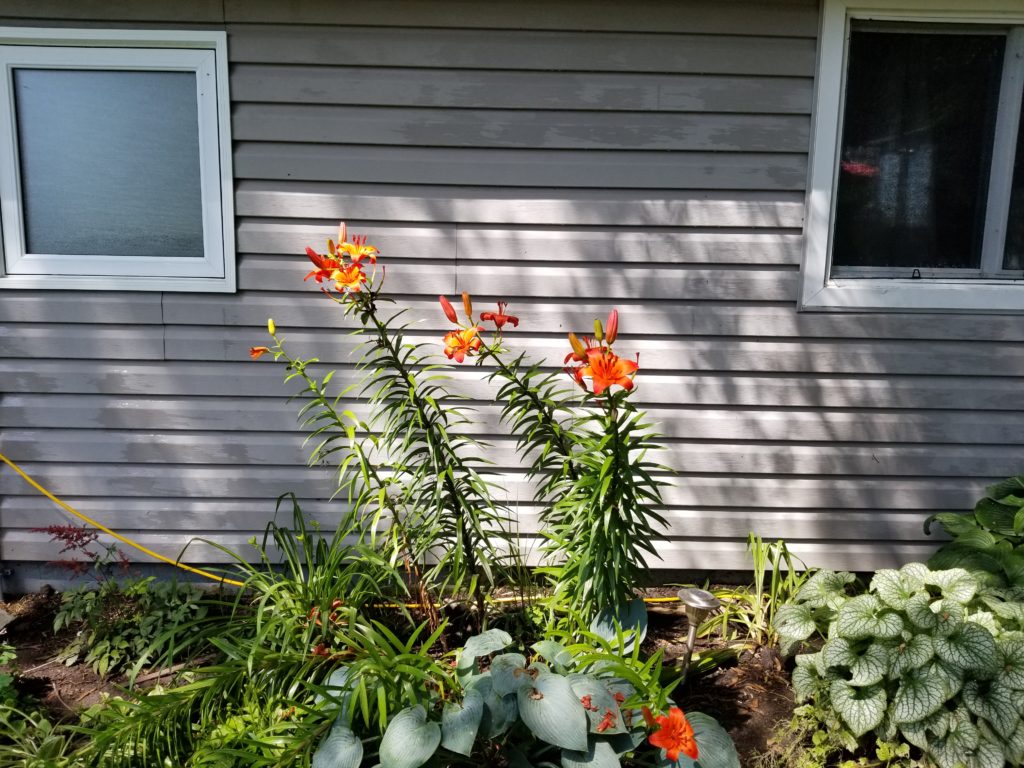
Here is the space before the waterfall.

And here it is after.

Broken Shovel Waterfall

I think the space is much improved. For now, I have the pump unplugged – everything is just so muddy from the rain and me playing around to get the water flow right. Once the ground dries up some the little bit of splashing won’t be a problem and the plants will love it. Those poor gangly lilies finally have something tall to lean up against. Maybe I’ll be able to find some slightly shorter ones to help balance them out.

What do you think? Would you build a waterfall out of broken shovels?

Sunday and Plants are Blooming!

One of the worst parts of middle age is that I’m always awake early. No more sleeping until noon or even 8 o’clock for this chick. So every weekend I’m wide awake at 5 am ready to start my day. Then for the first 3 or 4 hours I’m awake I have to be quiet because it’s so early. Which sucks monkey balls because everything I’m eager to work on today involves power tools. Even chores I just want to get out of the way involve waiting for the rest of the world to wake up. Usually it’s the weekly grocery shopping, but I took care of that yesterday while it was raining.

A Turtle Update

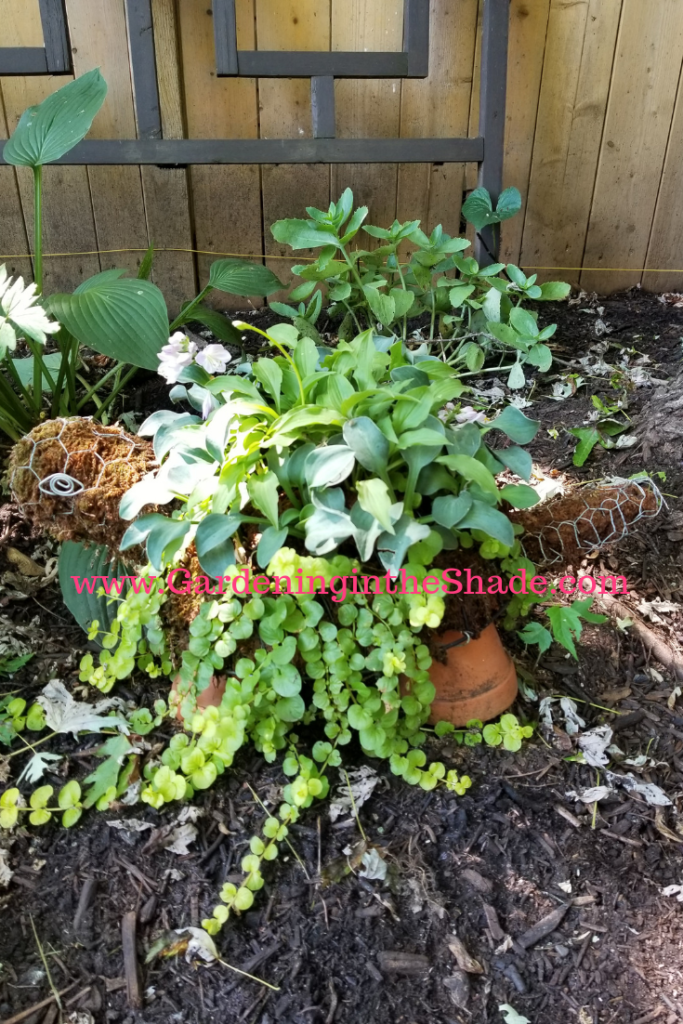
Just look at this guy! He’s gorgeous. The best part about not using hens and chicks for his shell is there’s no waiting for them to fill in. Here he is just a month after planting and everything is lush and full – and flowering! I just adore the flowers on some of these dwarf Hosta, they have all the bloom of any hosta but it’s condensed into a tighter more compact sturdy form. If you missed the post showing how I made my turtle you can see it >>here<<

Hosta in Bloom!

I like the flowers on all hosta, so I was shocked to find out a couple of years ago some people cut the scapes off before they can bloom! Above is a close up of the bloom on Blue Mouse Ears.
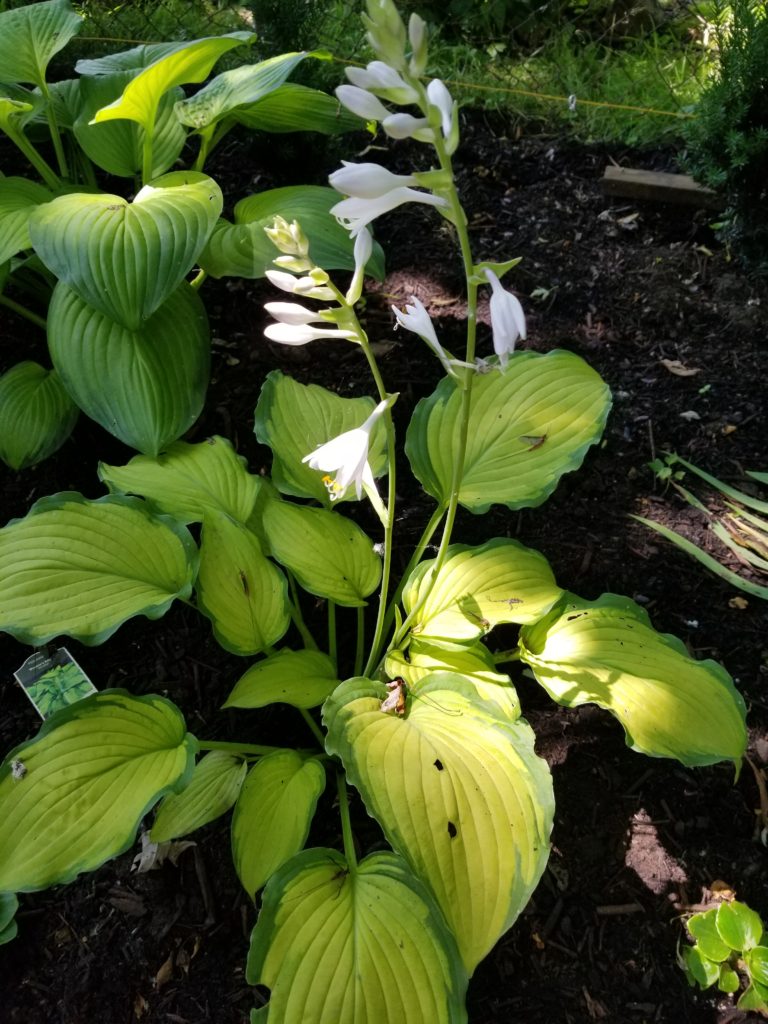
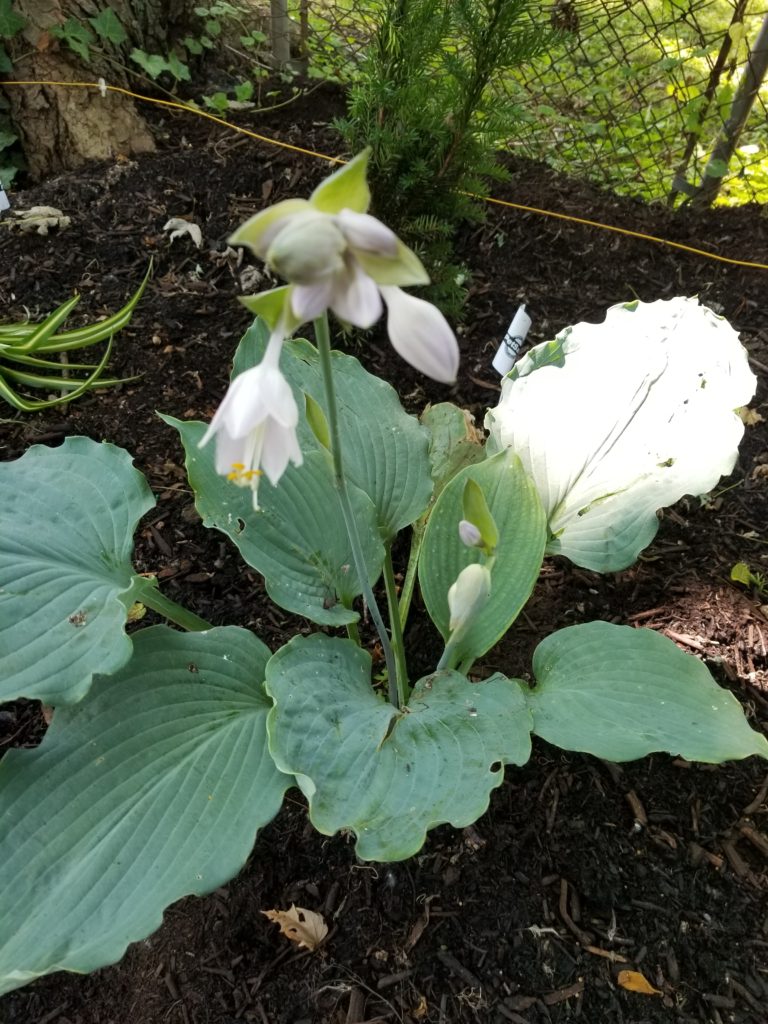
Prairies Edge is flowering. I wasn’t sure if I liked this one when I first got it, but it adds a nice bright spot to the garden. You can see the stupid May Flies hanging out on some of the leaves. Some of the leaf damage might be from slugs, I suspect maple keys are the culprit for the two holes though.

Diamond Lake is also in bloom. The leaves on this one are more silvery than blue. Both Diamond Lake and Prairies Edge seem to have a more upright habit. It will be interesting to see how they look in a couple of years with some size on them. Both seem to like their new home in the back garden.

Mosquitoes are fierce this year

With so much rain this spring there is a lot of standing water around. Since mosquitoes can basically breed in a bottle cap, there are a lot of them this year! I’m just one giant mosquito bite at this point. Our backyard has always been a haven for them because of all the shade and I’ve been back there a lot this year working on the new garden.

I know there are tons of “Plant This To Keep Mosquitoes Away” type articles out there. Personally I think every one of them is absolute hogwash. They all smell lovely, but mosquitoes don’t give a flying f*** about some lemony smelling citronella. So I rely on two things to make the mosquitoes bearable. DEET and an oscillating fan. An oscillating fan on the deck makes it possible to sit outside in the evening, and even keeps the flies away when they’re being miserable little jerks and chewing on ankles.

May Flies

I made a horrible mistake this week. One evening I went to sit outside and turned the outside lights on. I realized it was raining and went back in the house. I left the lights on! So now my house is absolutely covered in fish flies. It’s a bit soon to wash the siding – I don’t know if they are finished yet – but I suspect I’ll be looking after that chore one evening this week. I have swags of cobweb and dead fish flies hanging from the outside lights and it’s looks disgusting.

I used to use my power washer for that job, but it’s a cranky beast. Now I just use a scrub brush on an extension pole and a hose. I can have the house entire house clean in the time I would normally have spent fighting with the power washer and sulking. My favorite detergent for the flashing and eaves troughs is Mean Green Cleaner. I don’t know if the green refers to the color or that it is environmental, but it does a wicked job of getting the white flashing clean.

And that’s it! Finally it’s almost late enough to start working outside. Have a great Sunday!

Two Mini Hosta in Hypertufa Planters

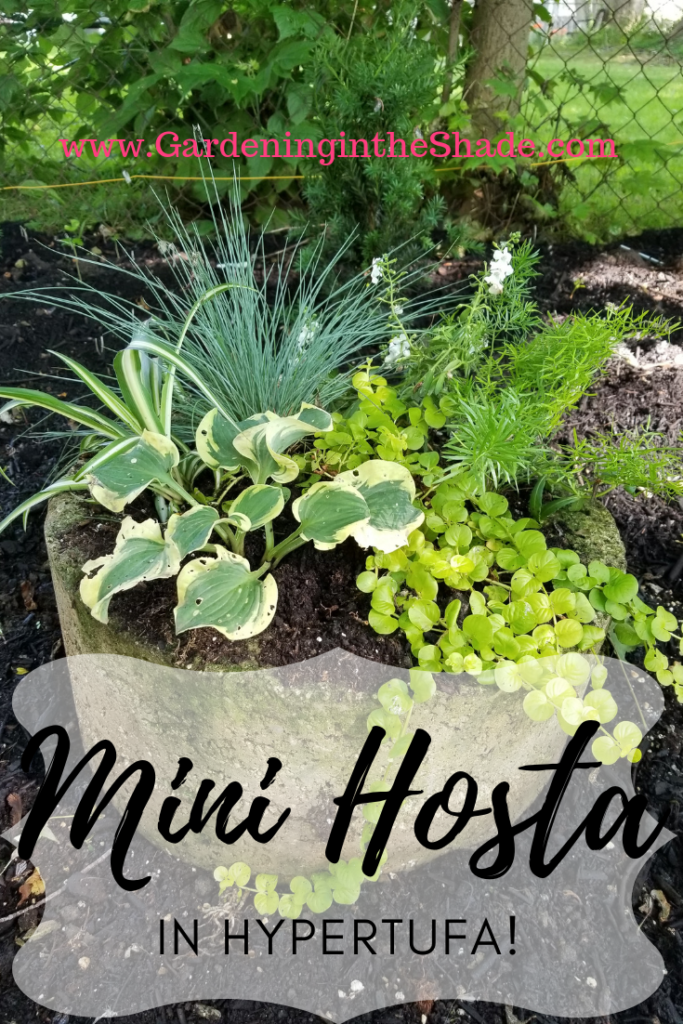
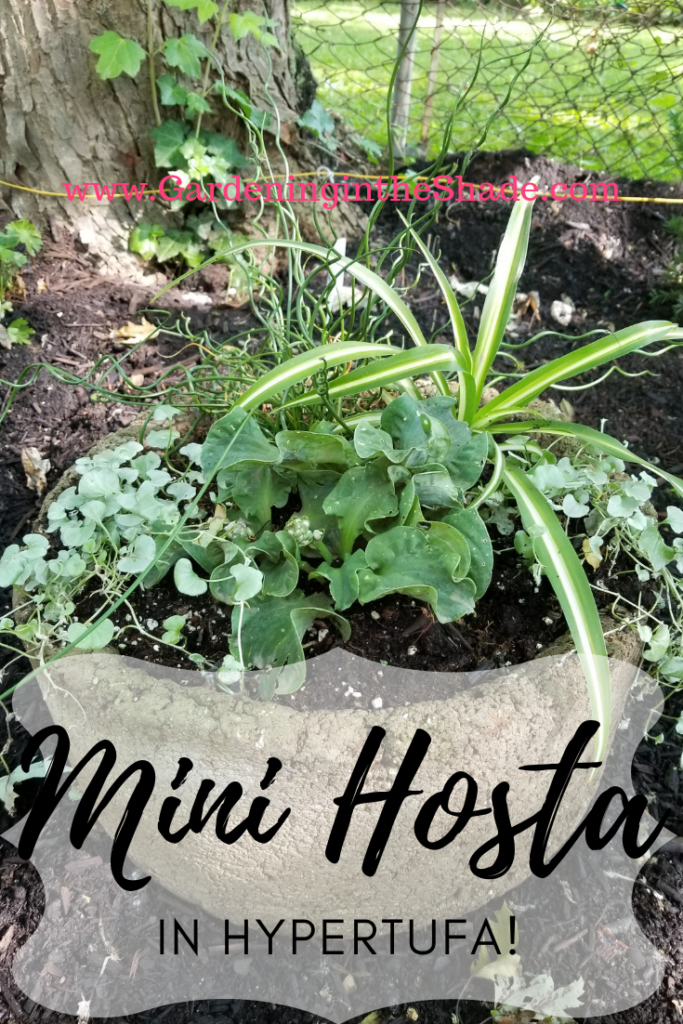
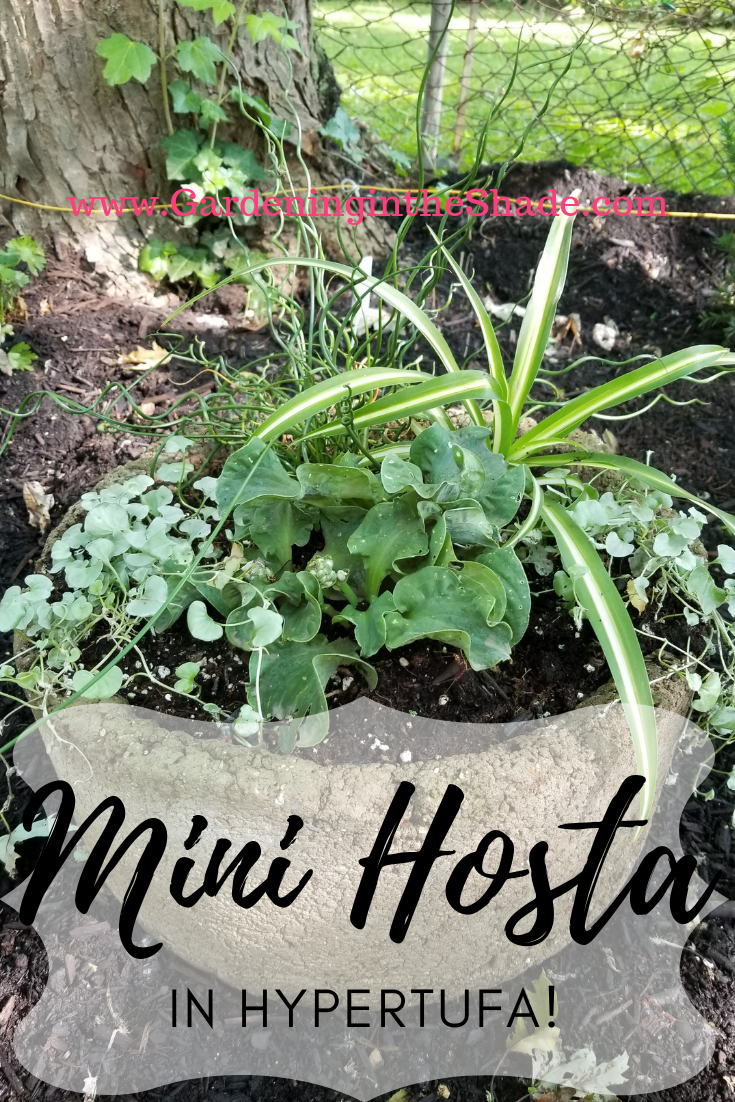
I have one last Mini Hosta planting to share, for this year at least, and it’s actually two. Two or three years ago I made a couple of hypertufa using the bottom of a trash can for the mold. I had seen a relatively squat planter with straight up and down sidewalls that I wanted to replicate. This year I planted mini hosta in those hypertufa.

Both planters feature hosta purchased last year. I had them planted under my Japanese Maple and neither seemed to be doing very much. I also wanted to have them in the new back garden where I could see them from the house.

Hosta ‘Mini Skirt’

Mini Hosta in Hypertufa

I planted ‘Mini Skirt’ with a blue fescue, creeping jenny, and white angelonia. The angelonia is one of those try it and see what happens situations. Angelonia is usually planted in full sun and tolerates heat well. It will get the heat but not so much the sun so it may work okay or it might completely flop. At the last minute, I crammed a leftover spider plant and some asparagus fern in there. Asparagus Fern will likely be scarce for the 2020 season, so if you like it in your planters I recommend you overwinter a bit indoors.

You can see the slugs or something have been at this one, most of that occurred when it was under the Japanese Maple. If it continues, I’ll sprinkle some Diatomaceous Earth around it.

Hosta ‘Church Mouse’

Mini Hosta in Hypertufa

Church Mouse has these lovely crisp and twisty blue-green leaves. When it flowers – soon, the buds are showing – the flowers are on short stems and they are perfectly proportioned to the plant. Church Mouse was an impulse buy, but as soon as I saw it I just had to have it.

For this planter I added a twisty juncus for height, some Dichondra Silver Falls for my spiller and since it is still a bit small for this year, a spider plant for filler although a little bit of fescue would better continue the blue & silver theme.

I’m happy with my Mini Hosta in Hypertufa. In the fall once the leaves have died back I’ll move both into the shed for the winter so the boy dogs can’t do what boy dogs do.

Have you planted any of the smaller hosta in your garden or do you keep them in pots? Have you made any hypertufa for your garden? Kim at the Hypertufa Gardener has all kinds of tips and ideas – I used her guidelines to make mine.

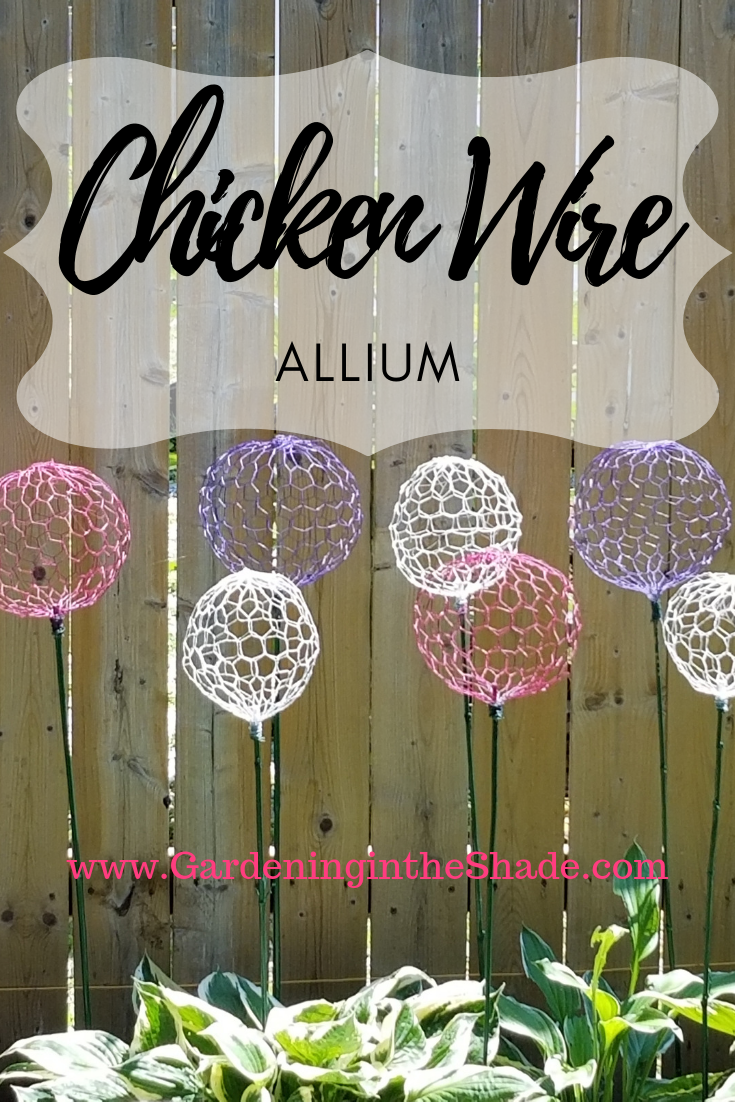
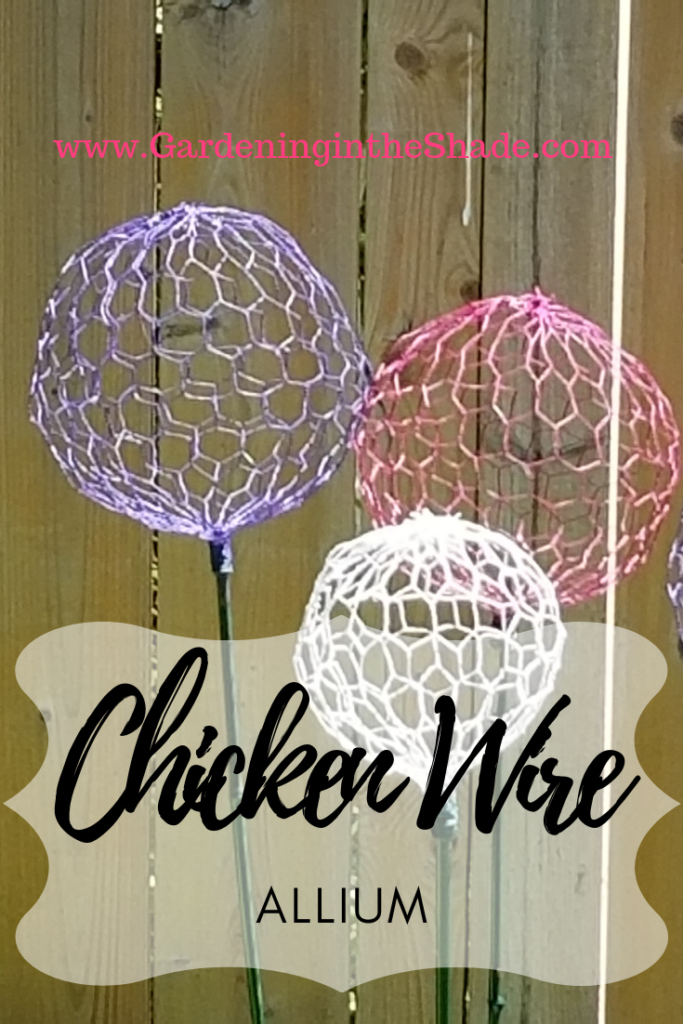
Chicken Wire Allium

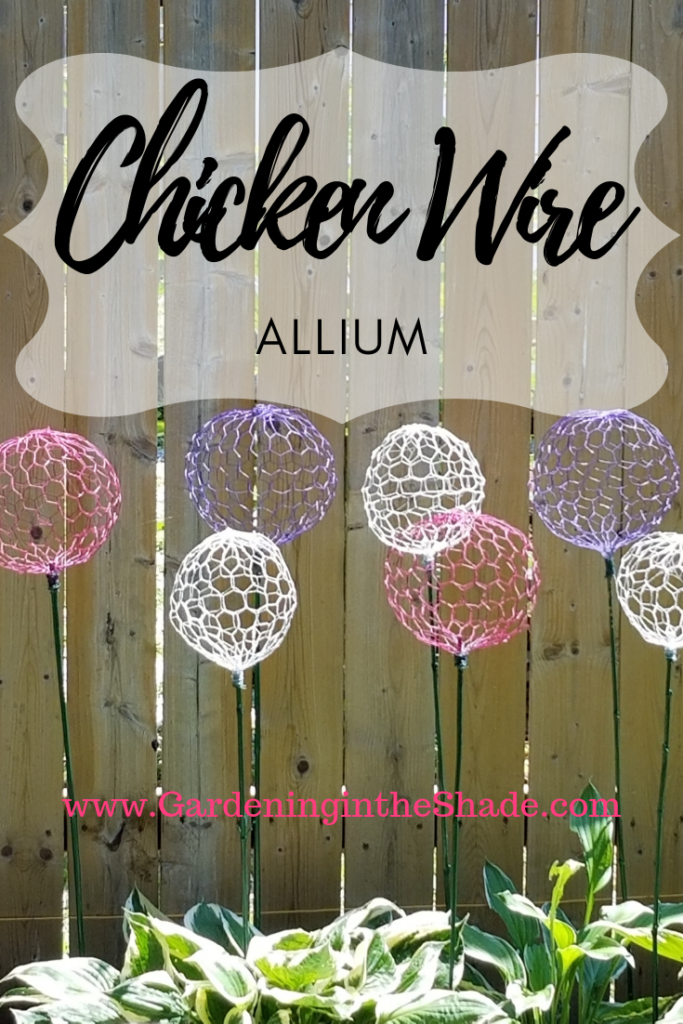
Chicken Wire Allium are one of those things that keeps popping up on my Pinterest feed. Every time I see them, I want them because Allium are such a cool looking flower. They’re like giant lolly pops in the garden. So as much as I try to come up with my own unique ideas here I just knew I had to replicate those allium.

Chicken Wire Allium

After a little bit of trial and error, these were pretty easy to make. With no power tools needed, it was something I could work on in the morning without disturbing the neighbors at the ridiculously early time I wake up every day.

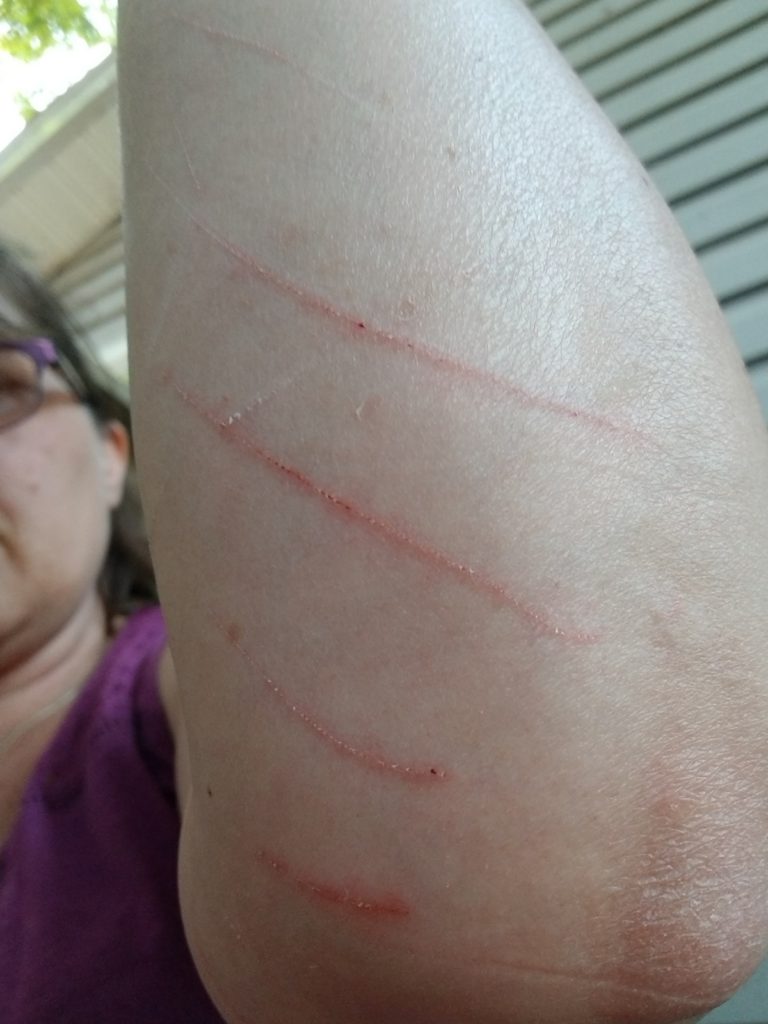
Chicken Wire is a bit bitey so I suggest long sleeves if possible. It also tends to tangle up in itself and what not, so it’s not really a good project for when you’re feeling irritable or impatient. As you unroll the wire, run if over the edge of your workbench to straighten it out so it doesn’t keep rolling back up on you.

Materials for Chicken Wire Allium

I’ve provided some links to the materials you will need, they are affiliate links.

How To Make Allium

Prep the Chicken Wire

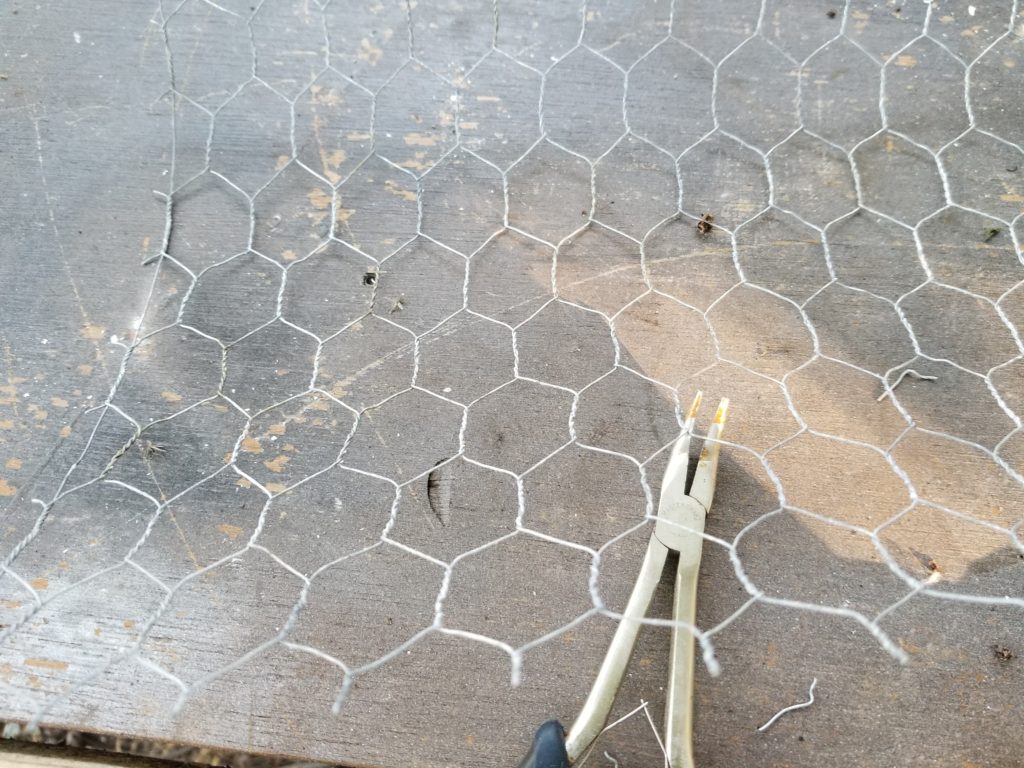
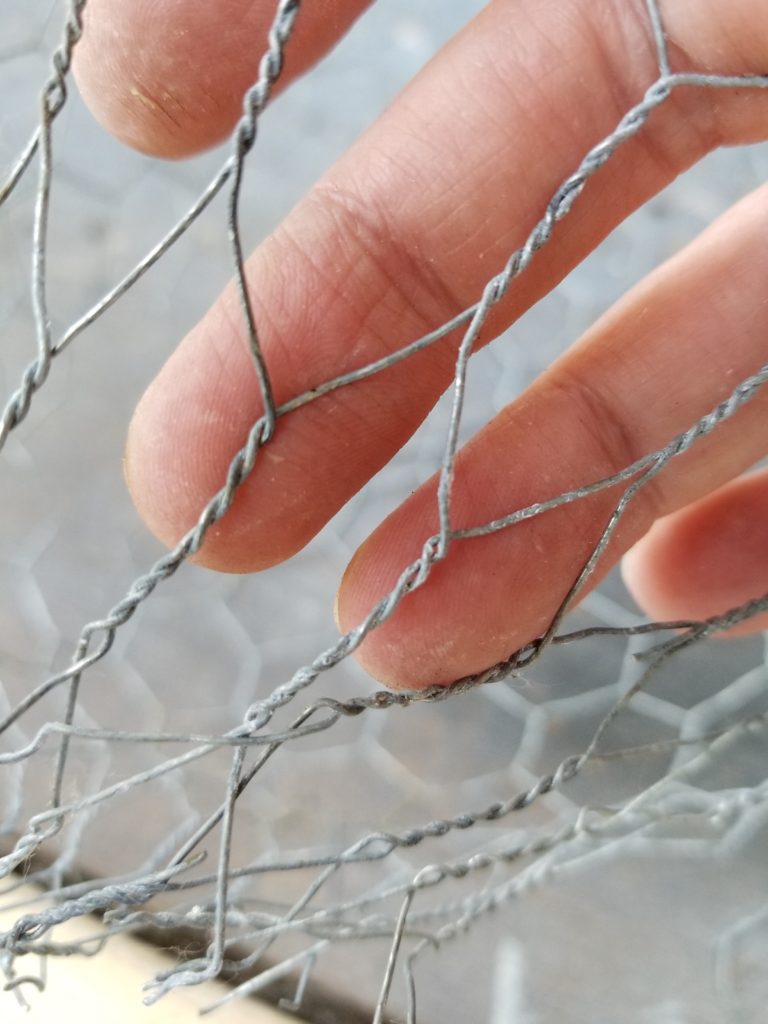
Prep for Chicken Wire AlliumAfter some trial and error, I found I got the best results with the chicken wire oriented as above. The twisty parts need to be running up and down.
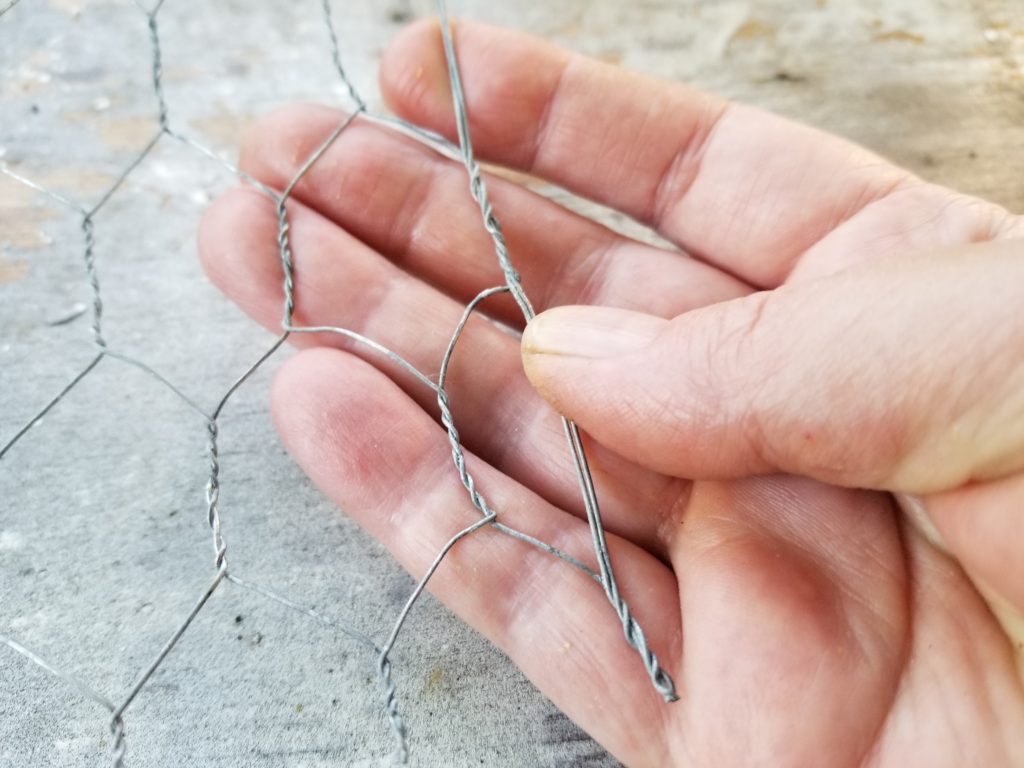
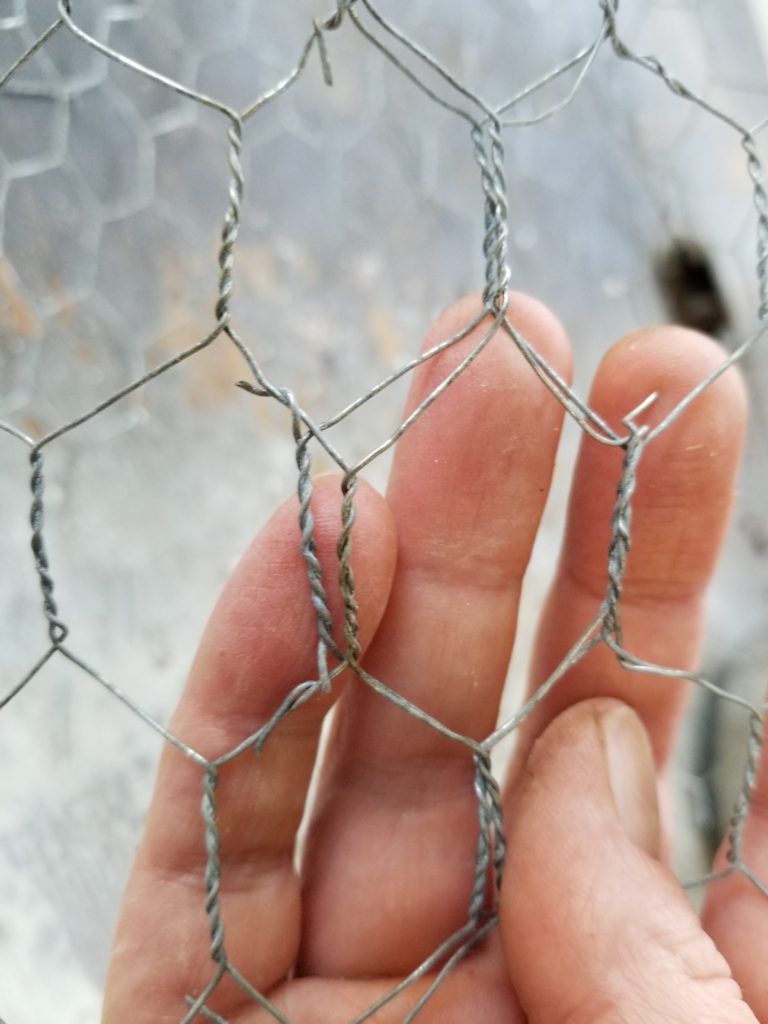
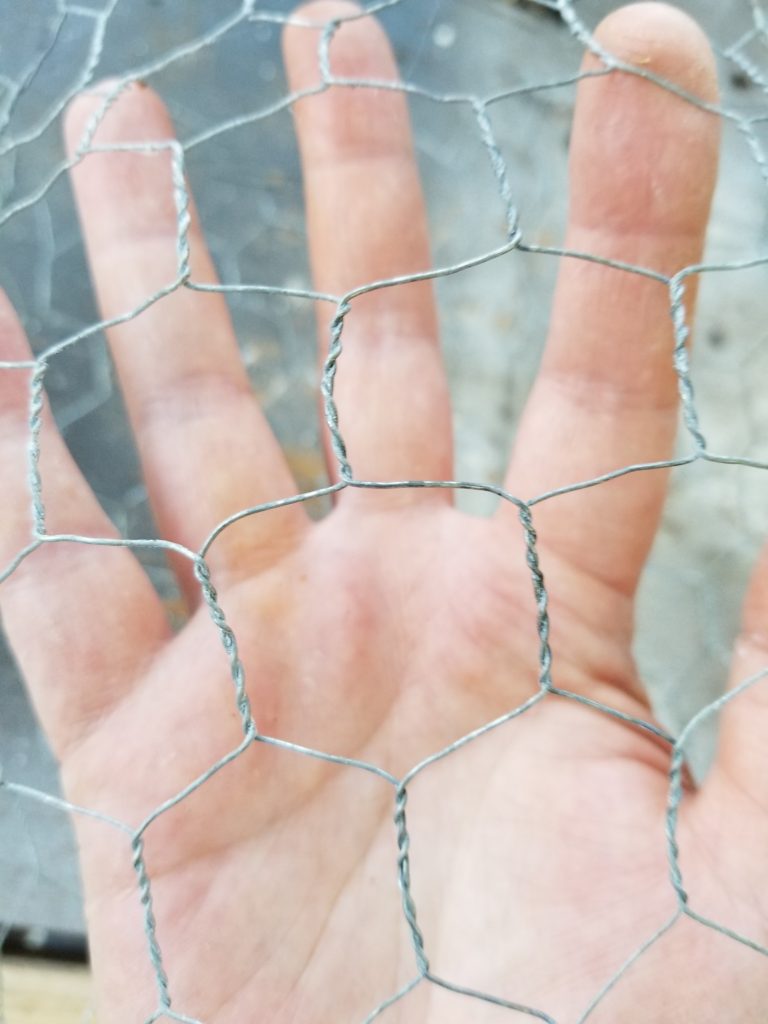
Usually on the edges of chicken wire there’s an extra wire added for stability – that needs to be trimmed off. If there are any running through the middle of your wire, trim out of the middle of each hexagon. If you leave them in it will prevent the mesh from stretching as it needs to. Cut a rectangle of chicken wire for each allium as below.

  • Large Allium – 14″ high x 21″ wide
  • Small Allium – 12″ high x 20″ wide
Shape the Chicken Wire

Shape your chicken wire into a tube, overlapping one row of hexagons as above. Twist your wire ends around to attach.

Half way between the top and bottom of your tube, stretch the hexagons all the way around the tube – they should almost look square. This makes the wire belly out to start your curve.

A row or two above that, start pulling the hexagons to stretch them vertically – this creates the top of your curve. Bring all of the wire ends together at the top and twist together as best you can. I made a dozen of these and never came up with a nice neat way to do this part.

Repeat the same on the bottom half of your tube, but leave the ends open to attach to your stake. Don’t worry too much about perfecting your shape yet. It’s much easier to make adjustments once it’s on a stake.

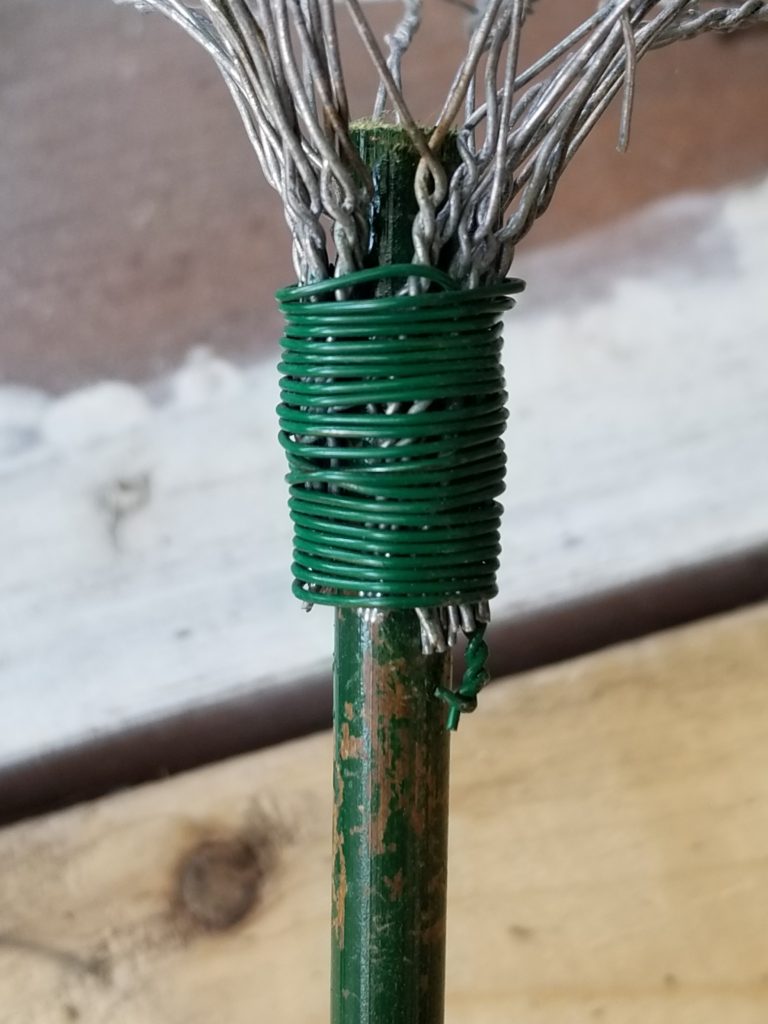
Grab a length of florist wire and wrap around the bottom of the chicken wire and stake as above. Once you have it on the stake it’s easy to tweak your shape to get a more rounded ball shape.

Hit them with a couple of coats of spray paint, make sure you get good coverage on the inside and outside. As you can see I now have a patch of fuchsia colored dirt, so make sure you don’t paint near anything important to you.

Pick a spot and shove the stakes in the ground to arrange your Chicken Wire Allium any way that makes you happy!

So what do you think? Would you plant a bunch of chicken wire Allium or would you rather buy some bulbs and plant the real thing?