After staining my deck on the weekend it was killing me to wait the two days before putting everything back on it. But the wait is finally over and I think it looks fantastic!
I love the way water beads up on the surface now! It’s such an amazing clean look. No more discoloration from moss and water and I can barely see the gouges from the dog’s toenails. It feels so nice and smooth when I walk out there barefoot. Like any dark surface it does show dusty shoe prints and paw prints, but they are easily swept away.
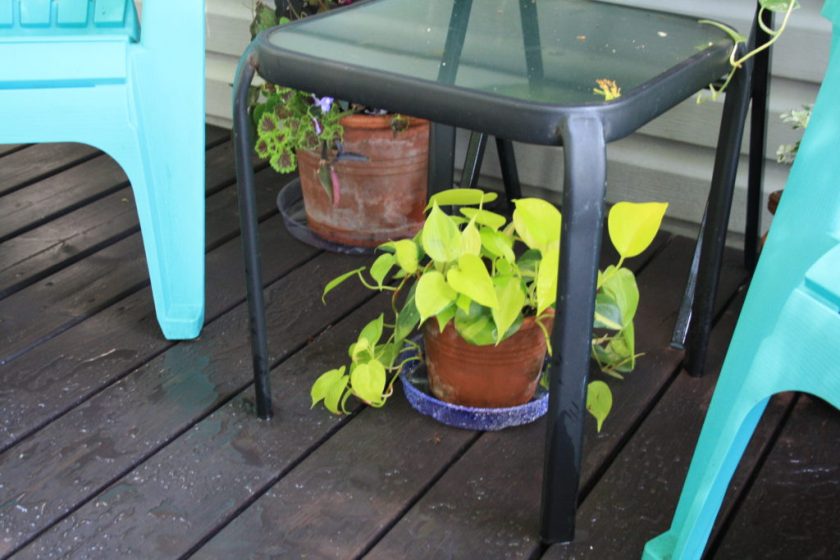
My chairs look amazing and cheery against the black stain and look how bright my pothos looks.
All of Mr. Toads hidey-holes are back in front of the patio door where he hangs out. The white flowers of begonia ‘Santa Barbara’ show well against the black stain. It’s a begonia to watch for next year – perfect for hanging baskets and planters.
This is a variety of Tradescantia I really like – I’ll be over wintering some of that for next spring.
In the pink planter is Begonia ‘Funky’, another new variety that will be available next spring. It has a coral tint to it and is very pretty.
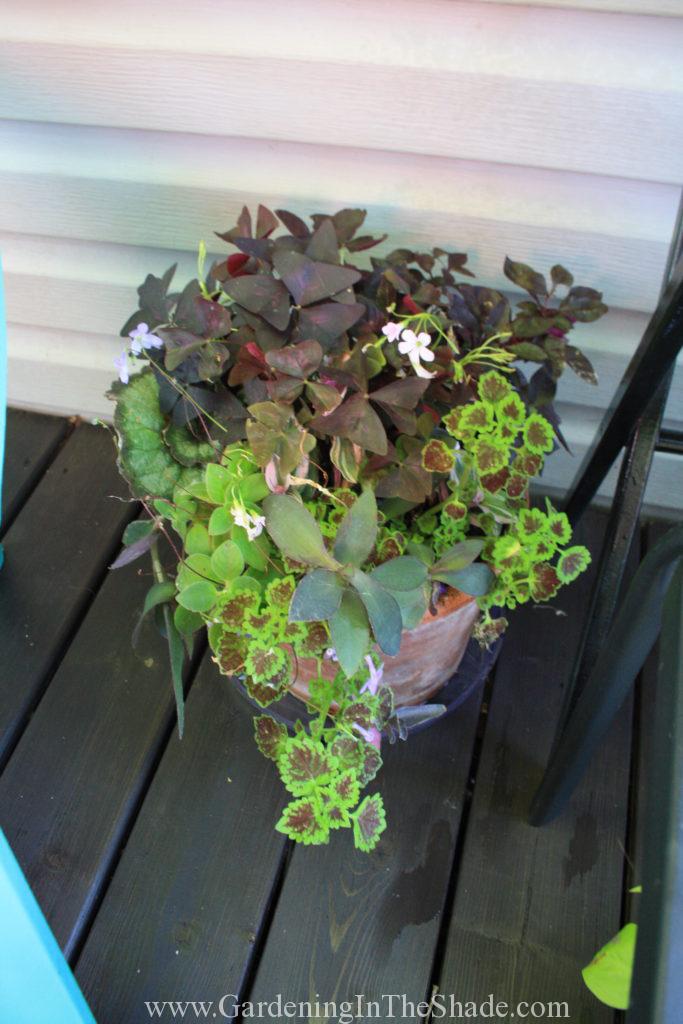
My Silver & Green planter also shows well against the black stain. I will probably leave it much as it is when I bring it in for the winter. Most of the plants in it are houseplants.
This purple and lime planter has plenty of room between the chair and my floral painted table. All of the little pots of houseplants are up there now, leaving room on the glass-topped table for coffee, tea or a drink.
I attached furniture glides to the bottoms of my Black & White planters. It lifts them off of the deck boards just enough for good air-circulation under the pots, which is beneficial for both the plants and the deck.
All of my planters now have something under them especially that pink pot. It has a very rough bottom on it and has already made a mark. Staining the deck may not have been as much work as I thought it would be, but I still want it to stay nice for as long as possible.
You can see how nicely the planters have filled in since I planted them at the end of may. You can also see under the pot the one spot where the pink pot left a mark. It could also be because that area is right next to the barbecue, maybe there was grease there I didn’t notice.
My deck is right next to my driveway, so it’s the first thing I see when I pull in, and I love it more every time. All that’s left to do is make cushions for the chairs and the last bit of staining in front of the other door. We have sorely needed rain in the forecast, so I won’t finish the rest of the stain until the weekend.
If you enjoyed this post, don’t forget to share it with your friends! For more just like it follow me on Pinterest, Facebook and Twitter or sign up for regular updates by email.
If you have ever thought about starting a garden or craft blog of your own see how easy it is>>here<<.
Have you ever spent hours thinking about a project, trying to talk yourself out of it because you’re convinced it will be too much work? Well that’s exactly where I was at on staining the deck or not staining the deck.
This is how my deck looked Thursday evening. My dad built my deck around 2002 or 2003. Before that most of it was the deck surrounding my parents above-ground pool for 15 or 20 years. Those boards are old!
Being under trees and heavily shaded, it’s always been an annual chore to clean the moss and slime off of the surface. I clean it with the power-washer every year and on my hands and knees with a scrub brush and bleach every other year. Still, I was drinking deeply of the whole ‘let it age naturally, its pressure treated’ and ‘old grey wood looks great!’ Kool-Aid.
As a child of the 70’s, I also have a bit of a mental block over stain. Back then, every single piece of outdoor wood was either ‘redwood’ or ‘cedar’. Neither of them looked the least bit natural, and both are what immediately comes to mind when I think of stain.
Last year I started thinking how much stain would spruce up that old wood. This spring I was thinking even harder about it. But I was also worried about the upkeep of stain. I know even the best stain in the world isn’t going to last forever, and I did not want to add another annual chore to my spring. So I cleaned the deck, on my hands and knees with bleach and laundry detergent to get the slime off. Then I hit it with the power washer.
It still looked like shit. Since stain was looking better by the minute, I asked at the hardware store if I needed to sand the deck down before staining it. They advised me that as long as it was clean, I could stain it without sanding it first. Just to be on the safe side, I grabbed a package of 60 grit sandpaper for my little palm sander.
Sanding the Deck
Sunday morning, I went outside for my morning coffee and smoke, still in my sleepwear of leggings and a t-shirt. Everything from the deck was still sitting off to the side of the yard and the deck was empty. I kept looking at that deck and the sander that was out from the night before.
Halfway through my first cup of coffee, I grabbed the sander and started sanding. And just like that, I started a job I was trying to avoid. I kept my expectations realistic. Rather than try for like new smooth, I just leveled out the grain a bit.
Two hours and two cups of coffee later, I finished sanding**. Or at least up to the other door. I decided to leave that area for next weekend so we could still get in and out. You can see how beat up the wood is from the dog’s nails. They have their own little version of the ‘Tokyo Drift’ they use when they’re rough-housing.
This is what my ‘pajamas’ looked like after I finished sanding. Next came the real moment of truth.
Staining the Deck
Once that brush hits wood, it’s commitment time! I was now staining the deck whether I wanted to or not.
Here it is after I finished the first coat. By this time I was really getting excited to see how it would look finished.
As I worked my way across, staining the deck, I used a piece of craft or poster board – the foam core kind – to keep the stain off of the siding. I also kept a damp rag handy, good for misses with the brush and continued bird shit episodes.
The truck you see in the background? Last year I had numerous parts of it on my deck for most of the summer.
Here it is after the second coat. That one board at the bottom of the steps is terrible to reach – I may have to take it off to get it fully stained. That big huge job I was dreading, knocked off in time for grocery shopping and dinner! Except for the cleaning and waiting until the wood dried from that, I sanded and stained the deck, or most of it, in one day!
Now I just have to finish that last section – a chore for next weekend. After that, it’s time to add a skirt to the deck and railings. Originally I wanted the deck left open for the view of the lake, but since I have no control over what neighbors do on their own property the view is no more. Now I need railings to fully enclose the yard for the very big, very scary German Shepherd who lives here.
I may also have a little surprise up my sleeve if all goes according to plan. If it doesn’t come to fruition this year, it will next year.
Tools and supplies used to stain my deck
I used 60 grit sandpaper and my orbital palm-sander to sand the deck and a wide short-bristled stain brush for the staining. I also used a foam brush for any tight spaces and will probably go back over the ‘in between’ spaces with a foam brush to get better coverage on the sides of the deck boards. I worked the stairs from top to bottom. I worked the top one board at a time, staining the full length of each before working my way back to the other side. So from left to right on one board, and then from right to left on the next. Working it that way was a bit easier on the knees.
The stain I used is a semi-transparent Rona brand stain. The color is black onyx, it’s the same stain I used for my Fretwork Garden Fence. Somehow I got very lucky when I bought it, because someone had already had two 4 liter cans (close to two gallons) mixed and then reconsidered. At $20 each, I grabbed both of them. The completed part of the deck is 8′ by almost 16′ and it took the better part of one can for two coats. That wood was thirsty!
According to the recommendations on my stain, I will need to wait one or two days before moving my furniture and plants back to the deck. Mr. Toad is very anxious to have his hidey-holes back.
**Before sanding pressure treated wood, take the time to research all necessary safety pre-cautions. If you aren’t sure whether it’s pressure treated or not, play it safe and assume it is.
Question
If you were adding a skirt to this deck, would you build it out even with the edges of the deck or would you recess it using the existing 4 x 4 support posts?
If you enjoyed this post, don’t forget to share it with your friends! For more just like it follow me on Pinterest, Facebook and Twitter or sign up for regular updates by email.
If you have ever thought about starting a garden or craft blog of your own see how easy it is>>here<<.
One of the things I found most challenging in my new gardens this year, aside from the surplus of pink sun-loving flowers, was how tall each plant would get, in particular the height of mature hosta in each variety I have.
I spent a week before my latest big garden do over looking up each variety and noting their mature height and spread. I used that information, along with color, to decide each plants place. A mature hosta can look so different from a young plant just purchased, that some of my choices look odd right now.
Hosta ‘Rhino Hide’ has thick heavily waxed leaves good for deterring slugs.
Consider Hosta ‘Rhino Hide’, at maturity it will have a height of 20″ and a spread of 30″.
Hosta ‘Blue Cadet’ in front of Hosta ‘Rhino Hide’
But it still looks lost in behind a Hosta ‘Blue Cadet’ that is a year old from division. Blue Cadet should have a mature height of only 12″ and a spread of 30″.
Hosta ‘Golden Meadows’
This one is Hosta ‘Golden Meadows’. At maturity it should reach a height of only 18″ and a spread of 36″. Right now, newly planted, it’s taller than ‘Rhino Hide’.
To make it even more complicated:
Then just to muddy the waters even further, here is a mature Hosta ‘Blue Cadet’ in my mother’s garden. My mother intends to divide it next year, but it makes me wonder how true the expected height of 12″ really is. Of course she’s got crazy good dirt on her property too.
My mother tells me there can even be some variation in leaf patterning on mature hosta as opposed to newly planted hosta. Brims may get wider or more defined. The leaves themselves can also be much larger, noticeable when you compare my 1 year old Blue Cadet, to her more mature one.
Something tells me that even though I’m finished tweaking my gardens for this year, I’ll have more changes next year. It’s also highly likely there will be other additions to contend with. Who knows, a few years from now I could have a yard that’s just garden. I’m okay with that idea.
If you enjoyed this post, don’t forget to share it with your friends! For more just like it follow me on Pinterest, Facebook and Twitter or sign up for regular updates by email.
If you have ever thought about starting a garden or craft blog of your own see how easy it is>>here<<.
One of my new perennials this year is Leading Lady Monarda. Pale pink and lavender colors are not my usual choices, but I have this variety in Lilac, the series also includes Plum.
Monarda ‘Leading Lady Lilac’, it’s the cutest little Bee Balm.
It started flowering last week, which took me by surprise because it was still so short. But that’s as tall as it gets! It only reaches a height of 10-12″ with a spread of 22″, making it perfect for a front border planting. It’s supposed to be well-behaved in the garden, which I’m hoping means it won’t spread all over the place. This is my first time trying Monarda in the garden, so we will see how it goes.
Leading Lady Monarda is also supposed to flower again above the first flush of flowers, extending the bloom time from early summer through to mid-summer. Deer are not a problem in my garden, but it’s also listed as being deer resistant. Maybe that means it’s also resistant to dog. My retriever has a habit of chomping blue and lilac colored flowers when he spots them.
Clockwise from top left: Heuchera ‘Caramel’, Perovskia ‘Denim ‘n Lace’, Monarda ‘Lilac Lollipop’, Dogwood ‘Silverleaf’, Hosta ‘Allegan Fog’ Hibiscus ‘Summerific Perfect Storm’, Hosta ‘London Fog’ and Monarda ‘Leading Lady Lilac’
For all I don’t normally enjoy pastel flowers, I am appreciating those little lilac colored flowers of the Leading Lady Monarda against the dark soil. Next year I may have to plant Dragon Wing Pink instead of Dragon Wing Red.
The Rest of the Garden
I spent a very long day in the gardens yesterday. It was hotter than – well you know – but I wanted to get everything planted. I widened most of the bed so I could pull some of the shrubs away from the fence, particularly my Japanese Maple. The poor ‘Denim ‘n Lace’ Perovskia may never do anything from the several times I’ve moved it already.
From the top left: Dogwood ‘Prairie Fire’, Veronica ‘White Wands’, Sedum ‘Lemon Jade’, Hosta ‘Hanky Panky’, Hibiscus ‘Mars Madness’, another ‘Hanky Panky’ and Japanese Forest Grass ‘Aureola’ in the center.
I pulled the hardy hibiscus on each side of the composters way out from the fence. Each has a dogwood behind for interest while the hibiscus put out their new growth every year. They are also each under planted with suitable Hosta varieties.
I decided the fence garden had too many shrubs in it, so I moved the Hydrangea ‘Endless summer’ over in front of the shed. I also moved a lot of the predominantly blue Hosta to that bed. I’ve left a big gap for another Hydrangea for balance, but mostly the space is for Hosta ‘June’ which I will be getting from my mother next spring.
If you enjoyed this post, don’t forget to share it with your friends! For more just like it follow me on Pinterest, Facebook and Twitter or sign up for regular updates by email.
If you have ever thought about starting a garden or craft blog of your own see how easy it is >>here<<.
I’m not sure how I feel about this new Heuchera in my garden. It’s a Proven Winners variety called Black Pearl. Black Pearl has black leaves (who would have guessed that?) with purple undersides. Flowering is later in the season, around midsummer, and it flowers white with a pink calyx.
I have it in a fully shaded spot which seems to cause the topside of the leaves to show as more olive than black. What is troubling me though is what to plant around it to make the black foliage pop.
I’ve kept my beds top dressed with compost instead of mulch, so the soil is black. Which makes the dark foliage of Black Pearl fade into the ground. I feel black foliage should offer dramatic contrast against its surroundings and I’m struggling with companion plants that will make that happen.
Heuchera Black Pearl has better heat and sun tolerance than other dark-leaved varieties. It does well in the landscape but I think the color of Black Pearl would be easier to display in a container. It’s a shorter Heuchera, only reaching 8-10″, so it would be hard to plant in front of it. Tomorrow I’m going to try moving it to improve its visibility in the garden.
I have two Brunnera Jack Frost that I could plant it in front of, or I could try a grouping of three Heuchera, and plant Black Pearl with Silver Scrolls Purple Petticoats. Silver Scrolls has a very complimentary but lighter leaf color, and Purple Petticoats would accent the purple undersides of the leaves nicely. Both are slightly taller at 12″ so Black Pearl would be a bit shorter and possibly work well in front of them.
It’s tricky to decide how it will all look when none of the plants involved are mature plants. At maturity the leaves of Black Pearl will have ruffled edges so perhaps next year the purple undersides of the leaves will be more noticeable and differentiate it from the background of dirt.
If you enjoyed this post, don’t forget to share it with your friends! For more just like it follow me on Pinterest, Facebook and Twitter or sign up for regular updates by email.
If you have ever thought about starting a garden or craft blog of your own see how easy it is>>here<<.
This website uses cookies so that we can provide you with the best user experience possible. Cookie information is stored in your browser and performs functions such as recognising you when you return to our website and helping our team to understand which sections of the website you find most interesting and useful.
Strictly Necessary Cookies
Strictly Necessary Cookie should be enabled at all times so that we can save your preferences for cookie settings.
If you disable this cookie, we will not be able to save your preferences. This means that every time you visit this website you will need to enable or disable cookies again.