Have I convinced you that Mini Hosta are just as cool as succulents yet? If I haven’t made you a fan yet, maybe my mini Hosta Tool Box will do it.
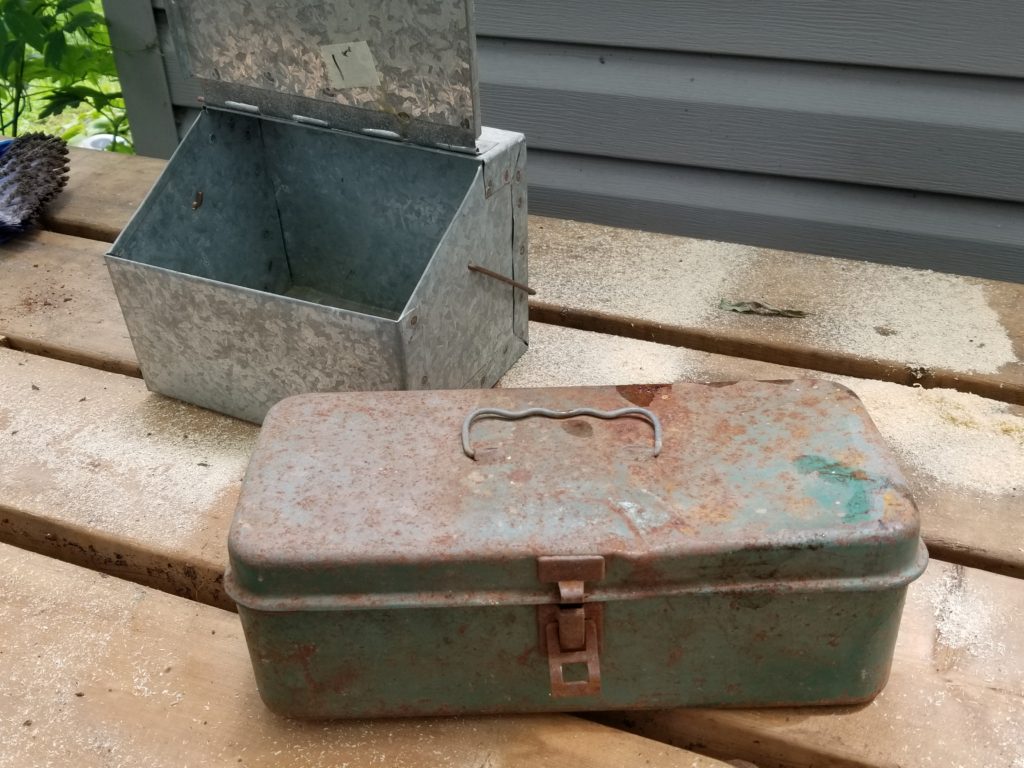
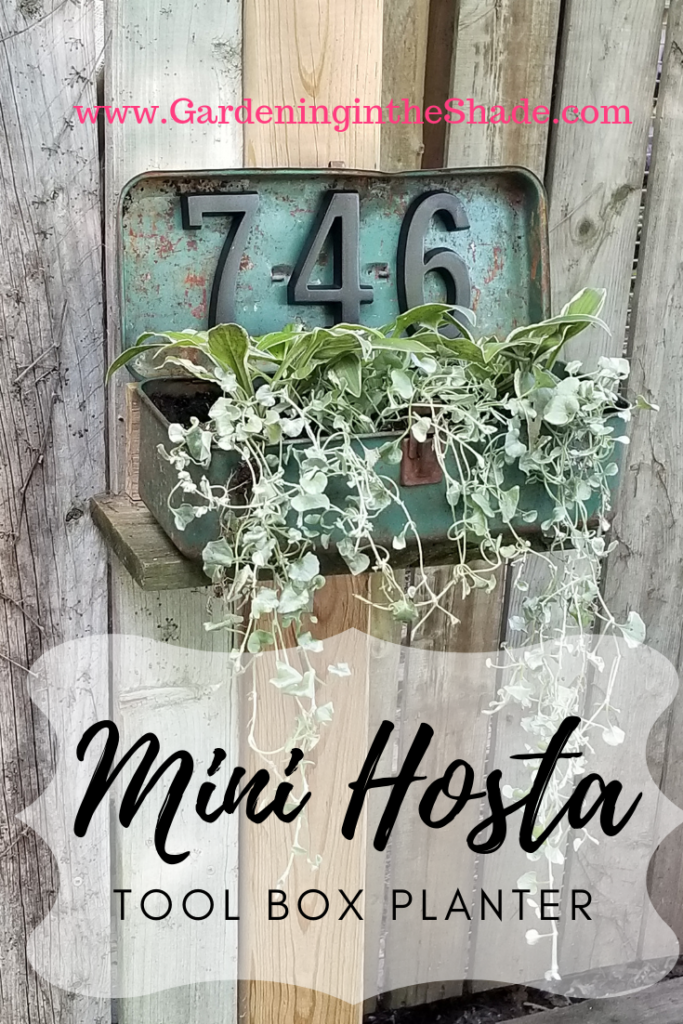
I mentioned a trip to Picker’s Pig Pen in my last post, what I didn’t mention was this fabulous old tool box. It was exactly what I was hoping to find. It has just the right amount of rust and it’s perfectly battered. One of the cutest succulent planters I’ve seen on Pinterest is an assortment of succulents in an old tool box. I needed a tool box so I could reproduce that planter with mini Hosta!
I only paid $20 for everything I got Saturday and honestly the table base was worth that easily! So these two boxes were pretty much free. Even the bit of tool box rubble was free! Old drill bits and miscellaneous screws. You know the stuff!
Both metal boxes were cleaned up and I drilled drainage holes in them with a drill bit meant for metal. When you are drilling in metal it helps to have some wood underneath that you don’t mind drilling into. There still might be some burrs, but the holes turn out much neater.
The Tin Box
I planted the galvanized box with creeping jenny and a Hosta ‘Waterslide’. Waterslide isn’t a true mini, but it is a small hosta. Mine is even smaller than it should be because I almost killed it a couple of years ago so it’s coming along.
The Tool Box
I planted the tool box with a green and white mini Hosta and some Dichondra ‘Silver Falls’. But I didn’t stop there…
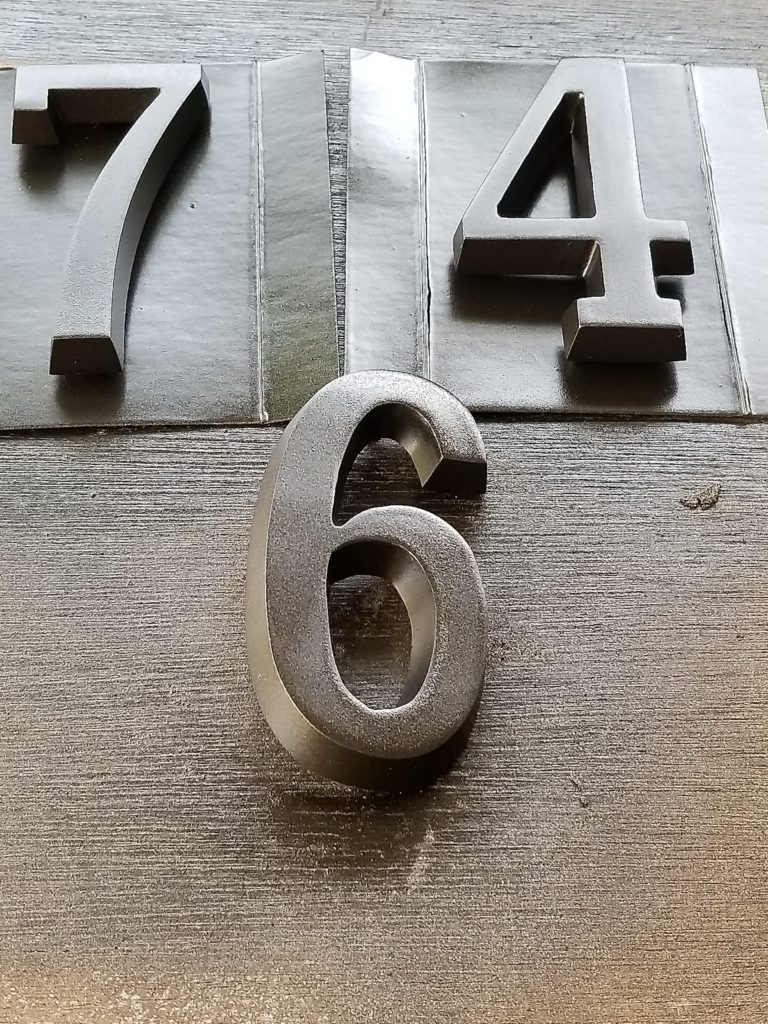
I spray painted some brushed nickel house numbers to attach to the lid of the toolbox.
So have I convinced you that Mini Hosta are cool yet or do you need more proof?
I’m still on the lookout for an old bird cage and a metal chair so I can replicate those looks too. I’ll make a convert of you guys yet.
It’s Sunday and what a glorious Sunday it is! We’ve had sunny skies all weekend and no rain in the forecast until overnight. I don’t even care that we’re in the midst of the 3rd plague of summer and poplar fuzz is coming down like snow.
If you’re wondering the 1st plague is those little bugs that look like mosquitoes and poop green specks all over everything, the 2nd is maple keys. Fourth is May flies. After the 4th plague I usually wash my siding.
So about that funny story…
Yesterday I was up bright and early, 5:30 am because middle age is waking up when you don’t need to be awake. First stop, as always, the bathroom. No glasses, no phone I hadn’t even had coffee or a swig of Diet Pepsi – don’t judge me. All was well until I tried to leave the bathroom to start the coffee maker. The doorknob was turning, but it wasn’t doing anything!
So apparently the guts of the doorknob are stripped or broken somewhere, and I’m locked in the bathroom. It felt like an episode of Scooby Doo or I Love Lucy! Both boys are still sleeping – like sensible people on a Saturday. I have no glasses on, so everything is just a random blur, but I figure I’ll be fine because I always have tools in the bathroom.
But nope, not this time. What I had was one of those miniature electronics screwdrivers and a pair of those flimsy barber scissors that they throw in with men’s beard trimmers. The truly lucky part was a spare pair of readers in one of the vanity drawers.
And that was how I came to be MacGuyvering my way out of the bathroom at 6 am with a pair of flimsy barber scissors.
Pickers Pig Pen!
Early in the morning yesterday I made a run to Pickers Pig Pen. I have a couple of things I found there that you’ll see later, but I can show you one thing now.
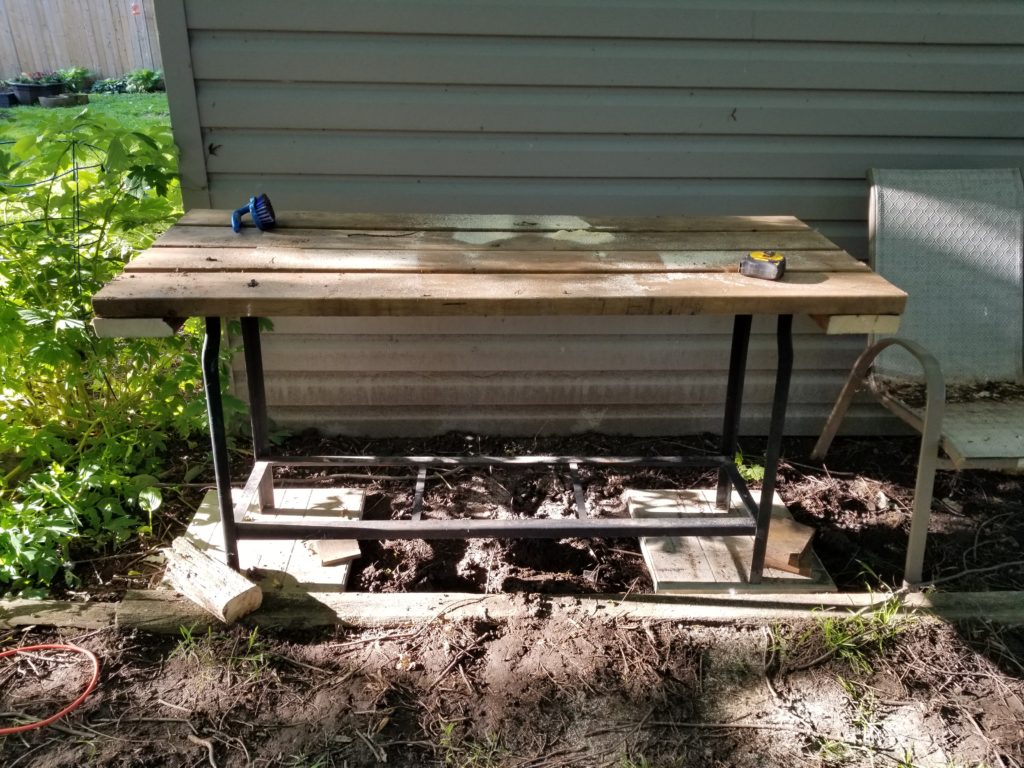
I found this black table base! Steel and very solid it’s perfect. I had been planning to make a small stand for my miter saw. Usually we end up hauling it from the shed to the front deck and it’s heavy and awkward to carry. Plus working on the deck isn’t ideal because there’s always something in the way. Truly, clutter follows me wherever I go and the deck is no exception.
My oldest boy tends to have clutter too, and I used some of his clutter to make a top for the table base. Two pressure treated 2x6x10′ cut down to 5′ made a 4′ x 5′ top, and a couple of cement pavers made a solid footing for underneath the legs. I do need to get some sand to level the ground under the pavers, but the table works perfectly for what I needed. You can tell by the sawdust I’ve already used it. Some gravel pathways are a part of next years garden goals and that will take care of the muddy ground to the front of the bench.
In Other News…
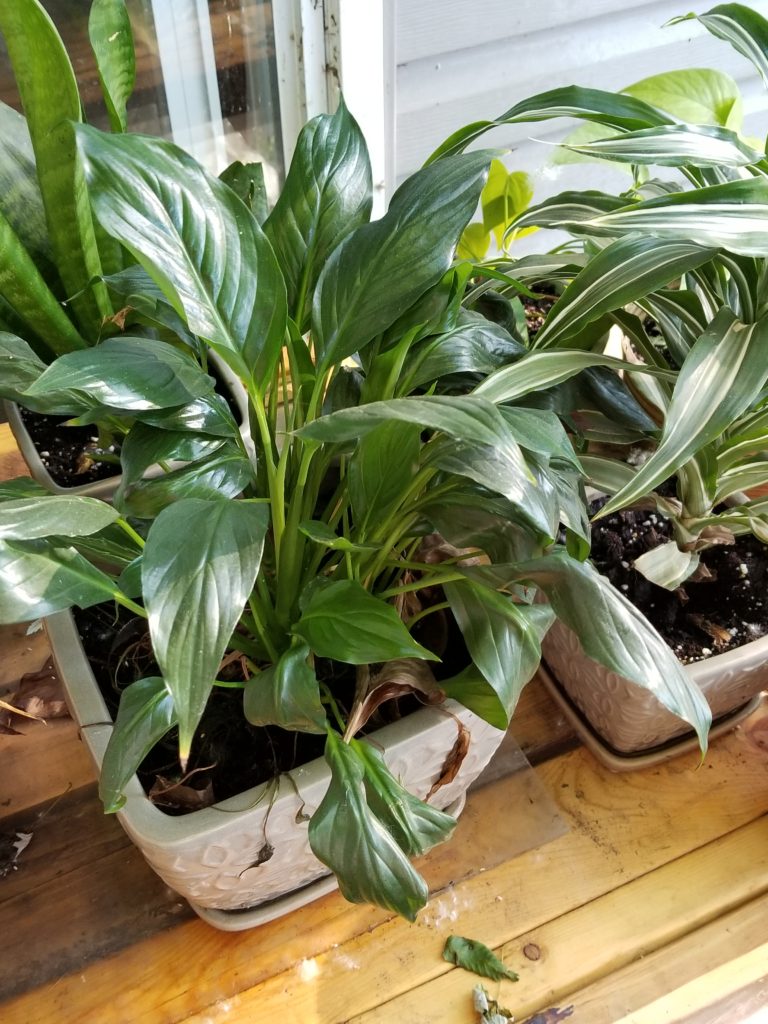
Houseplants have been moved outside for the summer, and not a moment too soon. My Peace Lily was looking pretty sad before the move. The house is bare without them, but there’s just not enough light indoors in the summer to keep them healthy.
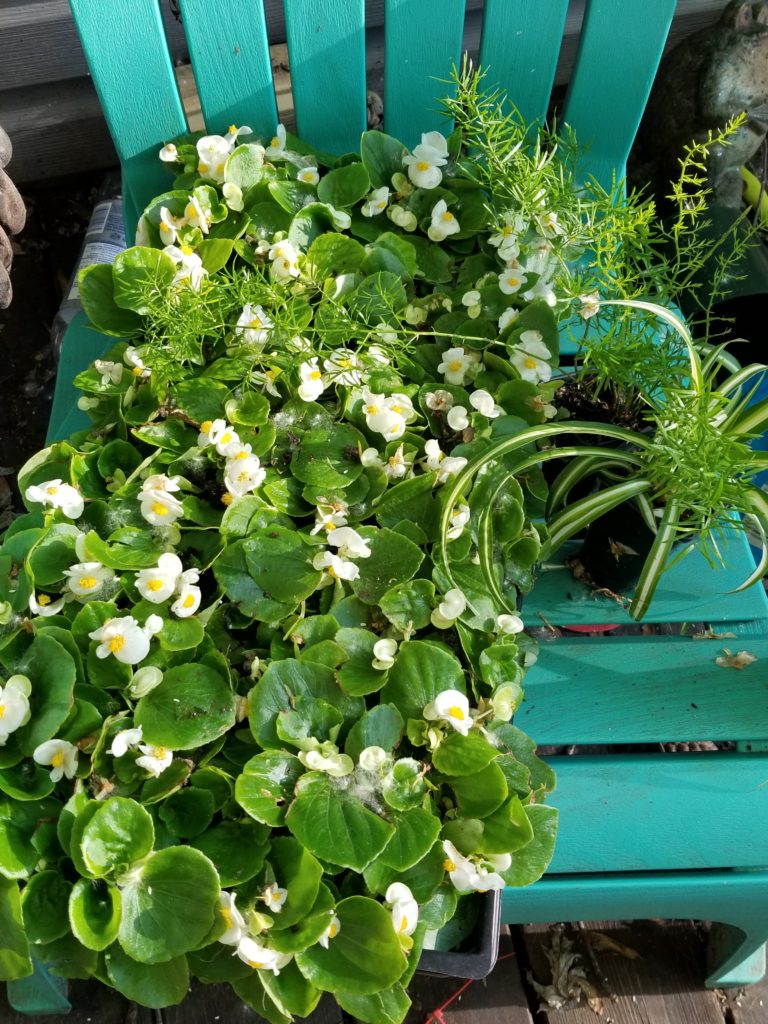
Most of the planting is done but I did grab a flat of white begonia to add to the new back garden. I think they will look quite showy with the dark soil. If you missed my post on that earlier this week you can see it here – The Back Garden, Mostly Done. I still have a couple of planters to finish and show you, those will come later this week.
For now, I have to head off to the grocery store. I would love to put it off until Monday but we’re on our last roll of toilet paper so that’s not happening. I can always pull a meal together with what’s on hand but toilet paper is a necessity that can’t wait.
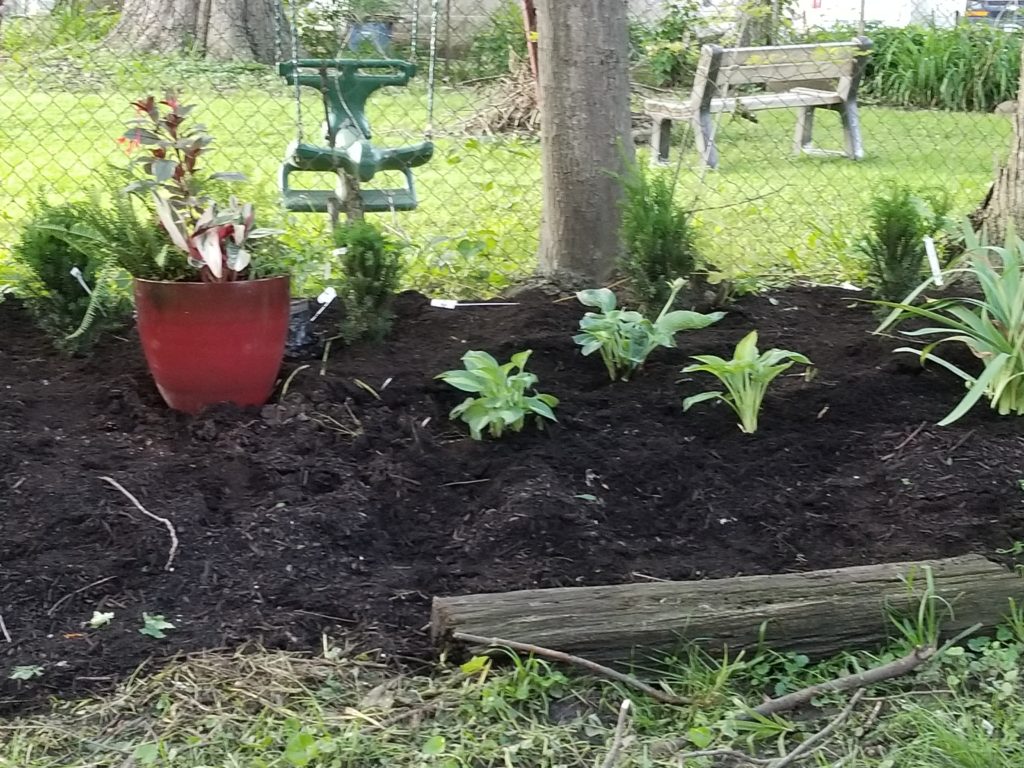
I have an odd little house in an odd little yard with other peoples yards on all 4 sides. One side is alley way and the person on the other side put up a hedge for privacy, hers not mine, but it helps me out too. The front yard and one of the sides are wood privacy fence.
Then we have the back yard with a rusted, broken down chain link fence. That has maple trees growing through it. Massive maple trees that would cost a fortune to have removed. So we live with the broken down fence.
Most of the time we’ve lived here there was an older woman who lived back there and spent little time in her yard. We could kind of forget there was no privacy back there.
Now we have new neighbors, younger ones who spend time in their yard. Nice neighbors, friendly neighbors, but it’s an adjustment to see people walking around back there. Worse, their property sits a couple of feet higher than mine. So no matter how nice they are, it feels uncomfortable.
Plus the fence is ugly and grass won’t grow back there, but the weeds surely do.
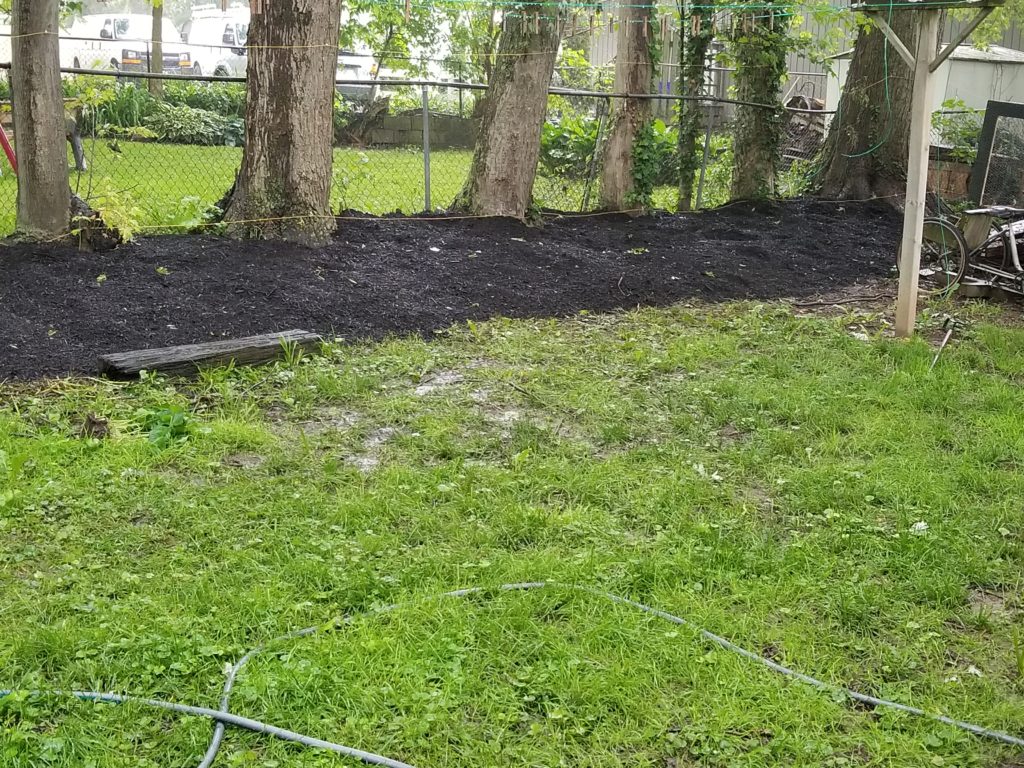
So this is where we started. 53 feet of fence-line that all looked as scruffy as this. Everything got scalped to the ground with the weed wacker. Then I spread newspapers over the scalped weeds and covered it all with 4 cubic yards of compost.
No Landscape Fabric?
I’ve never actually used commercial weed barrier, but I’ve heard so many people talk about how much of a headache they create down the road I would never consider it. Commercial weed barriers will start to drift up through the mulch, they are impossible to plant through if you want to make changes, and eventually weeds will grow on top of the weed barrier.
So I’m in the camp that does not recommend them. Better options are newspaper or cardboard.
A few layers of newspaper are easily punched through with a trowel if you need to change a planting. I’ve also heard of people using cardboard. I haven’t tried that yet but I would imagine for a planting of shrubbery it would work well. Both of those options will kill off the weeds and eventually disappear into the soil.
A Fresh Start
Even with nothing planted it was a huge improvement!
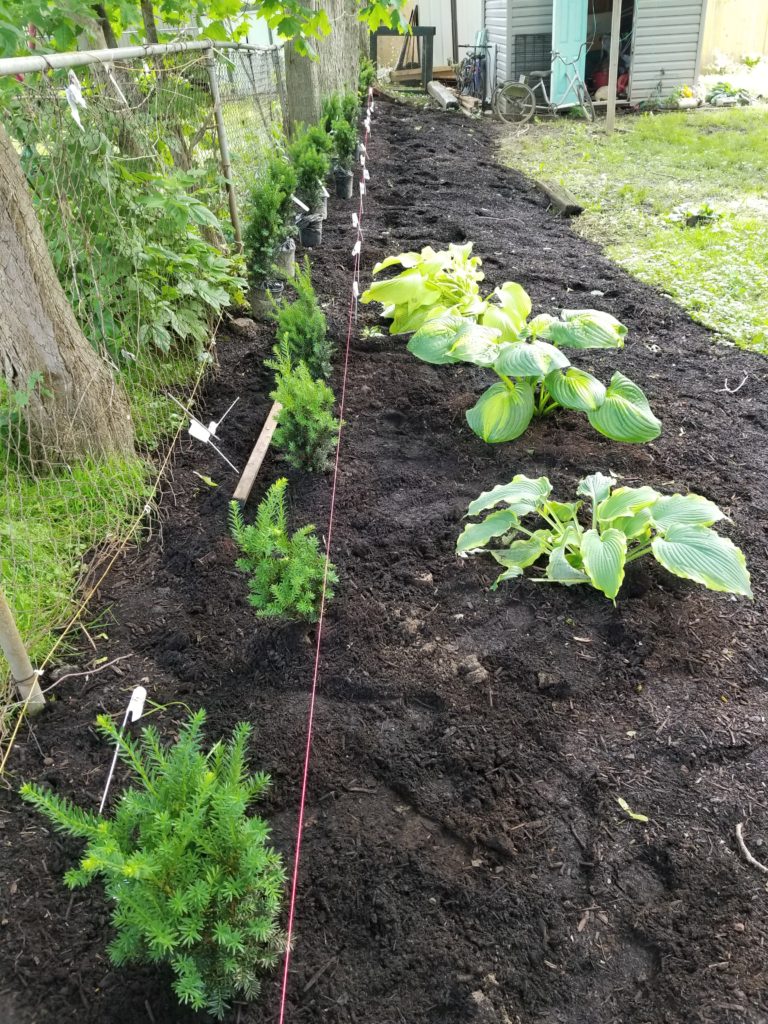
Next up, a hedge. After a bit of time spent on the internet, I went with Yew. Yew are the most drought tolerant option for shade. Things can get pretty dry under the maple trees! Small yews, because I find it easier to get a small evergreen to transplant successfully than it is a large evergreen. Also, small yews are cheaper than big yews and I needed more than one.
I wish I had taken a photo when it was just the yews planted. We’re taught to avoid straight lines in our plantings except when planting a hedge. Then you plant a hedge and find out there is something surprisingly satisfying about looking down a soldierly line of shrubs marching along in a straight line.
The yews are spaced a bit far apart for hedging, I am hoping to propagate a few more to fill the gaps.
Adding the Plants
Now that my backdrop of yews was in place it was time to start planting. Karen Chapman of Le Jardinet says…
Learning to select plant combinations rather than just individual plants, will immediately transform your garden from the onesy-twosey look to a cohesive design.
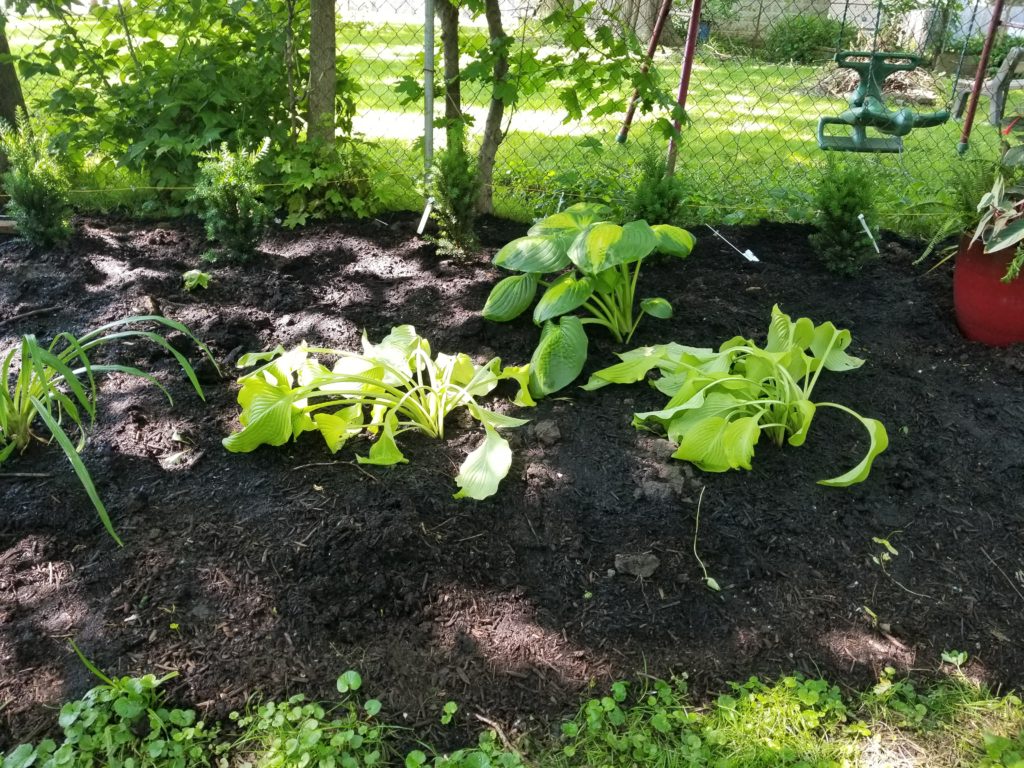
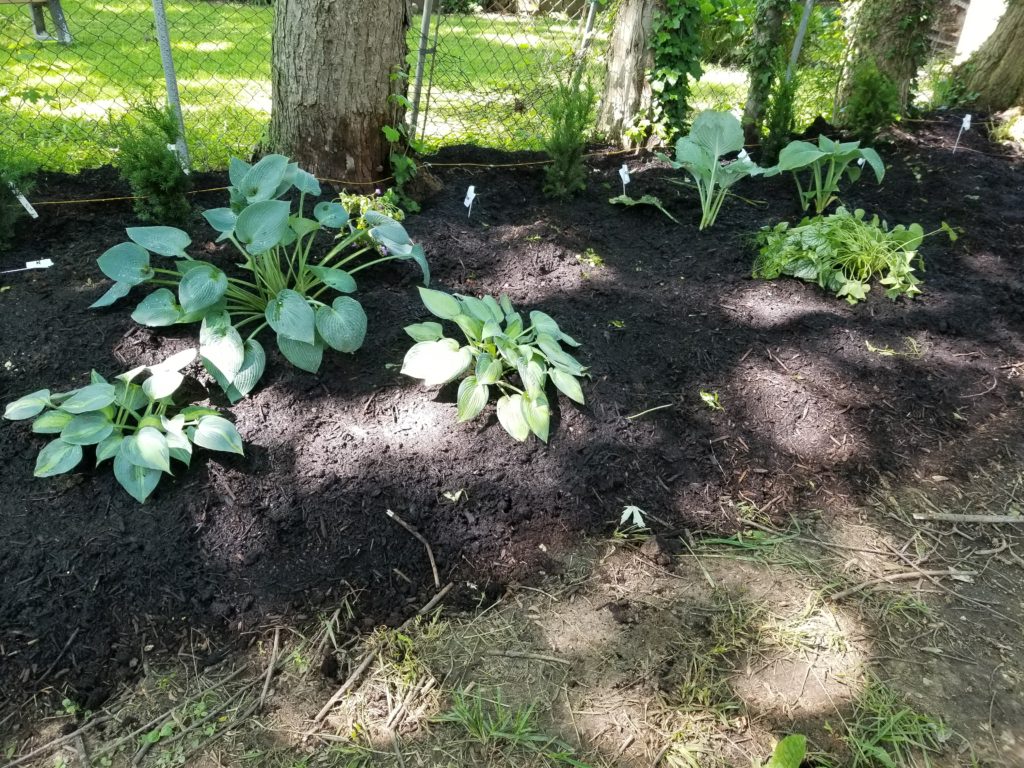
As I was planting, I tried to keep that advice in mind. I also used Excel. I have a list of all my Hosta on Excel that includes their height and spread. New divisions or new hosta don’t always show their true proportions for a few years so it’s helpful to have an idea of what they’ll become in time.
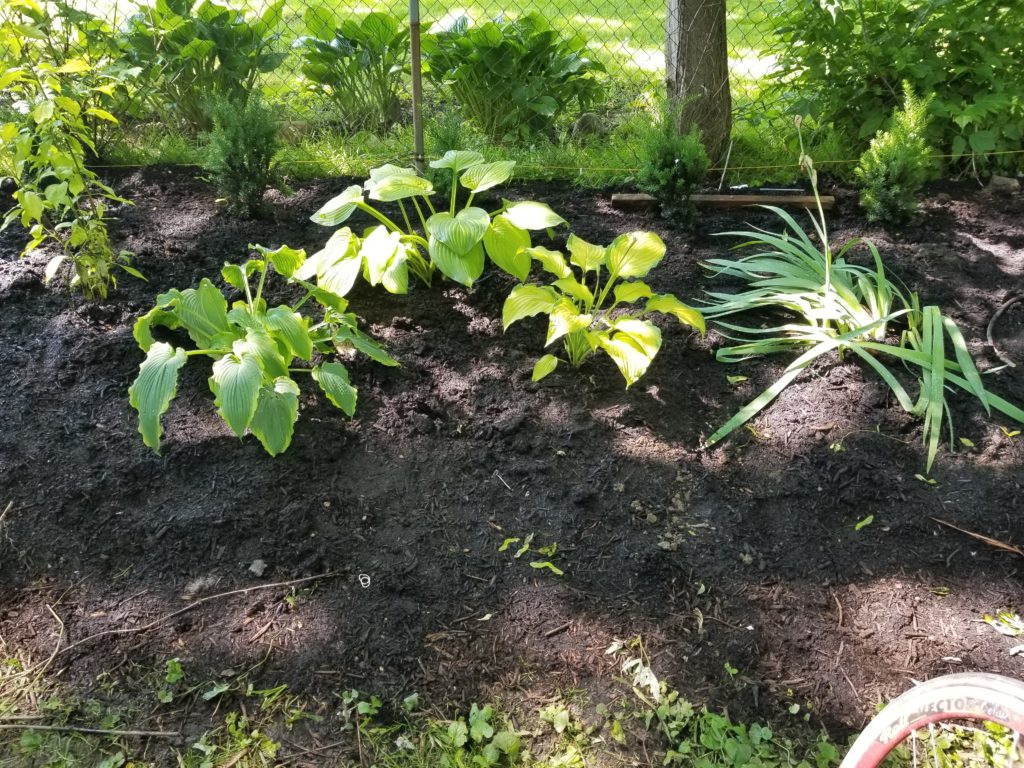
Starting at the left…
Starting in this corner is a Prairie Fire Dogwood. I have one in another location and somewhere along the line one of it’s branches touched the soil and ta-da there were two. The blue hosta in the back corner is a Hillbilly Blues. I don’t know what the smaller blue one to the front is.
These three Hosta are clockwise from the top – Guacamole, Prairies Edge, and Spartacus with a pale blue Iris to the right.
Here I’ve got a day lily (red I think) with an empty spot left for a white peony. I will probably put a planter there for now unless I manage to grab some peonies at an end of season sale.
Hosta Cathedral Windows at the top with two Sun Power at the bottom.
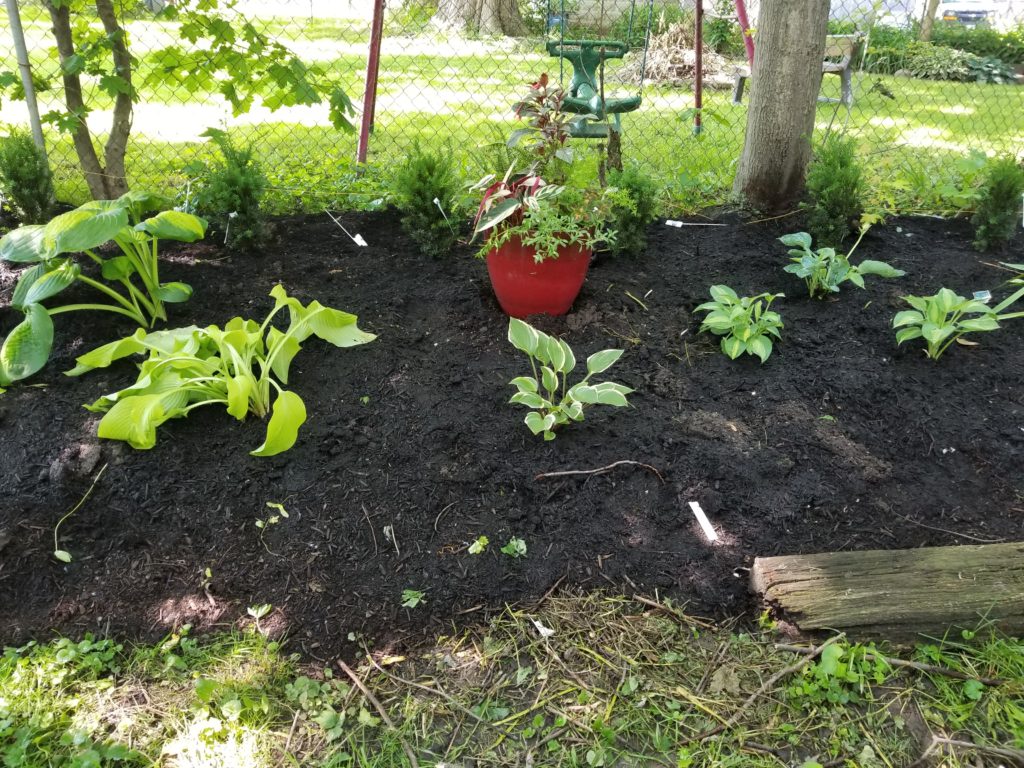
Here, I’ve got my Shade Planter in Red as a place holder for the Rose Glow Barberry I plan to put there. Nice that the planter is near the color of the shrub for planning purposes. The hosta in front has red stems. I’ll come back and put the name in once I have it.
Moving to the right…
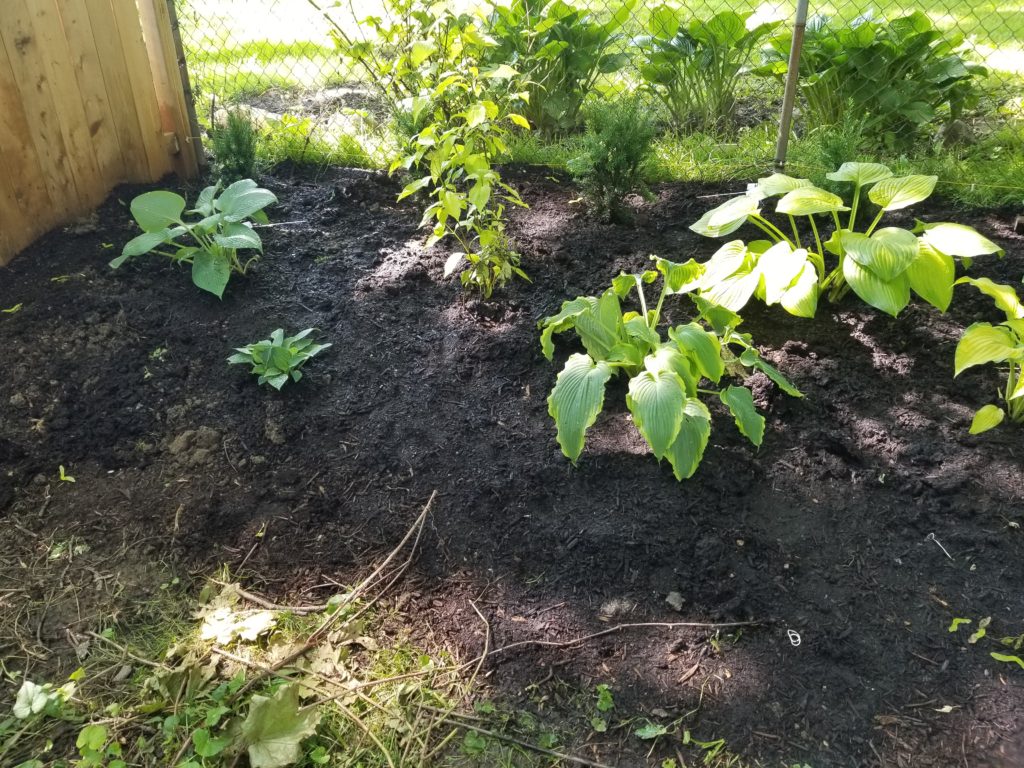
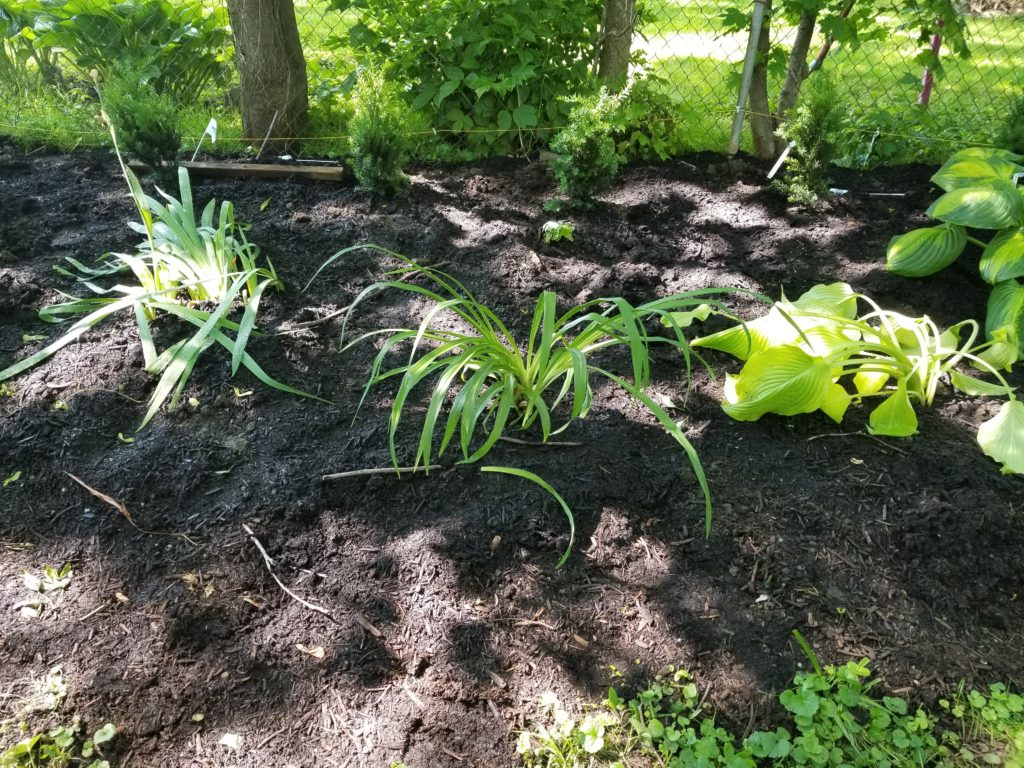
Abiqua Drinking Gourd in the back with two Strip Tease to the front. This is where the Excel spreadsheet comes in handy. Abiqua Drinking Gourd is new this year, once it’s mature it will be taller. All three will be 24″ tall. Next to them on the right is a white iris.
Here in the group to the left clockwise from the top – a blue sport of something or something that is fabulous. It stays blue longer into the season than any of the other blue ones I have, then a possible Golden Meadows and last – June (one of my favorites). To the right Diamond Lake, a random blue and Brunnera Jack Frost in front. The empty space between is for another Day Lily and a White Peony.
Moving & Dividing Hosta in June!
Most recommend dividing Hosta early in the spring. Dividing in spring just as the pips are emerging gives the least disruption to appearance. That said, Hosta are pretty durable. If you can live with a not so nice plant for a year they will generally pull through being divided or transplanted well into the season. Some of them won’t even look like anything happened.
Wishlist
I still have some plans for this bed.
White peony – I think there is enough dappled sunlight to make a go of 2 or 3.
Another Day Lily or two – they add a nice vertical element even when they aren’t in bloom.
Hellebore – Dark green leaves and early white flowers, who wouldn’t want that?
A Red Glow Barberry – in a small yard, shrubbery has to be carefully considered. I’ve wanted one of these for a long time so that will happen.
A yellow Barberry – for the far end near the shed to add some bright.
I’m not sure of the exact number of rain free days we’ve had here since May, but I know the number is low. Like really really low. Let me tell you about this past week. We had a sunny day or two at the beginning of the week, I think Monday and Tuesday. I think it rained Wednesday. Thursday either rained or looked like it was going to rain. Friday the clouds parted, angels sang and the sun shone. You could hear lawn mowers and weed trimmers fire up through the neighborhood.
Saturday – more rain. Today? More rain. The forecast called for rain most of the day but only partly cloudy for 3 hours – from 5 am to 8 am.
I slept until 7.
Honestly there is not a spot in my yard that isn’t soggy and spongy. There is so much left to plant! Outside projects are impossible if it takes more than a couple of hours. Wash windows? Nope. Hang out laundry? Hardly but I did hang a couple of loads out at 6 am one Saturday so it would dry in time for the rain expected by noon.
Never the less, I persisted! On Friday I spread two more loads of compost. The last load was a very generous yard (it was way more than a yard) and I am done spreading compost for this year.
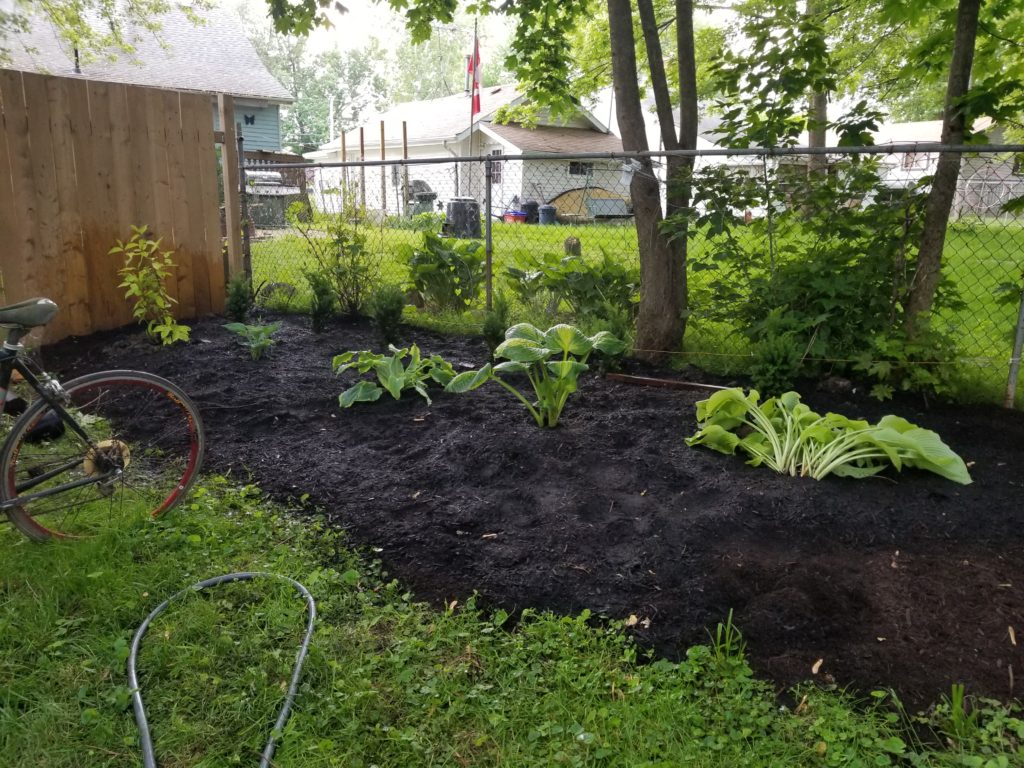
The Back Yard
The goal is to rehabilitate this scruffy back yard. You can see the chain-link fence with a bunch of maple trees growing through it. I can’t afford to have the trees removed let alone replace the fence, so I have to make it work. You can see where I’ve run wire for the pet-fence to keep the dogs contained. Neither are wanderers, but the Shepherd does want to do what Shepherds do and protect the yard. That behavior absolutely must be contained to our yard.
The entire yard is clay, but it is more of a problem in the back yard than anywhere else. There’s a significant slope to the yard, watering can be difficult because the water just wants to run down hill. Hopefully the thick layer of compost will help to absorb some of the water on it’s way through.
The plan is to grow a hedge. All of my research says that Yew is the best option for this location. It will tolerate shade and prefers things a little dry. Well-drained we can’t do but I’ve got dry covered – if it ever stops raining.
Nothing planted in this photo is in it’s final location. If we get any breaks in the rain this week, I’ll plant the hedge then start on the garden in front of it.
Is it rainy where you’re at? How are you coping with the disappointing weather?
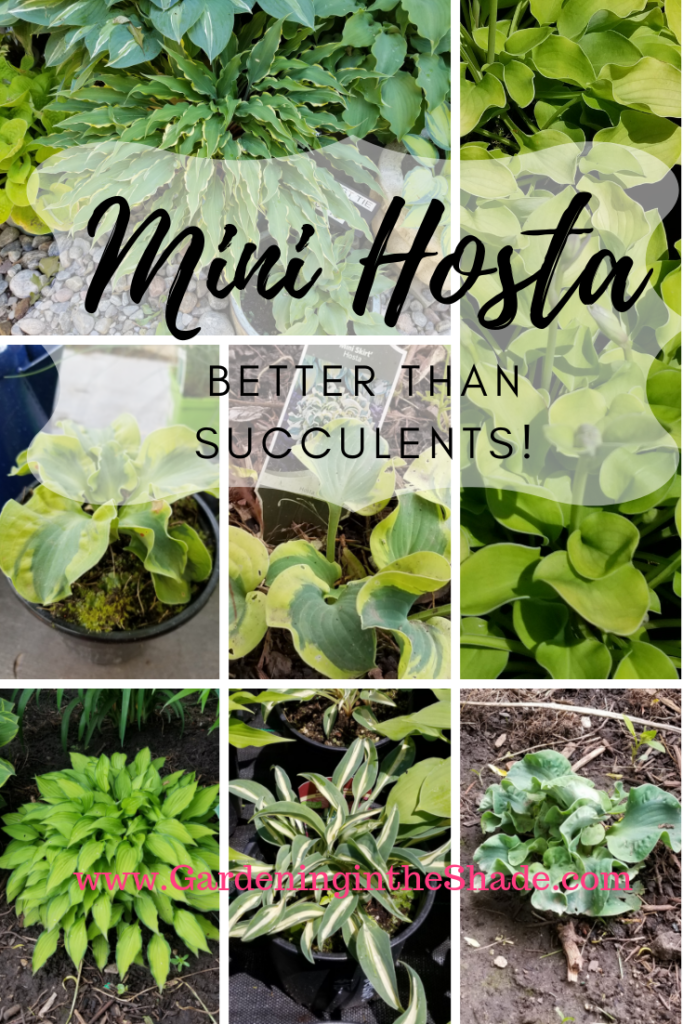
Sure succulents are cool, but have you tried Mini Hosta yet?
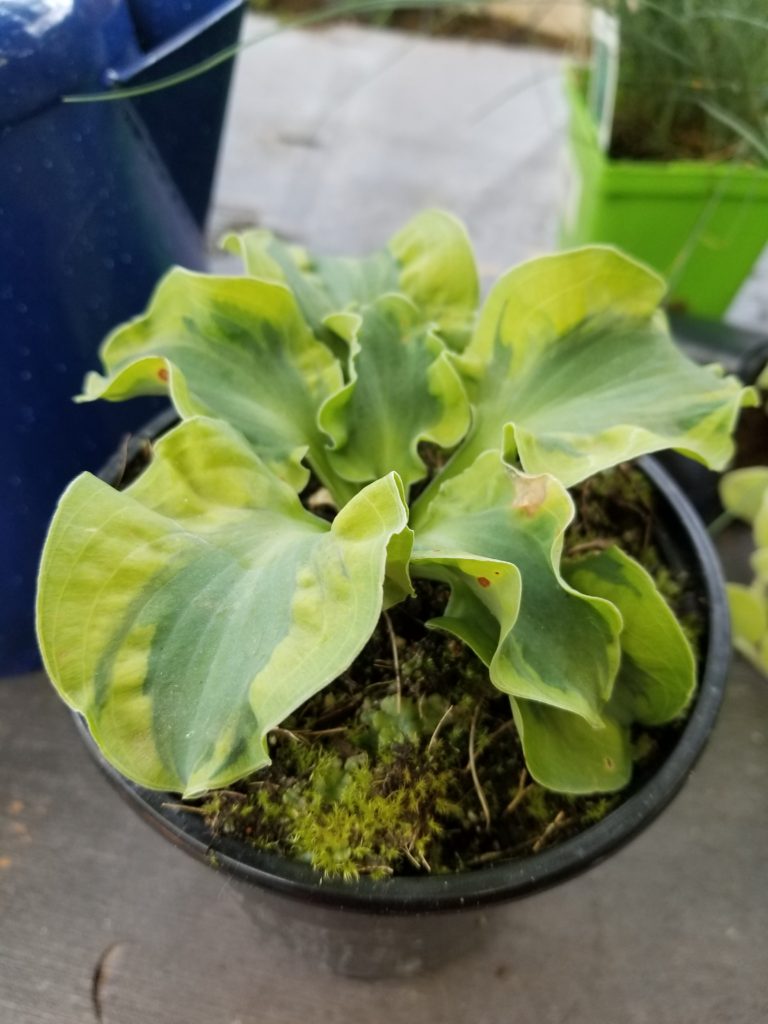
They come in blue, green, yellow, and all kinds of variegated combinations. Some are really tiny and some are just small, leaves might be long and narrow or short and round.
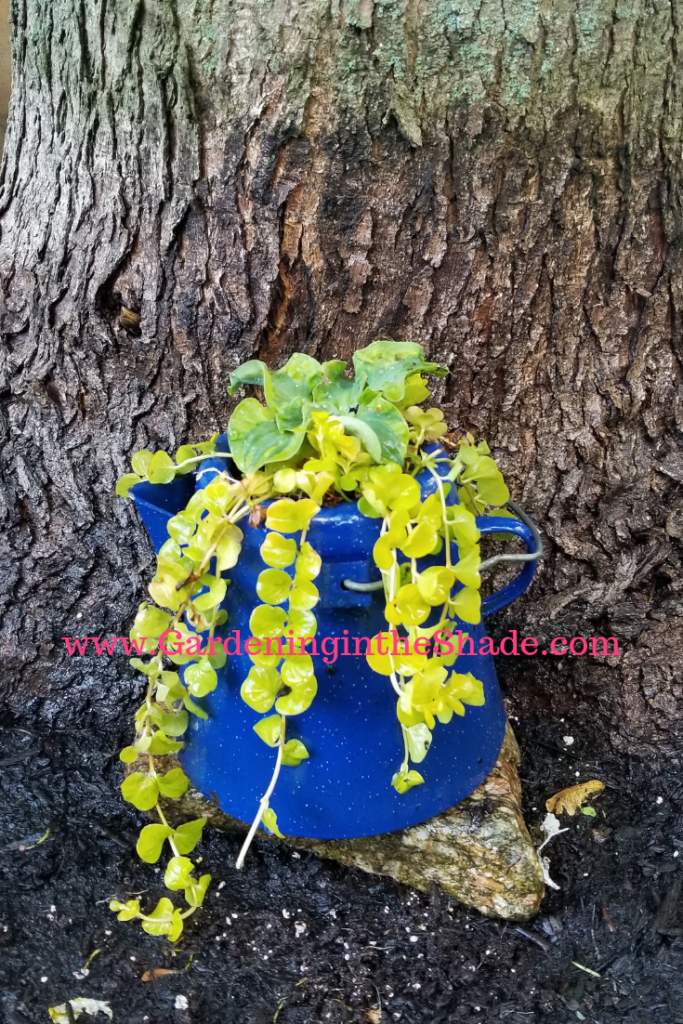
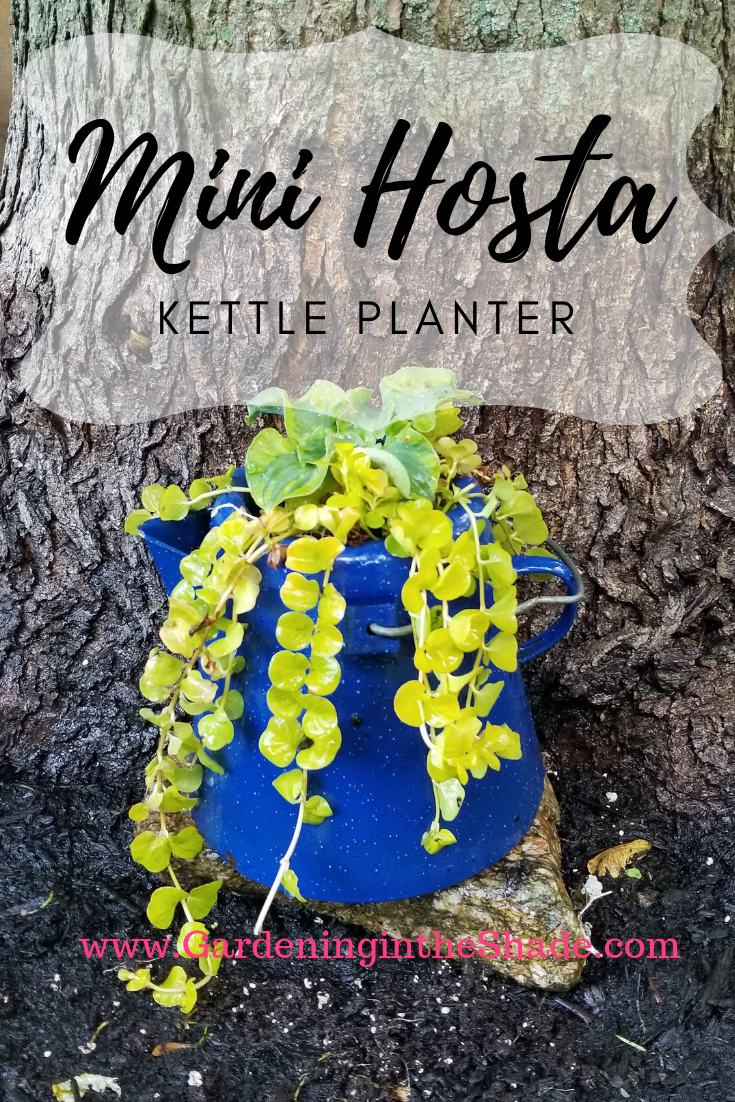
Miniature Hosta are just as collectible as succulents. Well really, all hosta are collectible, but miniatures have nearly as many adorable planting options as succulents. Check out my up-cycled enamel kettle planter!
I found this blue enamel kettle at Value Village and decided it would be perfect for a small planter. Most of the time I prefer large planters, but for a miniature, this is a large planter.
Hosta are a perennial but they do very well in planters. Some people have hosta that are in the same planter for years, they just store it in an unheated building over the winter and bring them out when the pips are ready to emerge.
Benefits of Hosta in Pots
you can control the moisture more easily in a planter.
they’re portable, you can move them where you like without touching a shovel.
perfect for tenants who want a lovely garden but don’t want to leave behind their collection if they move.
if you worry about HVX, pots and planters are effective quarantine for new plants.
The Mini Hosta Kettle
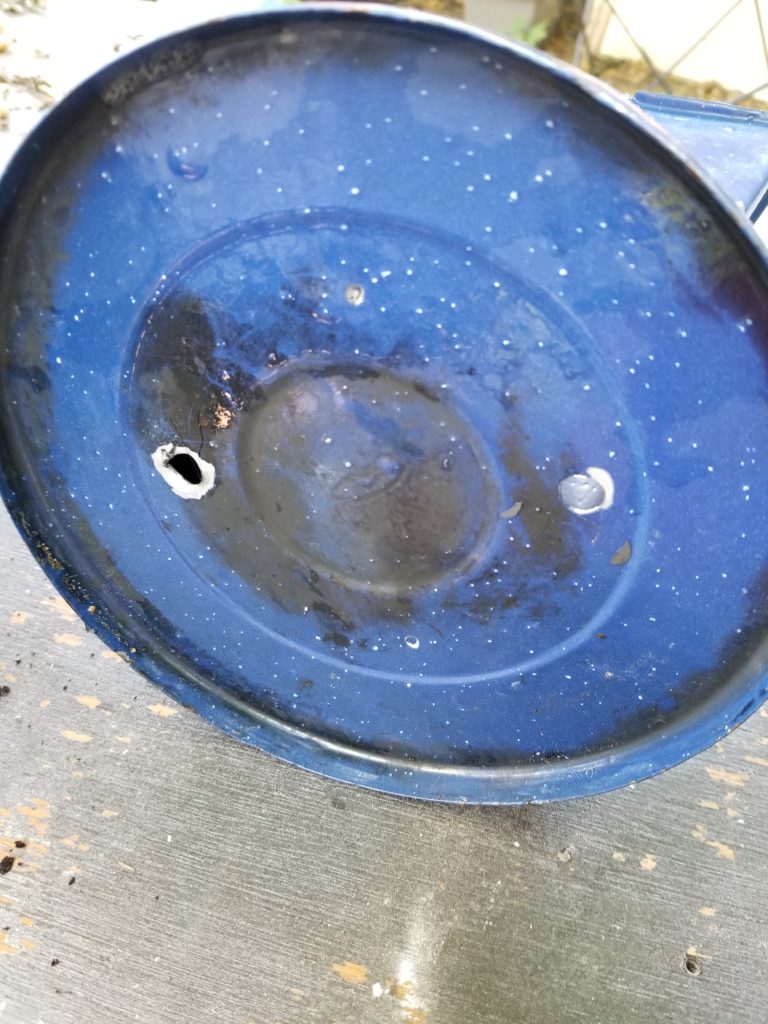
This kettle won’t be used to make tea ever again after I drilled a couple of drainage holes in the bottom.
Hosta ‘School Mouse’ is the star of this planter. See the green stuff growing on the top of the soil? That’s something that happens sometimes in greenhouses, scrape that off before transplanting.
School Mouse was an impulse buy, but notice how similar it is to ‘Church Mouse’? I love those ruffled twisty leaves.
I added some creeping jenny (Lysimachia) as a trailer and there it is – a planter that is just as adorable as a succulent. Still don’t believe me? Take a look at the Hosta Turtle I made last week.
So what do you think? Could you get hooked on Mini Hosta?
This website uses cookies so that we can provide you with the best user experience possible. Cookie information is stored in your browser and performs functions such as recognising you when you return to our website and helping our team to understand which sections of the website you find most interesting and useful.
Strictly Necessary Cookies
Strictly Necessary Cookie should be enabled at all times so that we can save your preferences for cookie settings.
If you disable this cookie, we will not be able to save your preferences. This means that every time you visit this website you will need to enable or disable cookies again.


 I mentioned a trip to Picker’s Pig Pen in my last post, what I didn’t mention was this fabulous old tool box. It was exactly what I was hoping to find. It has just the right amount of rust and it’s perfectly battered. One of the cutest succulent planters I’ve seen on Pinterest is an assortment of succulents in an old tool box. I needed a tool box so I could reproduce that planter with mini Hosta!
 Both metal boxes were cleaned up and I drilled drainage holes in them with a drill bit meant for metal. When you are drilling in metal it helps to have some wood underneath that you don’t mind drilling into. There still might be some burrs, but the holes turn out much neater.
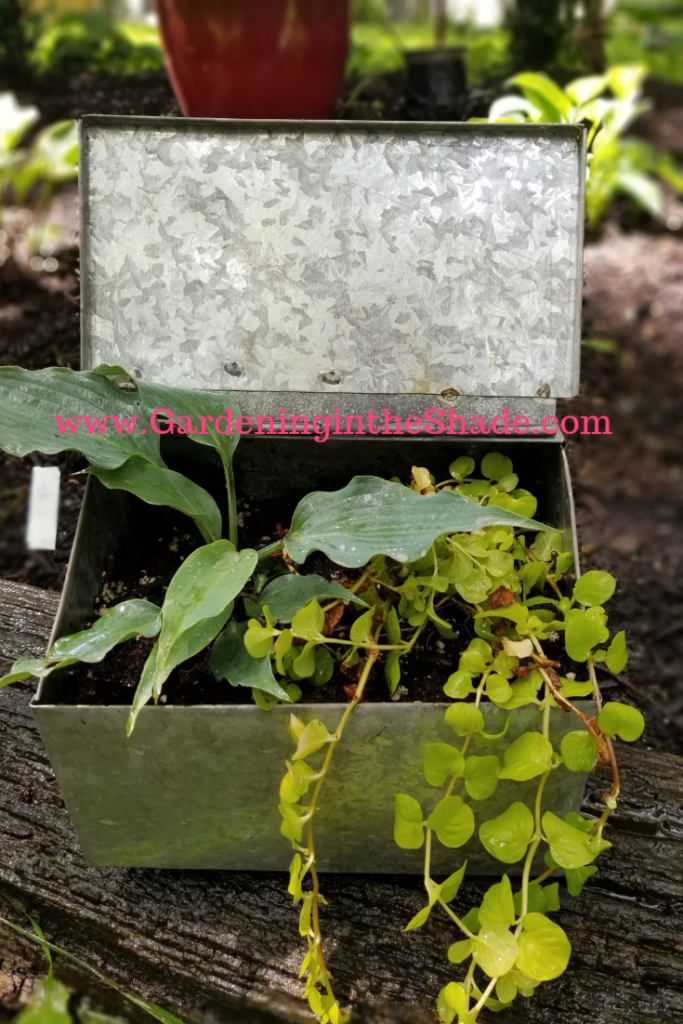


 Honestly there is not a spot in my yard that isn’t soggy and spongy. There is so much left to plant! Outside projects are impossible if it takes more than a couple of hours. Wash windows? Nope. Hang out laundry? Hardly but I did hang a couple of loads out at 6 am one Saturday so it would dry in time for the rain expected by noon.
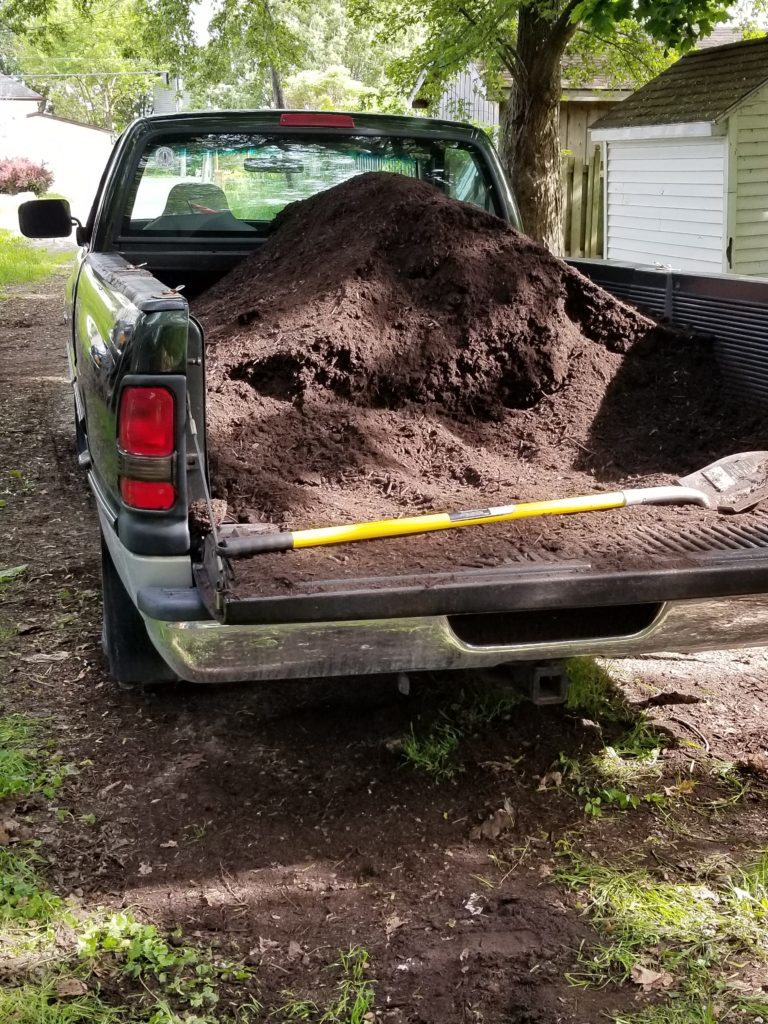 Never the less, I persisted! On Friday I spread two more loads of compost. The last load was a very generous yard (it was way more than a yard) and I am done spreading compost for this year.
 They come in blue, green, yellow, and all kinds of variegated combinations. Some are really tiny and some are just small, leaves might be long and narrow or short and round.
 School Mouse was an impulse buy, but notice how similar it is to ‘Church Mouse’? I love those ruffled twisty leaves.